![]()
Loft  : Between Object Faces


Access: Open this function from the following location:
-
Select Solid > Creation > Loft from the menu bar.
Create a new object that interpolates a series of sections.
|
Loft between object faces: |
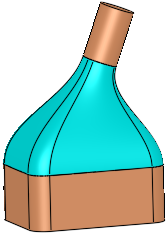
Loft result: |
|
|
|
Note: The Tangent option is only available for face selection if all the edges (boundaries) of the face have adjacent faces (same object), and when the face has no adjacent tangent (smooth) faces (like a face created by Round).
|
Demo: Press the button below to view
a short movie demonstrating the function:
|
Practice: Press the button below to open Cimatron with a practice ELT file similar to that used to create the movie (if the relevant feature already exists in the ELT file, you can either edit it or delete it and create a new feature). |
|
|
|

Required Step 1 
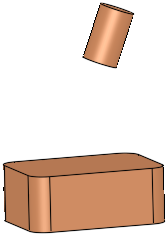
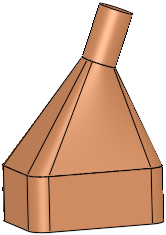
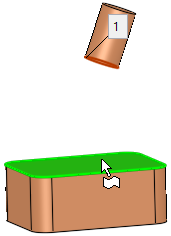
Select the closed 2D or 3D face, composite curve or sketch to be lofted.
|
Pick the 1st object face: |
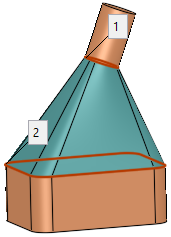
Pick the 2nd object face: |
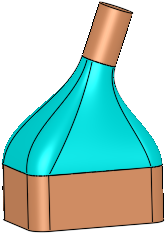
A loft is created between the two object faces (Free): |
|
|
|
|

Optional Step 1 
Set the slope parameters. The following slope types can be selected:
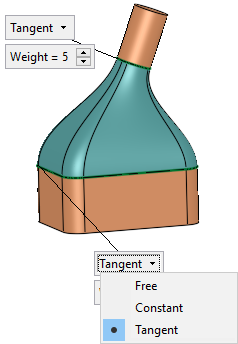 |
Free: Boundary conditions are not checked. Constant: Allows you to define the Weight values of the Slope. Tangent: Ensures the same tangent on the common edge. |
|
Smooth Faces Connection / Free Faces Connection |
This option is only displayed if at least one of the slope parameters is defined as Tangent. This is a toggle option Smooth Faces Connection / Free Faces Connection to define the continuity on the face boundaries. Smooth Faces Connection: Connect the faces smoothly. The resulting faces will be smooth with adjacent faces, resulting in a more streamlined model with less sharp corners. Free Faces Connection: Connect the faces freely. Continuity on the face boundaries has no importance.
|
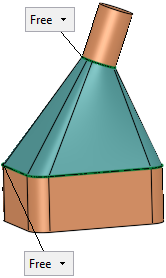
Free
By default, the slopes at the edges of the face are free.
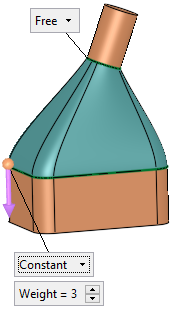
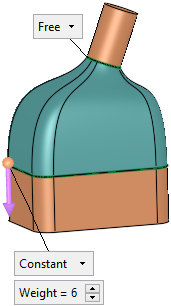
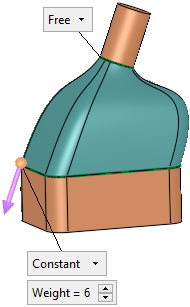
Constant
To define the slopes at one or both edges, toggle to Constant. Enter a Weight value to define the area of influence of the section.
A direction arrow is displayed to set the slope direction. Click on the arrow head to flip the direction, or click the arrow origin to set a new direction.
|
Constant, Weight = 3: |
Constant, Weight = 6: |
Slope direction changed: |
|
|
|
|
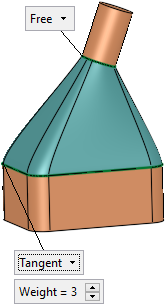
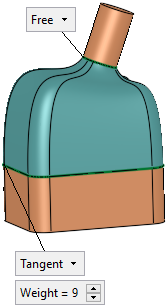
Tangent
To set the same tangent on the common edge, toggle to Tangent. Enter a Weight value to define the area of influence of the section.
|
Tangent, Weight = 3: |
Tangent, Weight = 9: |
|
|
|
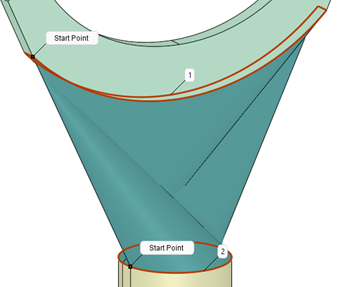
Optional Step 2 
Edit contour start points and directions. There are two options:
-
Each contour face displays a standard purple directional arrow that points in the default direction of the contour as the function has assigned it. Flip the arrow to reverse the direction of contour at that section.

-
Select a different point on one of the highlighted contours to move the start point and start point tag for that contour.
When you have completed the steps, click OK ![]() or Apply
or Apply ![]() in the Feature Guide to complete the function.
in the Feature Guide to complete the function.
When completed, the Loft feature will appear in the Feature Tree as follows: