|
|
CMM (XYZ Labeling) > Attach Labels  : Editing

Access: Activate the appropriate part/electrode and then select Tools > Tools > Attach Labels (CMM) from the menu bar.
There are a number of ways that probe movements defined in CMM Attach Labels can be edited. For example:
Editing the settings in the Groups dialog
Editing the sequence of the probe's movements
Editing the location of the part geometry
Editing the settings in the Groups dialog
-
If you are not in the CMM Attach Labels function, invoke the function. The function automatically opens at the second required step.
-
Select the number on the label of the movement to be edited. The number is highlighted, the probe is positioned at the selected point, and the screen parameters (the probe's approach direction or rotation parameters - if 5 axes is selected) become available.
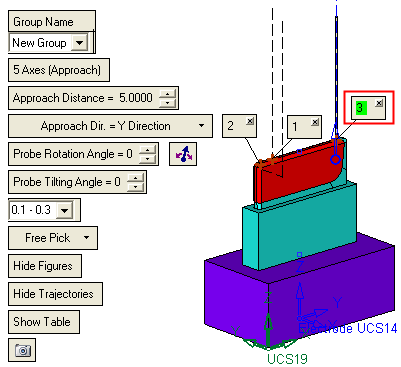
If required, show the table of the probe's movementstable of the probe's movements to view the parameter settings.
-
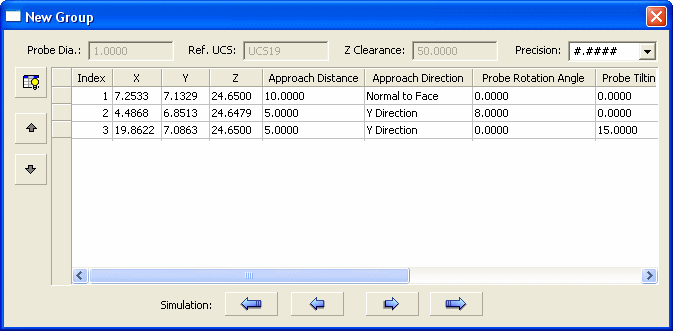
Select the first required step in the feature guide. The Groups dialog is displayed.
-
Edit the parameters as required and press <exit><exit> to approve the changes.
Notes:
-
Changes to any parameter setting will affect all points belonging to the same group.
-
When changing the UCS in an existing group (a group with selected points, i.e., not empty), the new UCS must be positioned in the same orientation as the original UCS. Otherwise, the system cannot recalculate the position of the points and requests you to delete them.
Editing the sequence of the probe's movements
-
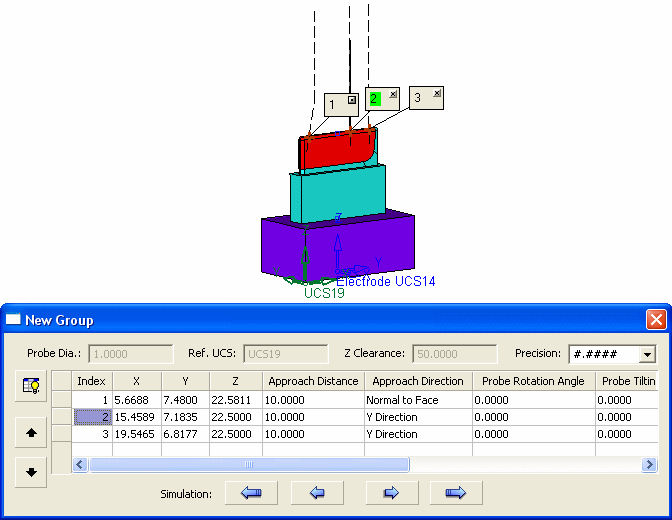
Show the table of the probe's movementstable of the probe's movements to view the parameter settings.
-
Select point to be edited, either by selecting the number on the appropriate label or by selecting the index number (in the table) that corresponds to the label number to be edited.
-
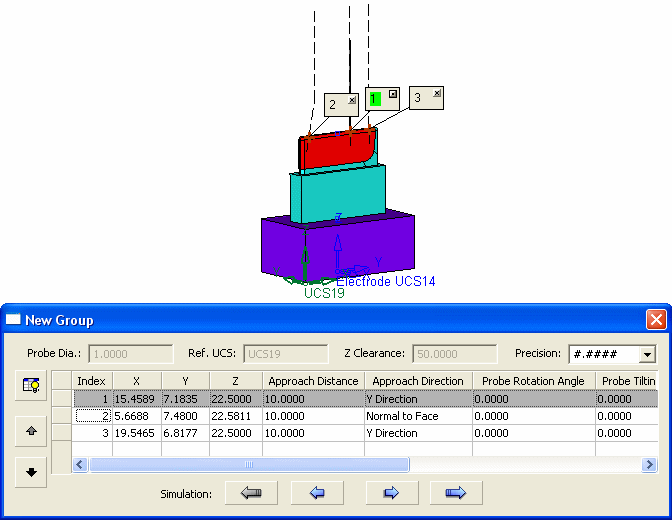
In the table, use the

 arrows to move the row either up or down to change the sequence of the probe's movements. The label numbers are updated accordingly.
In this case, the selected row is moved up one place, and this is reflected in updated labels.
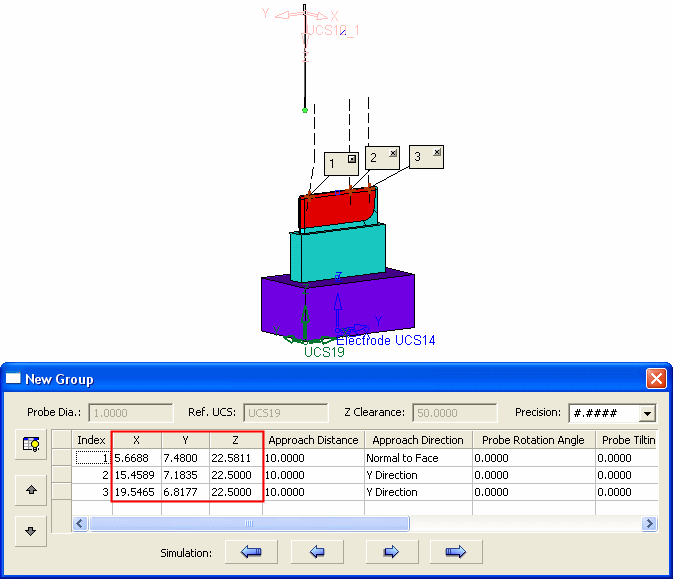
Editing the location of the part geometry
-
Show the table of the probe's movementstable of the probe's movements to view the XYZ coordinate settings.
-
Move the part as required. In this case, (by using the Move Geometry> Linear function) the part is moved 20mm along the X axis and -30 along the Y axis.
Re-invoke the CMM Attach Labels function and show the table to view the changed XYZ coordinate settings (you can also observe that the part has moved). See how the points correspond to the location change of the model (see the image below).
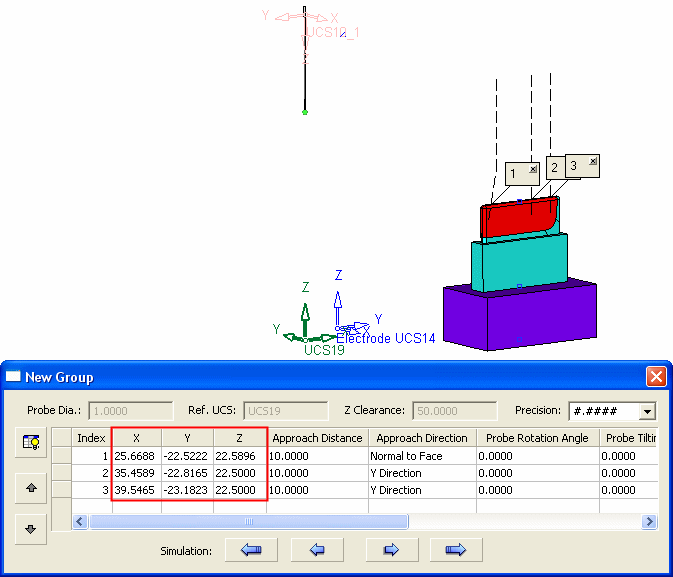
Note: If you also rotate the body (when using the Move Geometry feature), the result of the updated CMM (XYZ_Labeling) feature will not be correct. The reason for this is the same as if you try to select a UCS with a different orientation (in a group that has some points assigned to it) as the Ref. UCS. In order to change the UCS in an existing group (which is not empty - with selected points), the new UCS must be positioned in the same orientation as the original UCS. Otherwise, the system cannot recalculate the position of the points and requests you to delete them.
|