|
|
Customizing Control Panel Tabs

Access: Open this function from the following location:
-
Cimatron Control Panel: Select Start > All Programs > Cimatron > Cimatron Control Panel.
Cimatron Control Panel tabs can be customized in the following ways:
Adding a New Customized Tab
Add a new customized tab to the Control Panel. Only one new tab can be added to the Control Panel.
To add a new tab:
-
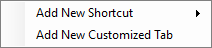
Press the Add New icon at the lower left of the Control Panel dialog.

-
The following options are displayed. Select Add New Customized Tab.
-
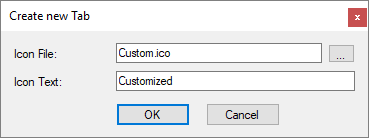
The following dialog is displayed:
-
Enter the Icon File (browse to the appropriate location) and the Icon Text.
For example:
|
An example of a completed new tab dialog . . . |
and how it would appear in the Control Panel. |
|
|
Note the entries in the dialog and the corresponding appearance in the Control Panel. |
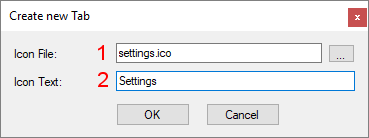

If an Icon file is not defined, a default icon is displayed.
-
Press OK.
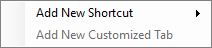
Note: Since only one new tab can be added to the Control Panel, pressing on the Add New button after the tab has been added displays the following options with the Add New Customized Tab option grayed out:
Editing Existing Tabs
Edit an existing Control Panel tab.
To edit an existing tab:
-
Right-click on the tab to be edited. The following popup is displayed:

If a customized tab has already been added, the following popup is displayed:
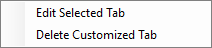
Select the option:
|
Edit Selected Tab |
Edit the Create/Edit dialog. For example:
|
||||
|
Delete Customized Tab |
Delete the customized tab from the Control Panel. A confirmation message is displayed. This option is only displayed if a customized tab has already been added. |
|