|
|
Light Settings: Textures & Materials 

Access: Open this function from the following location:
-
Select View > Settings > Light Settings from the menu bar.
When the Lighting & Textures dialog is displayed, choose the Textures & Materials tab in the dialog.
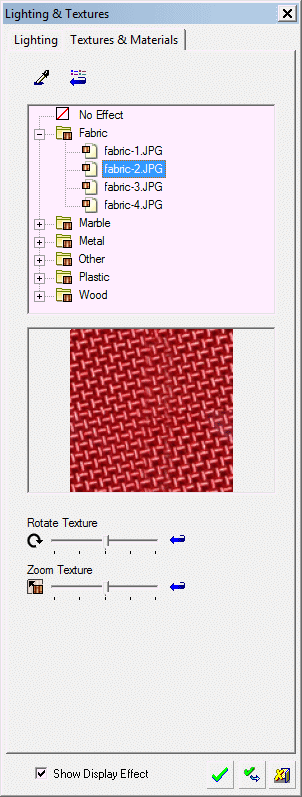
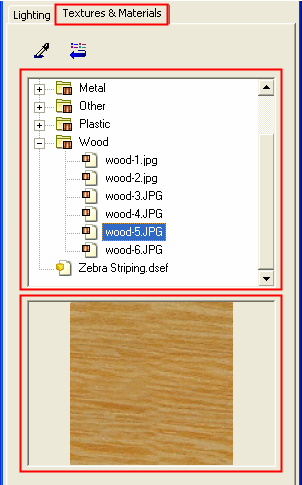
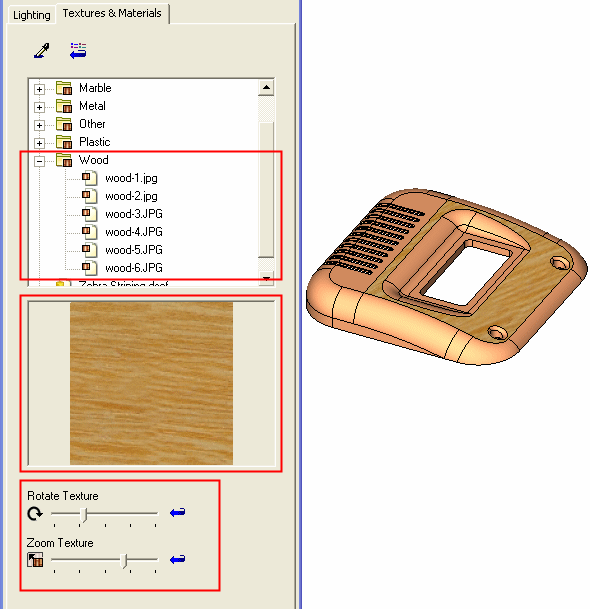
The Textures and Materials tab in the Lighting & Textures dialog enables you to select and manipulate textures for faces and objects.
The Lighting & Textures dialog is displayed showing the Textures and Materials tab.
|
|
Tabs: Textures & Materials
Textures & Materials Parameters:
Notes:
|
Dialog Panes
The Textures and Materials tab contains the following panes:
|
|
|
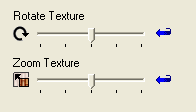
Rotate / Zoom
Rotate and/or Zoom the chosen texture on the selected face.
|
Rotate |
Rotates the texture on the selected face by moving the slider right (clockwise) or left (counterclockwise). |
|
Zoom |
Enables you to select the required zoom for the texture on the selected face by moving the slider right (zoom in) or left (zoom out). |
Show Display Effect
Display or hide textures on entities.
Select this checkbox to show the results of Texture settings in the Lighting & Textures dialog on the display.
|
|
|
|
|
|
 :
: :
:

Dialog Buttons
The following buttons are displayed in the Lighting & Textures dialog:
|
|
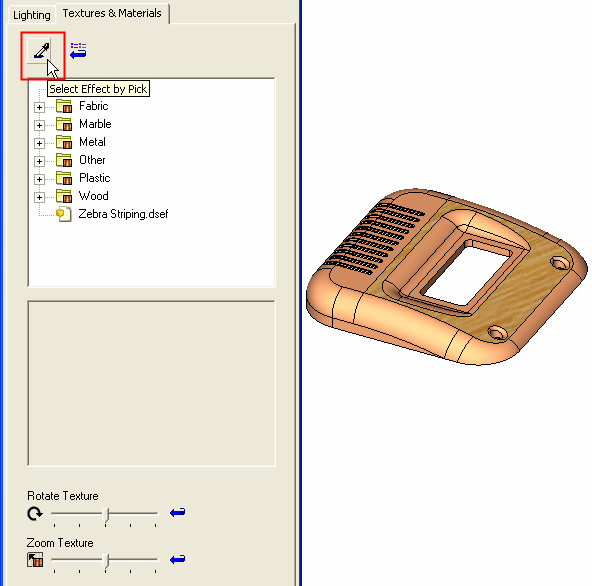
Displays the texture used on a selected face. When you pick a face with an attached texture, the following occurs:
This texture (together with the zoom and rotation properties) can now be attached to another entity if required. See To select a texture by pick for additional information. |
|
|
Restore: Undo all parameter changes in the dialog made during the current session of the function. |
|
|
OK: Accept the settings and close the dialog. |
|
|
Apply: Accept the settings and remain in the dialog. |
|
|
Cancel: Reject the settings and close the dialog. |

Example Operations
To edit (zoom/rotate) a texture
Pick the face to be textured.
Select the required texture from the upper pane.
Click OK ![]() or Apply
or Apply ![]() .
.
Pick the face whose texture is to be removed (pick a face that has a texture attached to it).
Example:Example:
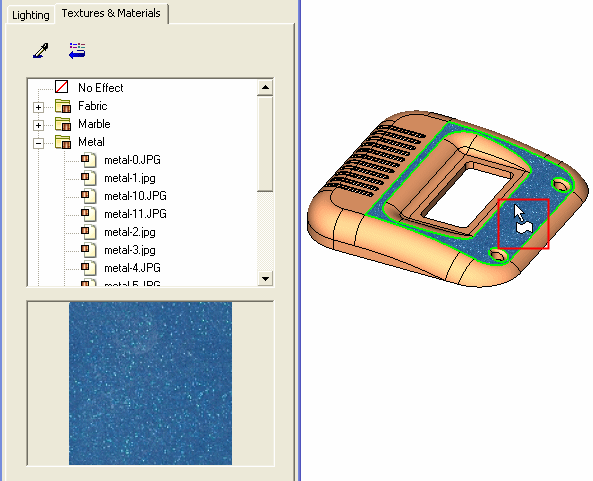
Select the texture, No Effect. The texture is detached and the face is initially marked in selected mode.
Example:Example:
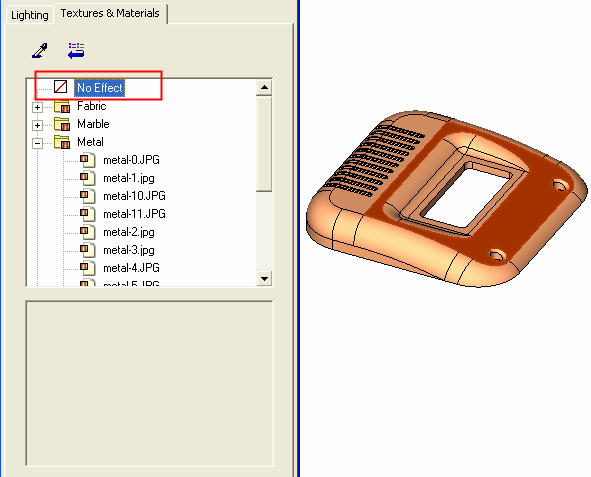
Click OK ![]() . Upon exiting the function, the default face color is displayed instead of the detached texture.
. Upon exiting the function, the default face color is displayed instead of the detached texture.
Select the eye dropper button ![]() .
.
Example:Example:
Pick a face that has a texture attached to it.
Example:Example:
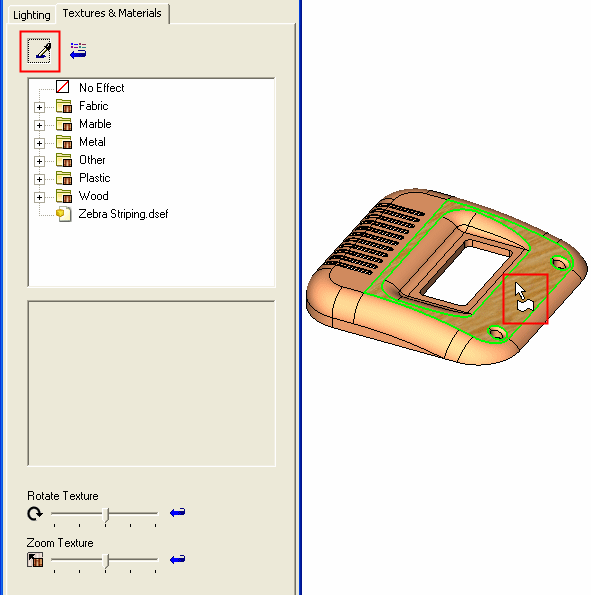
When you pick a face with an attached texture, the following occurs in the Lighting & Textures dialog:
-
-
The texture file is displayed in the upper pane (the folder containing the texture is opened).
-
The texture image is displayed in the lower pane.
-
The texture zoom and rotation properties used in the selected face are also displayed.
-
This texture (together with the zoom and rotation properties) can now be attached to another entity, if required.
Click OK ![]() or Apply
or Apply ![]() .
.
To edit (zoom/rotate) a texture:
Attach a texture to a face or Select Texture by Pick.
Edit the texture by zooming or rotating it as required.
Click OK ![]() or Apply
or Apply ![]() .
.
Add your own texture by adding a jpg picture to one of the sub-folders under the following folder of your installation: ...\Data\Textures\.
The new texture is displayed (together with the existing textures) in the upper pane of the Textures & Materials tab of the Lighting & Textures dialog.
|