Selection Filter 

Access: Open this function from the following location:
Access: Open this function from one of the following locations:
-
Select Edit > Filter > Selection Filter from the menu bar.
-
You can also open this menu by pressing the left and right mouse buttons together.
To reset the Selection Filter, press the Reset button at the bottom of the dialog.
The Selection Filter enables you to define the types and attributes of geometry available for selection. For example, if only Faces are marked in the Selection Filter, then only Faces will be available for selection in the graphics window for the current operation.
The Selection Filter dialog allows you to define the types and attributes of geometry available for picking. Entities can be filtered by geometry, color, line style, line width, and sets. This means that if the filters for specific entity types are OFF (unselected), for example, Faces colored blue, the cursor symbol does not indicate that entity type (blue face) when you move the mouse over it, and therefore it cannot be picked. See also Quick Color Filter and Quick Geometry Filter.
The Selection Filter is divided into the following tabs:
See the Selection Filter Buttons and the Selection Filter Popup Menu options.
Notes:
-
As a shortcut, you can use the Quick Geometry Filter icons on the toolbar.
-
If you drag a box to select all entities, only those entity types specified in the Selection Filter will be selected.
-
If you have selected entities and you want to erase your current selection and start selecting from the beginning, press the Clear Selection button (
 ) in the toolbar.
 -
The Selection Filter is used when manually picking geometry. In NC, if you want to automatically select geometry meeting a certain profile, you can define geometric sets and/or select geometry by criteria.
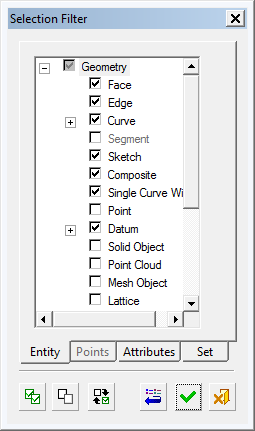
Entity
The Entity tab in the Selection Filter dialog enables you to select the required Entity filters.
|
|
Click the Entity tab to display a list of entity types. Mark the checkboxes to select which picking options will be available. Alternatively, unselect entities already selected by default, if required. See the Selection Filter Buttons and the Selection Filter Popup Menu options. Note: When the Filter Objects button |
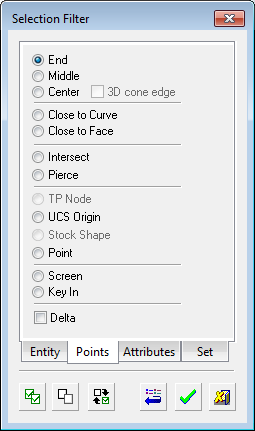
Points
The Points tab in the Selection Filter dialog enables you to select the required Point filters. Select the Point checkbox in the Entity tab to activate the Points tab. If the Point checkbox is not selected, the Points tab is grayed out and you cannot enter it.
Click the Points tab to display a list of available point location types.
See the Selection Filter Buttons and the Selection Filter Popup Menu options. See Picking Points for additional details.
|
The default Point selection radio buttons may look as shown below. Even though only one radio button may be selected by default, Cimatron enables you to locate points on numerous entities. However, once you select a Point filter, only that filter will be available (all the other options are unselected). |
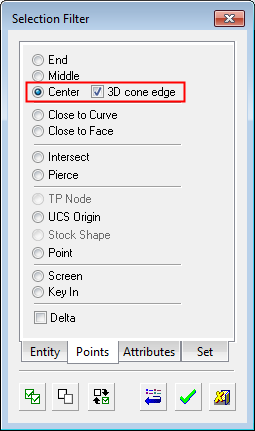
If you select the Center Point option, an additional option is available - 3D Cone Edge. |
When the Points Optional Selection toggle button In this case, the Points tabs of the Selection Filter displays checkboxes to enable multiple point types to be selected (see below). |
|
|
|
|
|
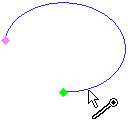
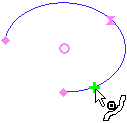
Example: |
Example: |
|
|
|
See Picking Points for additional details. |
|
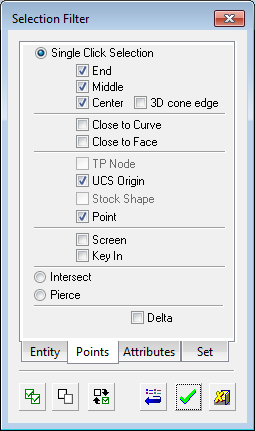
Note: Every 2D spline edge or curve that can be simplified to an arc with a tolerance of 0.001 mm has a center point.
Attributes
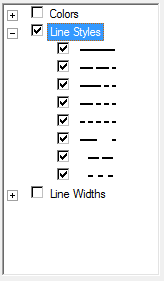
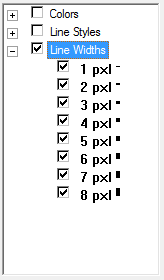
The Attributes tab in the Selection Filter dialog enables you to select the required colors, line styles and line widths attribute filters.
|
|
Mark the colors, pens, and line fonts to be available for picking. See Attributes > Colors below, for examples of using colors as filters. See the Selection Filter Buttons and the Selection Filter Popup Menu options.
|
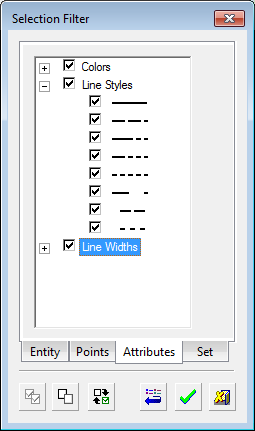
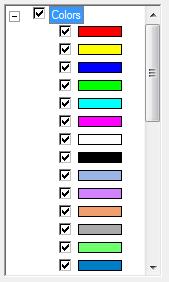
Attributes > Colors
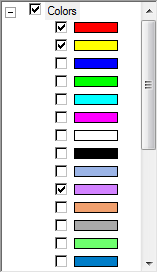
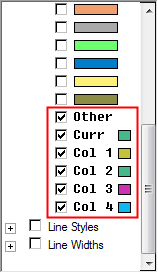
Sixteen (16) standard and five (5) 'other' custom (non-standard) colors can be used when filtering by colors. The 'other' colors are defined by the system when you use the color filter options with custom (non-standard) colors.
Using Standard Colors:
|
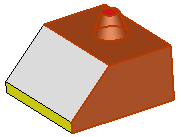
Standard RED, YELLOW and PURPLE entities are selected: |
The selected standard colors as they appear in the Selection Filter dialog when used with the color filter options: |
|
|
|
|
|
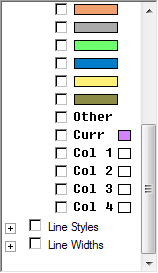
Using Custom Colors:
|
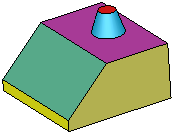
'Other' custom (non-standard) colors are selected: |
The 'other' colors are defined by the system when you use the color filter options with custom (non-standard) colors. |
|
|
|

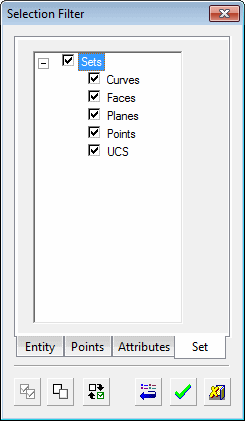
Sets
Select the required Set filters.
|
|
Sets are used to display or hide specific geometric entities and are useful when picking geometry for procedures. See the Selection Filter Buttons and the Selection Filter Popup Menu options. |
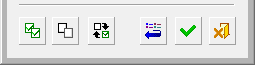
Selection Filter Buttons
Each of the Selection Filter tabs displays the following buttons:
|
|
Select All Items: |
|
|
Clear Selection: |
|
|
Toggle Selection: |
|
|
Reset: Reset the selection filter to its default settings only for the current function, stage, and option. To reset all filters of all tools to the system defaults, use the Reset Filter Default Preference option. |
|
|
OK: |
|
|
Cancel: |
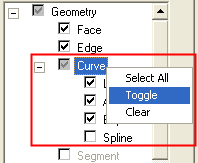
Selection Filter Popup Menu
Right-click on a filter parent "folder" in the Selection Filter dialog to display a popup menu. The popup menu is only available from a parent folder (a folder containing additional filter options) in the Entity, Attributes, or Sets tabs.
|
|
The popup menu contains the following options:
|