BOM: Editing Operations

Access: Open this function from one of the following locations:
-
Click the
 button in the toolbar.
 -
Select Symbols > Tables > BOM from the menu bar.
-
Select Drafting Symbols > BOM on the popup menu (right-click the graphics area).
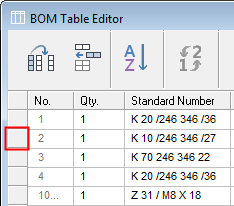
Modify the BoM using the BOM Table Editor dialog buttons and Popup menu options.
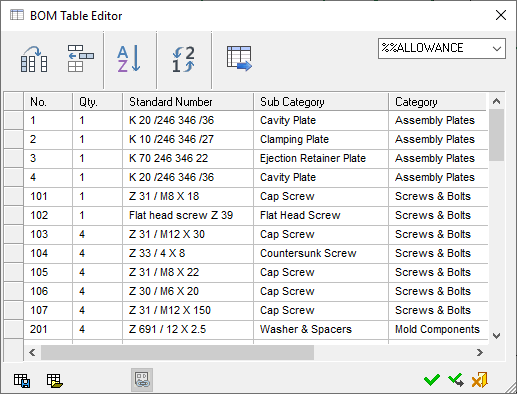
The following BoM table editing options are available:
Symbolic Text
Click inside the cell in which you wish to insert the Symbolic Text and select the required field from the scroll-down menu.
Symbolic Text in the Assembly
Attach symbolic text in the BOM to the Assembly
- Double-click the BoM TableBoM Table. The BOMBOM dialog is displayed.
 .
.
- Right-click in the specific cell and select Attach Symbolic TextAttach Symbolic Text from the popup menu.

- Select the part component and then click Apply and exit the BoM function. The text in the cell is now connected to the symbolic text field in the part file.
Detach symbolic text in the BOM from the Assembly
- Double-click the BoM TableBoM Table. The BOMBOM dialog is displayed..
- Right-click in the specific cell and select Detach Symbolic TextDetach Symbolic Text from the popup menu.
- Click Apply and exit the BoM function. The text in the cell is now free text and is not attached to the text field in the part file.
Text Editing
To edit text within a cell, double-click the cell. To perform other operations, right-click within the cell to display a popup menu and select the required option.
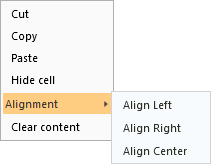
Cut |
Cut, Copy, Paste the contents of the cell. |
Copy |
|
Paste |
|
Hide Cell |
Hide the cell. |
Alignment |
Align the text in the cell left, right or center. |
Clear Content |
Clear the cell content. |
Table Function
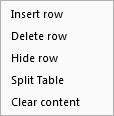
To modify the rows in the BoM, right-click the gray squaregray square to the left of the specific row. The row is shaded and a popup menu with row editing options is displayed.
↵
|
Insert Row |
Insert a row above the selected row. |
|
Delete Row |
Delete the selected row. |
|
Hide Row |
Hide the selected row. This is unavailable in the BOM Table Editor. |
|
Split Table |
Split the BoM table at the selected row. |
|
Clear Content |
Clear the contents of the row. |
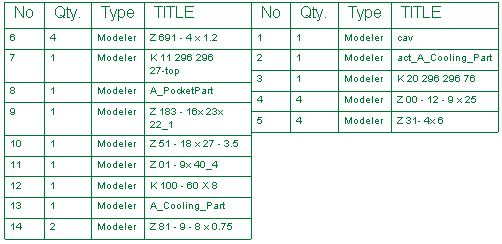
Splitting a BoM
A BoM can be split either from the BOM Table Editor dialog or from the BoM Table (in the Drafting sheet).
Either:
In the BOM Table Editor: right-click the gray squaregray square to the left of the row where the BoM will be split and select the Split Table option from the popup menu. Press OK ![]() .
.
Or:
On the BOM Table (in the Drafting sheet): right-click on the row where the BoM will be split and select the Split Table option.
In the BOM feature guide toggle the Split BOM to LeftSplit BOM to Left ![]() / Split BOM to RightSplit BOM to Right
/ Split BOM to RightSplit BOM to Right ![]() button as required.
button as required.
|
Split BOM Right |
|
|
|
Split BOM Left |
|
|

In the BOM feature guide toggle the Title UpTitle Up ![]() / Title DownTitle Down
/ Title DownTitle Down ![]() button as required
button as required
|
Split BOM Left - Title Down |
|
|
|
Split BOM Left - Title Up |
|
|
The BoM table is displayed split when Export BOM to File ![]() is invoked.
is invoked.