|
|
Modifying a Chain 

Access: Open this function from one of the following locations:
-
Click the
button in the toolbar. -
Select Views > View Creation > Hatch from the menu bar.
-
Select Drafting Symbols > Hatch on the popup menu (right-click the graphics area).
Add a hatched surface to the drawing.
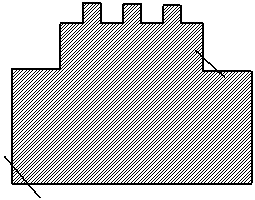
In the following example, a Chain is modified to change the area of the Hatch.
-
InvokeInvoke the Hatch function. The Hatch dialog and parameters are displayed.
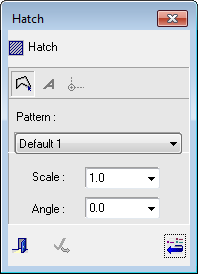
- Select the Chain dropdown option.
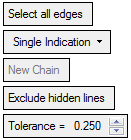
- Pick the first and last edges to define the chain and <exit><exit>.

- A Hatch is created within the defined chain.
- Click the Add Geometry to the Contour button
 , select the Free dropdown option and unpick the first group of intersected edges.
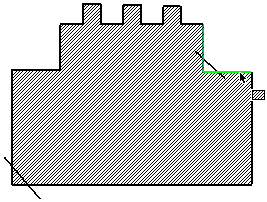
- Select the One By One dropdown option and pick the new contour to include the intersecting line.
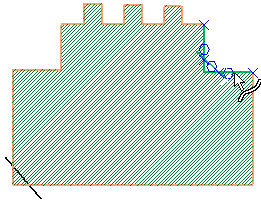
- Select the Free dropdown option and unpick the second group of intersected edges. Select the One By One dropdown option and pick the new contour to include the intersecting line (as in Steps 6 and 7) and <exit><exit>.
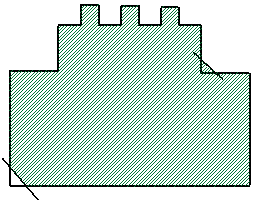
A Hatch is created within the newly-defined perimeter.
Notes:
-
The One By One dropdown option cannot be applied to a transformed curve (e.g. the edge of a projected circle) or to a common edge (the edge must be split).
-
The Chain option cannot be applied to both 2D and 3D curves together.
See Modifying the Hatch for details on how to change the characteristics of the hatch surface.
|