Table of Holes: Defining Undefined Holes 

Access: Open this function from one of the following locations:
-
Click the
button in the toolbar. -
Select Symbols > Tables > Table of Holes from the menu bar.
Define new holes within the Table of Holes (TOH) from holes that were previously marked as Undefined in the TOH. This includes attaching hole parameters, adding a name, attaching pictures, and more.
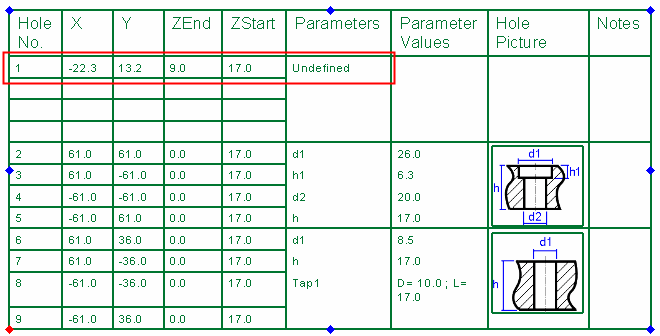
Holes are marked as Undefined if they do not match one of the hole types recognized by Cimatron. This could, for example, be a hole with a draft angle.
Define new holes from undefined holes
-
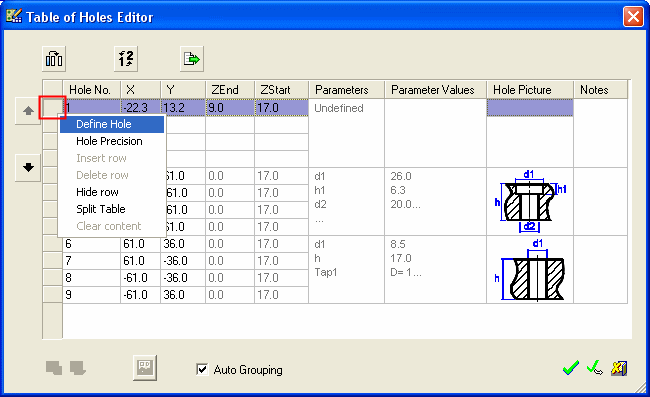
From the Table of Holes Editor dialog, right-click the grey square to the left of the row (of an undefined hole). The row is highlighted and a popup menu with row editing options is displayed, as shown above.
-
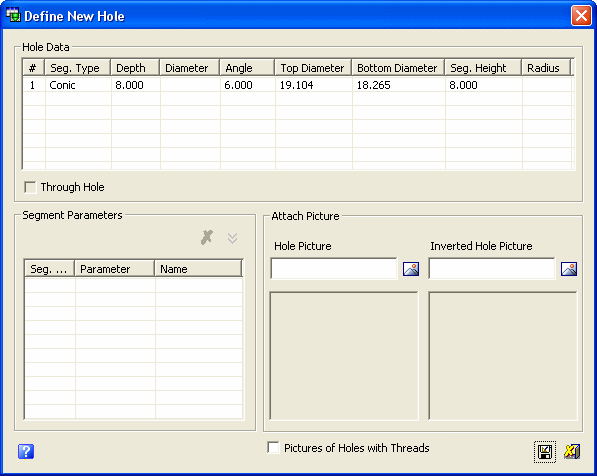
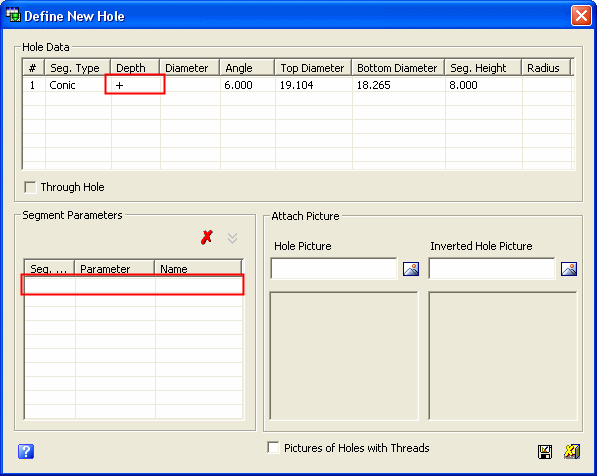
Select Define Hole (This option is available if an undefined hole is displayed in the ToH). The Define New Hole dialog is displayed:
-
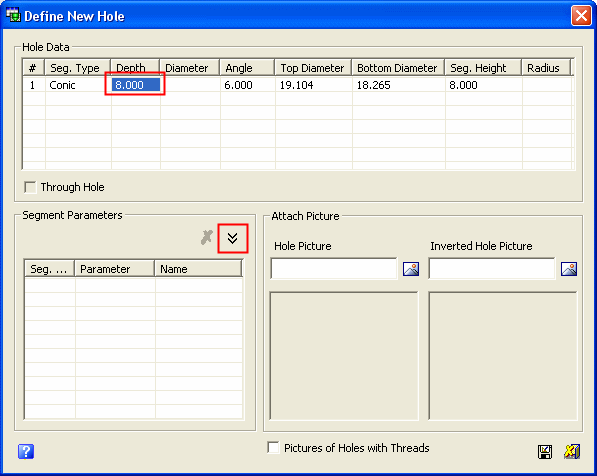
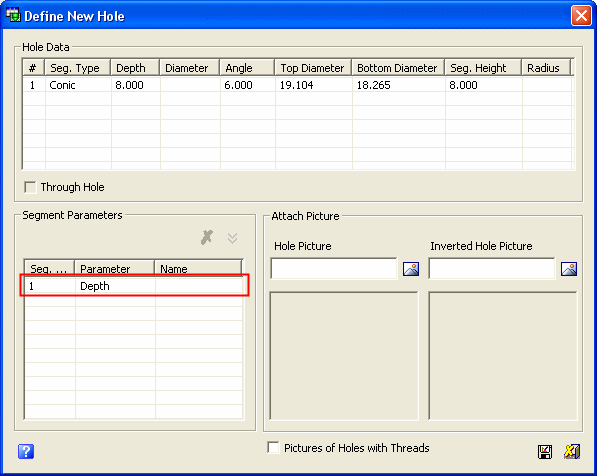
From the Hole Data area, select the required parameter. The Attach New Parameter
 button becomes available in the Define New Hole dialog:
-
Either double-click on the selected parameter or click the Attach New Parameter
button to attach the selected parameter to the hole. The parameter is displayed in the Segment Parameters area:
-
In the Segment Parameters area, double click in the Name column of the selected parameter to add a name to the parameter:
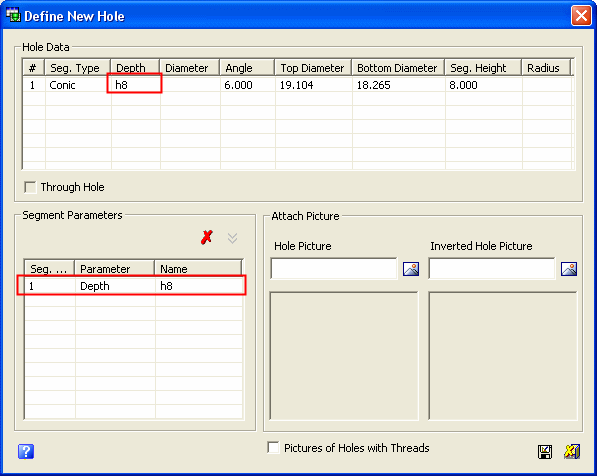
The name assigned in the Segment Parameters area is automatically displayed in the Hole Data area, shown above.
-
If required, from the Attach Picture area, click the appropriate
 button to add either a Hole Picture or an Inverted Hole Picture to the hole:
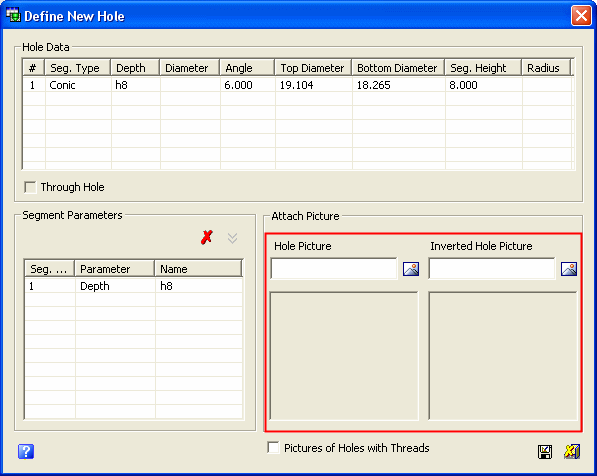
From the displayed Open dialog select the required picture/inverted picture file to attach to the hole. The picture will be displayed in the Table of Holes.
If the holes contain threads, select the Pictures of Holes with Threads checkbox. This checkbox changes the picture of the hole to show the threads.
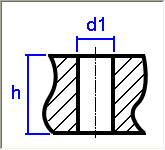
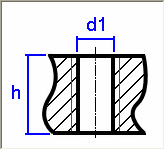
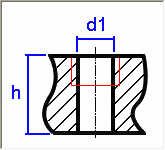
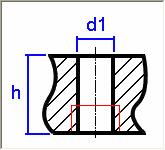
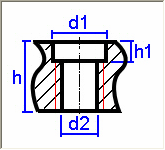
For exampleFor example:
|
Hole image without threads: |
Hole image with threads (full depth): |
|
|
|
|
Hole image with threads (top): |
Hole image with threads (bottom): |
|
|
|
|
Hole image without threads: |
Hole image with threads: |
|
|
|

-
If required, you can click the Remove Parameter
 button to select a parameter and un-attach it from the hole, a plus sign is then displayed in the parameter cell in the Hole Data area (indicating the parameter has been used) and removed from the Segment Parameters area, as follows:
Note: If required you can repeat steps 4 through 9, to reassign this parameter to the hole.
-
Click the Save Hole
 button to save this undefined hole as a specific hole type. The Save As dialog is displayed listing all the existing hole types.
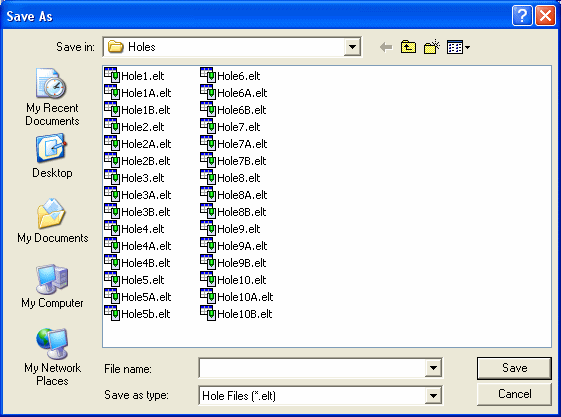
Either select one of the existing hole types, or if required, enter a new name here (to create a new hole type).
-
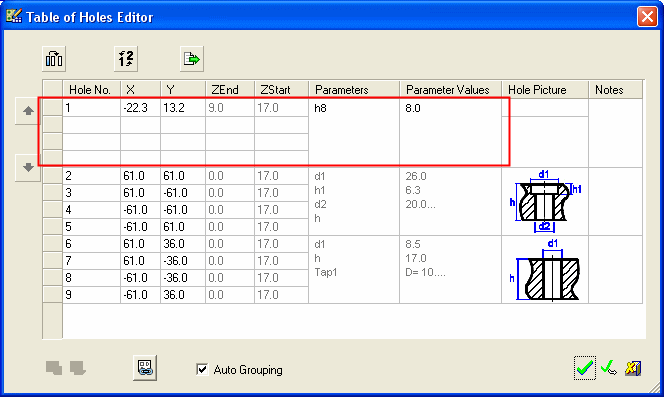
Press Save in the Save As dialog. The update hole data is now displayed in the Table of Holes Editor.
-
Press OK
 to display the updated ToH. For example:
