Modifying the BOM: By Dynamic Editing - Drag and Drop Operations

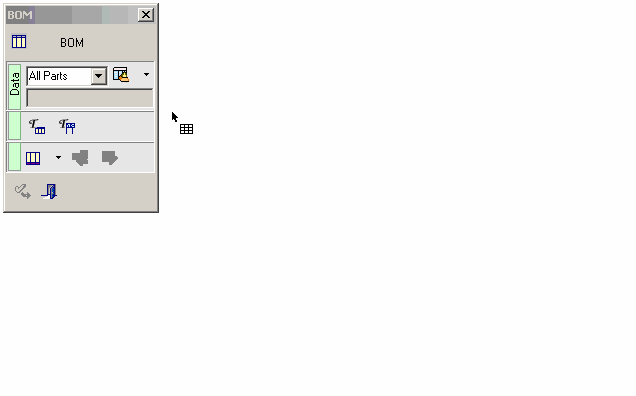
Access: Open this function from one of the following locations:
-
Click the
 button in the toolbar.
 -
Select Symbols > Tables > BOM from the menu bar.
-
Select Drafting Symbols > BOM on the popup menu (right-click the graphics area).
Modify the BOM using dynamic editing (drag and drop) operations on the BOM Table or the BOM Table Editor dialog.
|
Demo: Press the button below to view a short movie demonstrating the function: |
|
|

Dynamic Sizing
Dynamic BOM sizing refers to the dynamic resizing of column widths by dragging them to the required size.
Column widths can be set dynamically from the BOM Table Editor dialog or from the BOM Table in the Drafting Sheet. In both these areas, drag the appropriate column walls to the required width.
Note: Column widths can also be set numerically using the Properties button of the Column Chooser dialog, which is accessed via the BOM Table Editor dialog.
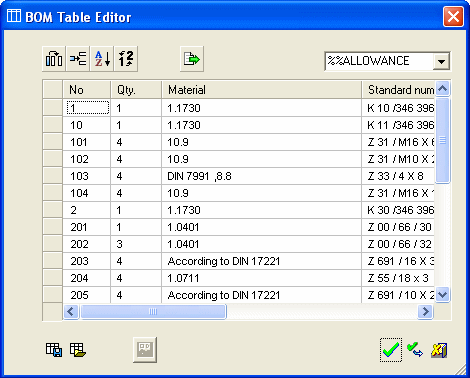
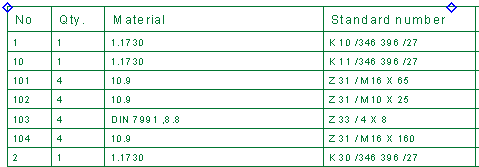
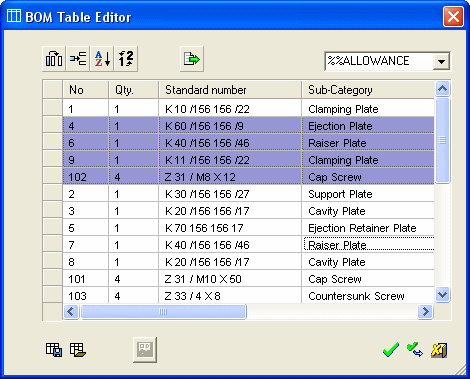
BOM Table Editor dialog
To size the BOM columns dynamically, click on the column walls and drag them accordingly.
The BOM Table in edit mode.
In the gray area of the columns, select the column to be adjusted. The cursor changes.
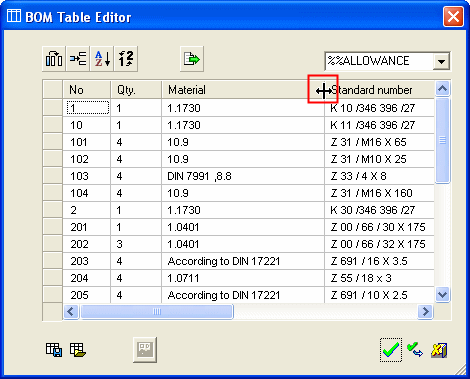
Drag the column to the required width. Press OK.
The column width is updated in the BOM Table.
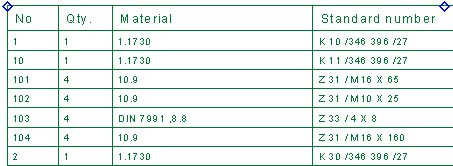
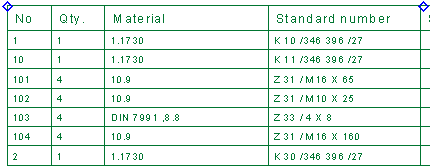
BOM Table
To size the BOM columns dynamically, click on the column walls and drag them accordingly.
The BOM Table in edit mode.
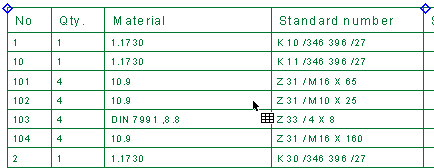
Select the column to be adjusted. The column is highlighted and the cursor changes.
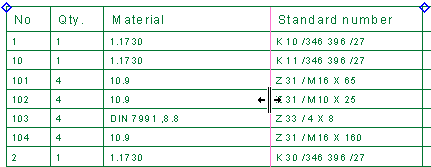
Drag the column to the required width.
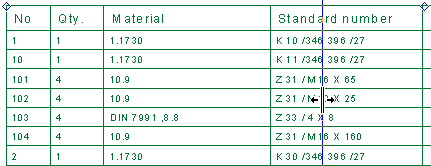
The new column width.
Dynamic Positioning
Dynamic BOM positioning refers to internal and external positioning:
- Internal Positioning - dragging rows up or down the BOM Table Editor dialog
- External Positioning - dragging the BOM table to reposition it
Internal Positioning
This refers to dragging rows up or down the BOM Table Editor dialog to reposition them within the table. This applies to the BOM Table Editor dialog both in Assembly and Drafting.
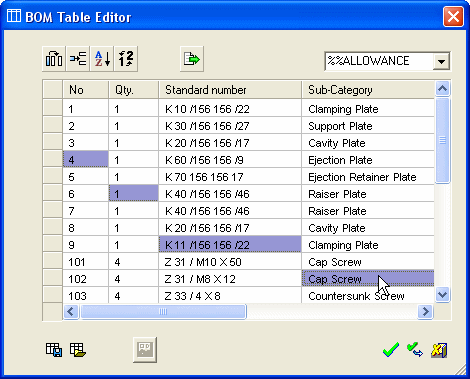
Drag one or more rows
-
Select the required row(s) or cell(s) to be dragged.
Multiple rows or cells can be selected (consecutive or non-consecutive), as shown below:
-
Drag to the required location.
If you selected cells, when you start dragging the appropriate rows will be fully selected.
A thick red line throughout the row represents the target spot - the cursor location (the dragged rows will be inserted between the 2 rows either side of the red line).
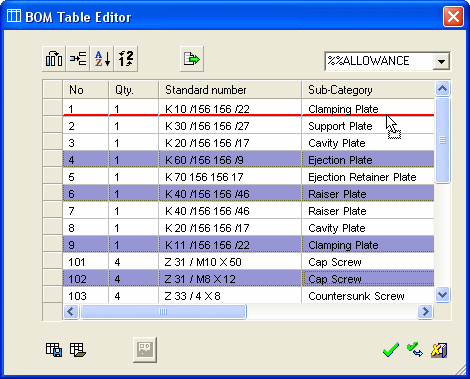
The result of the drag operation:
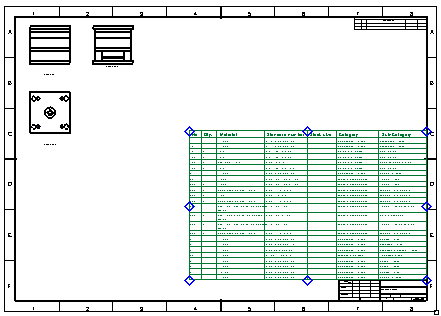
External Positioning
To move the BOM, select one of the 8 hot spots (one at each corner and one at each mid-point) and drag the BOM to its new location.
Note: If the hot spots are not displayed, highlight the BOM table by moving the cursor over it, and then do one of the following:
-
Double-click the BOM table.
-
Right-click the BOM table and select Edit This from the popup submenu.
Example
-
As you move the cursor over an individual the hot spot, it becomes highlighted. Pick a hot spot and drag the entire BOM table to the required position. These hot spots can be associated to reference entities, such as lines, arcs and points.
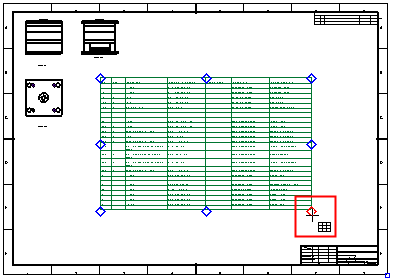
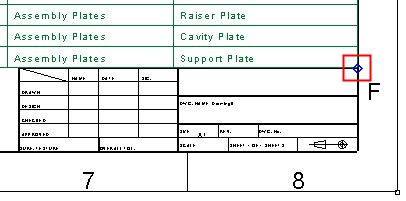
The BOM table is positioned as required.