Edit Sketch Orientation 


Access: Invoke the Sketcher, define the sketch plane and then invoke this function from the following location:
-
Click the Sketcher Tools
>
Edit Sketch Orientation button in the
Sketcher toolbar.
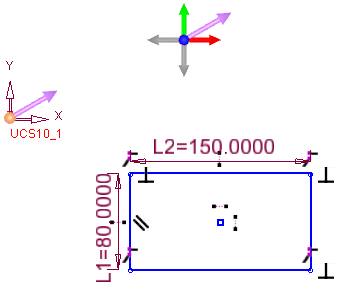
Change the X and Y directions of the sketch.
The Edit Sketch Orientation function enables you to define a new sketch origin point and set a different X axis direction.
General Interaction
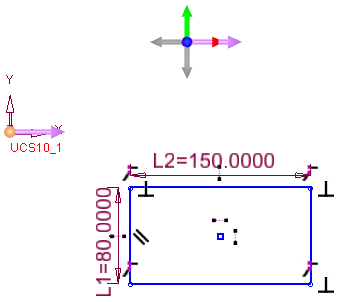
The following is the Feature Guide for Edit Sketch Orientation.
|
|
|
Required Step 1 ![]() : Define the origin point and the X axis direction.
: Define the origin point and the X axis direction.
Change the sketch orientation
InvokeInvoke the Edit Sketch Orientation Sketcher tool.
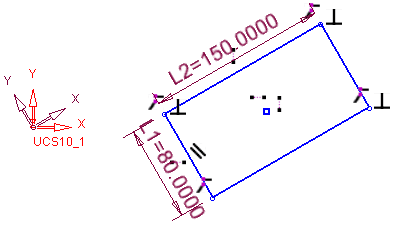
The current origin point is selected and a direction arrow is displayed on it. The default direction is that of the X axis in the current sketch.
Define the origin point and the X axis direction.
Use the direction arrow to set a different X direction.
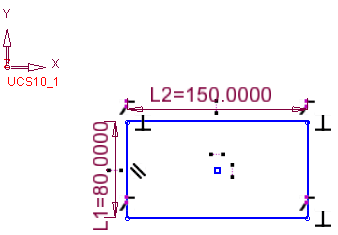
If required, select another origin point. When another origin point is selected, the direction arrow moves to it (keeping its existing direction). Sketcher points may not be selected.
You may also select a different UCS. In this case, the direction arrow points to the X direction of the selected UCS and the UCS origin is selected as the sketch origin.
Note: Selecting a different UCS orientation will change the X direction of the sketch but not the sketch plane. As such, the selected direction cannot be perpendicular to the sketch plane.
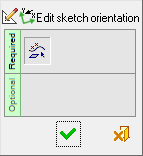
When OK ![]() is clicked in the Feature Guide, the selected direction will become the X direction of the sketch and the origin point will become the origin point of the sketch. The plane of the sketch does not change.
is clicked in the Feature Guide, the selected direction will become the X direction of the sketch and the origin point will become the origin point of the sketch. The plane of the sketch does not change.