Picking Drill Points
In the Geometry table, click the field of the value of Drill Points. The following dialog appears.
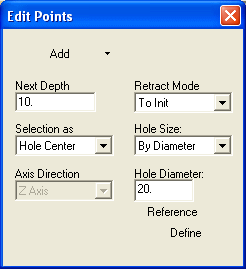
To pick drill points, make sure the top field is set to Add. (If no points currently exist, Add mode is the default.) For each point, specify Next Depth and Retract Mode.
You can select drill points by Single Point, Hole Center or Cylinder Center. If you are in a 4 or 5-axis toolpath, you can also define the drill orientation.
-
To select drilling points by criteria, right-click and select By Criteria.
-
To reset the criteria selection, right-click and select Reset Criteria.
-
To reset the point selection, right-click and select Reset Selection.
-
To modify points, set the top field to Modify. For each point, you can change the X, Y, and Z coordinates, Depth, and Retract Mode settings.
-
To delete points, set the top field to Unselect, and pick the points to delete.
-
Once you have defined your points, either <exit><exit> or right-click and select Finish Selection.
Selecting by single point
-
Select individual points one by one. The cursor will tell you what type of point you are selecting. The points do not have to be part of any object; they can be intersection points, sketched points, etc.
Selecting by hole Diameter
-
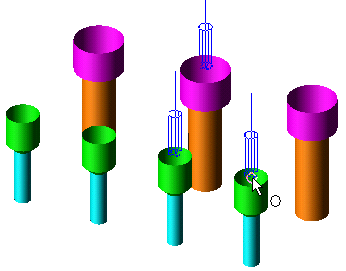
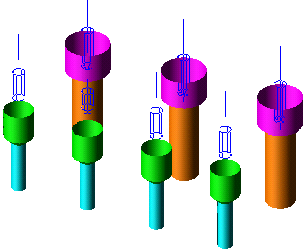
Set the hole diameter you want to select, or you can choose to select all holes.
-
Drag a box around the selection area. Entities that meet the selection criteria are automatically selected.
In the example below, a diameter of 10mm was specified. This criteria selects both the green and orange holes, seven holes in total. Therefore, the counterbored / countersunk section of the holes are considered separate drill holes.
In the example, the holes were created using the Solid > Hole function, but any circular object, such as Extrude, can be selected. The object must be based on either a circle or two concentric arcs.
Selecting by cylinder center
-
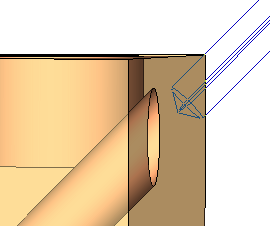
Select a Cylindrical face to define its upper axis point as the drill point and the axis orientation as the drilling orientation.
Notes:
-
The picking point along the cylinder defines the closest side as the drilling side. If the drilling side is wrong - unselect it and select the same cylinder by picking on its other side.
-
If the drilling side is cut at an angle, the drilling point would be at the highest point.