Step 1 - Open a New Mold Project
Every Mold Project uses the Setup Wizard to define the project.
-
From the Cimatron opening screen, click the Mold Setup Wizard button.
The Mold Project Setup Wizard is loaded.
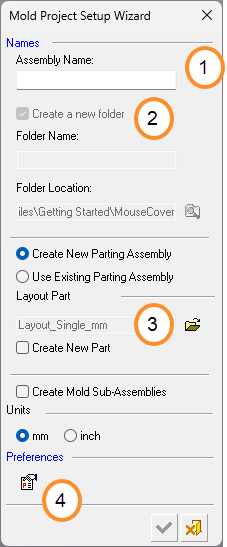
Item Description 1 Assembly Name field 2 Create a New Folder checkbox 3 Layout definition 4 Preferences button -
In the Assembly Name field, enter Mouse cover.
-
Select Create a New Folder to save the main assembly in a new folder.
-
To define the layout, press the folder button next to the layout field. The Mouse cover is a single cavity mold so accept the default layout part, Layout_Single_mm.
While loading the project, you can decide on the layout (pattern of coordinate systems used to place the work parts) and where to position your parts.You can either create a new layout part or load one from a predefined layouts library.
You can define the name of the Assembly. Text can be added to the beginning or end of the name using the Assembly Name_Generator in the Preferences.
1. Click the Preferences button.
2. In the Preferences Editor, open MoldBase > Name_Generator > Assembly_Name. Ensure that the Suffix field is empty.
3. Click OK to close the Preferences dialog.

-
Click OK to close the the Mold Setup Wizard.