Step 3 - Split the Model Into Core and Cavity
Note: The Work Part now appears in the Assembly Tree.
-
Switch back to Mixed RenderMixed Render
 mode and hide the Layout part for a clearer display.
 -
Select the Parting tab to display the parting tree.

-
Click Parting > New Direction.
-
Select the faces to be assigned to this direction. Select one of the faces as shown in the image below.

-
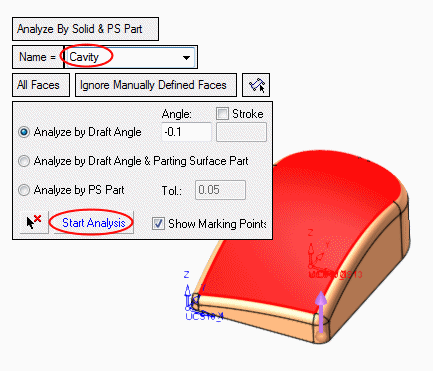
Change the name of the split direction to Cavity.
-
Click the Start Analysis button to assigned all relevant faces based on the defined draft angle and parting surface if these exist.
This analysis uses topology (solid data from both closed and open solids) to assign relevant faces. The topology algorithm looks for neighbors to the selected faces and expands the selections as long as it does not reach the limitation of a defined draft angle or stop parting face.
-
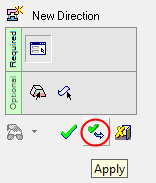
Click Apply.
-
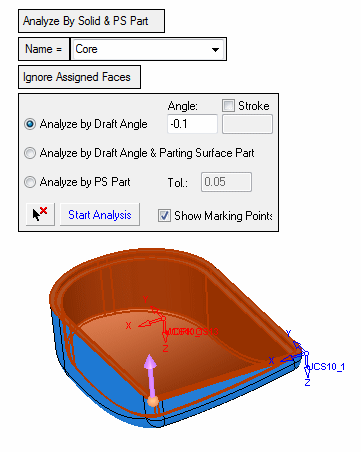
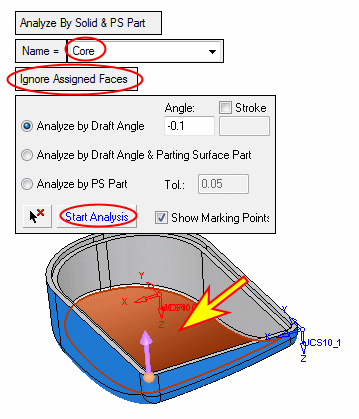
Perform the following steps:
- Click the arrow to change direction and name the new split direction Core.
- Click Ignore Assigned Faces.
- Select the face as indicated by the arrow in the picture below and press Start Analysis.
-
Click OK.