Table of Holes
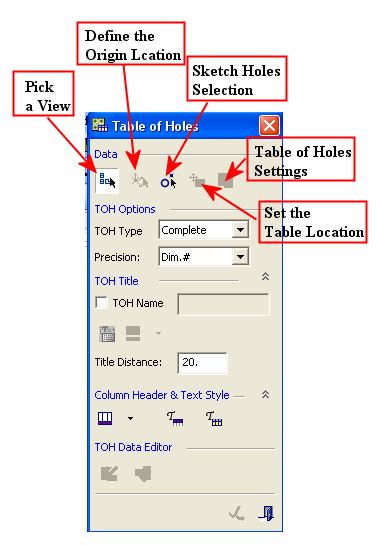
This section describes selecting the required view, the origin point, and the table location. The system runs the hole analyzer on the selected model and creates a table of holes displaying information such as hole number, hole type, and hole parameters. During this process, the system automatically groups identical holes together (containing the same geometry, hole attributes, and threads).
Table of Holes Dialog
- Unpack the TOH Exercise.ctf file.
- Open the TOH Exercise.elt file.
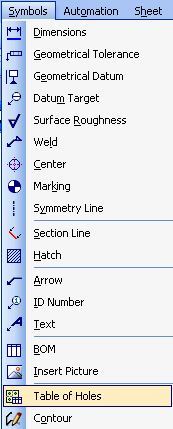
- From the Symbols menu, select Table of HolesTable of Holes.
- Expand the dialog using the double arrows. The Table of Holes dialog is displayed.
This dialog contains five required steps:
-
Reference view selection
-
Origin point definition (X, Y, and Z position only)
-
Table location
-
Table of Holes settings
-
Sketch holes selection