|
|
Screws & Bolts  : Options and Results


Access: Open this function from one of the following locations:
-
Select Mold Design > Add Mold Component > Screws & Bolts from the menu bar.
-
Select Add Mold Component > Screws & Bolts from the Mold Design Guide Toolbar.
The general interaction is similar to that for adding all mold components from the catalog. However, for each category of mold component to be added (Injection Devices, Plates, etc.), the Component Selection dialog which appears at required step 1, is displayed with the appropriate Category component type automatically selected and the Sub-Category component types displayed. For example, if Plates are selected to be added, the Plate category is automatically selected when the Component Selection dialog is displayed and all the Plate sub-categories are available for selection.
Required Step 1 
-
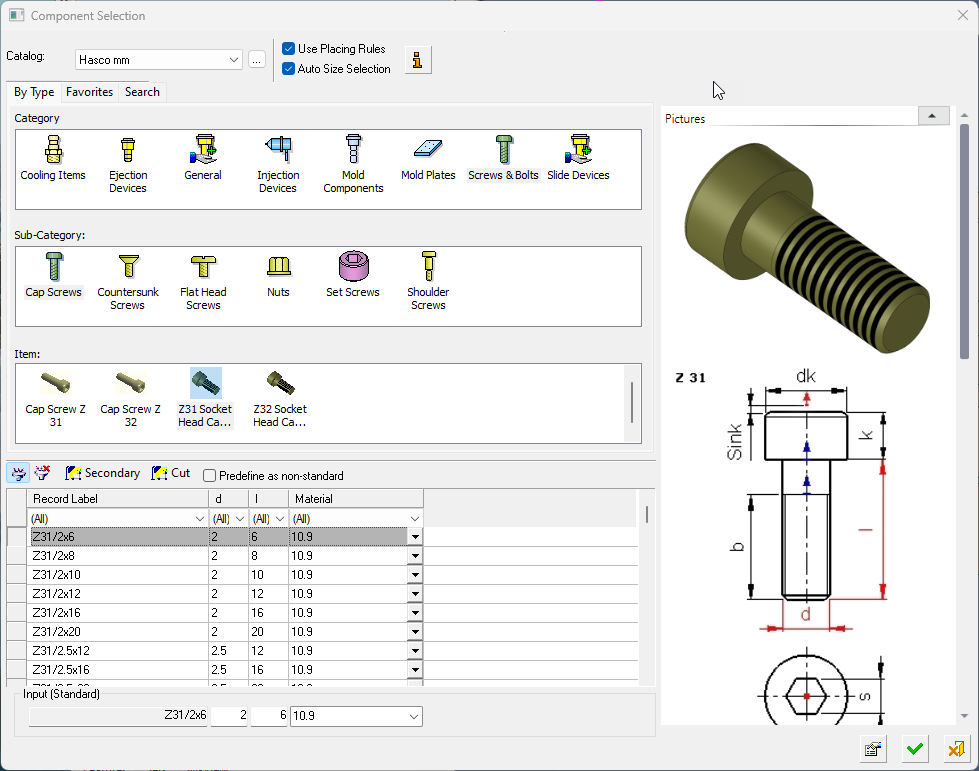
Select screws and bolts component from the catalog.
The Component Selection dialog is displayed with the appropriate Category component type automatically selected and the Sub-Category component types displayed for selection.
See the Add Mold Parts function for a description of this dialog and how to select the size of a component from the catalog.
 The appropriate Category component type is automatically selected and the Sub-Category component types are displayed for selection.
The Item row of the dialog displays a small image of the actual components, which enables easy recognition of the items. Pick a component item from this row, select the required size record from the catalog table and then position the component on the assembly.
If required, perform the optional steps of this function. -
After the Component Selection dialog is displayed, the remaining interaction is identical to that for adding mold parts.
-
Click OKOK
 or ApplyApply
 in the Feature Guide to complete the function.
|