|
|
Blend : Defining Boundaries
Create a face by blending (connecting) between edges, sketches, contours, curves, and points.
|
Demo: Press the button below to view a short movie demonstrating the function: |
Practice: Press the button below to open Cimatron with a practice ELT file similar to that used to create the movie (if the relevant feature already exists in the ELT file, you can either edit it or delete it and create a new feature). |
|
|
|

Optional Step 2 
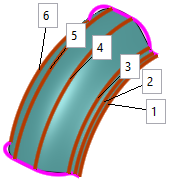
Pick boundaries or guide contours for the blend face. The following parameters are displayed:

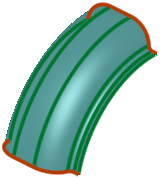
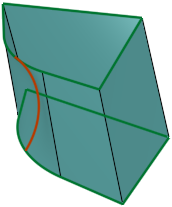
Boundary example
-
After picking the edges of the blend section in Required Step 1, pick boundaries to complete the blend face.
|
Picked edges in Required Step 1 |
|
|
-
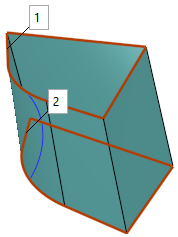
Select Optional Step 2 - Select Boundaries
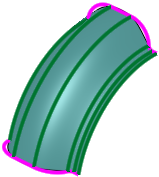
and pick the boundaries to be defined for the face. In the example below, the boundary curves are colored magenta.
| Boundary curves selected |
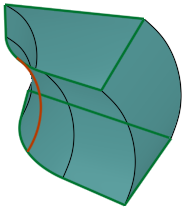
Blend face result |
|
|
|
|
|
A face is created with the picked edges forming the boundary of the face.
Virtual Guide example
-
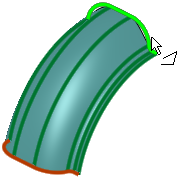
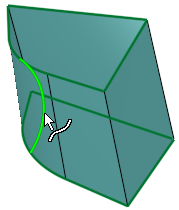
After picking the edges of the blend section in Required Step 1, pick one or more virtual guide curves to complete the blend face.
The selected guide curve defines the shape of the skin face and sets the progression for the entire section. This allows you to create a single guide curve instead of several guides.
|
Picked edges in Required Step 1 |
|
|
-
Select Optional Step 2 - Select Boundaries
and pick the virtual guides to be defined for the face.
The toggle option Virtual Guide ON / Virtual Guide OFF is displayed.
|
Virtual Guide ON
|
The selected guide curve defines the shape of the blend face. The curves of the blend are influenced by the selected guide curve. |
|
Virtual Guide OFF |
The curves of the blend are not influenced by the selected guide curve. |
|
Virtual guide selected |
Virtual Guide ON |
Virtual Guide OFF |
|
|
|
|
|