Cooling Sketch 


Access: Open this function from one of the following locations:
-
Select Mold Design > Cooling > Cooling Sketch from the menu bar.
-
Select Cooling > Cooling Sketch from the Mold Design Guide Toolbar.
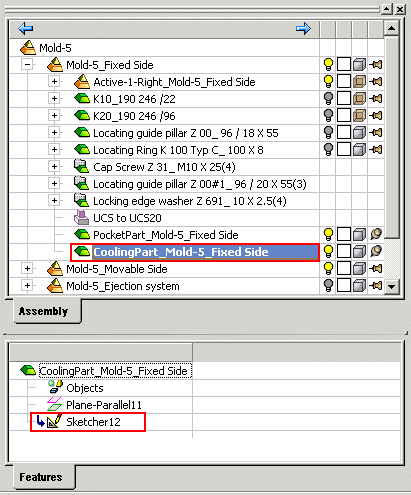
Create a sketch of cooling lines in a cooling part. A cooling part will be created if it does not already exist.
Important: Make sure that the required assembly is activated before using this operation.
-
Select the datum plane where you want to create the cooling sketch. Within the cooling options, this plane can be created, if required, using either the Parallel Plane or Inclined Plane options.
-
Press Sketch on the Mold Design Guide Toolbar to run the Sketcher. Select the required plane, if you didn't previously select one.
-
Using the Line option of the Sketcher (this is the default option), draw the center lines of the cooling channels. These will be the skeletons of the cooling system.
When you exit the Sketcher, the Feature Tree now contains a Sketcher feature.
-
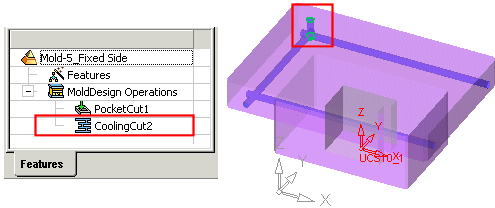
Use the Cooling Channel function to create the cooling channels around the sketched lines. A cooling channel is created.
When completed, the Cooling Cut feature will appear in the Feature Tree as follows:
Notes:
-
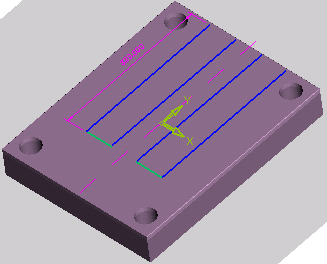
Only straight lines are considered as the channel axes.
-
Make sure that all your skeleton lines are feasible, i.e. can be created by machining, such as in the example below.
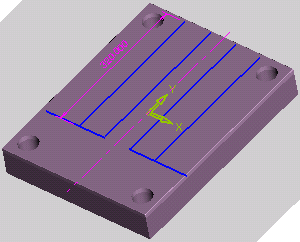
In the example below, the highlighted lines (in green) cannot be machined.
-
Drill extensions are automatically created according to user defined parameters.
