Section View (Solid) 

Access: A view is created under the currently active sheetactive sheet(either double-click the sheet name ![]() in the Drawing Tree or right-click the sheet name
in the Drawing Tree or right-click the sheet name ![]() and select Activate Sheet). The View Creation dialog can be accessed using one of the following methods:
and select Activate Sheet). The View Creation dialog can be accessed using one of the following methods:
-
Click
in the toolbar. -
Right-click the currently active Sheet item
 in the Drawing Tree and select View Creation.
 -
Right-click the graphics area and select View Creation.
-
Select Views > View Creation > View Creation from the Drafting menu bar.
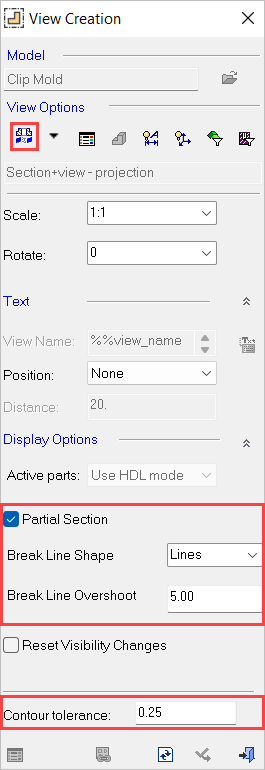
Create Section Views that are limited to the actual size of the section line. To use this option, check the Partial Section option in the View Creation dialog. The section view stays associated to the section line and if the section line gets adjusted longer, then the section view will extend as well.
Two types of section view projections can be created: Regular and True Length. Both can be displayed as section plus view or as section only.
|
|
Regular |
True Length - unfolded |
||
|
Section plus view |
Section plus view |
|||
|
|
|
|
||
|
Section only |
Section only |
|||
|
|
|
|
Notes:
-
Only a view with a section line of up to two segments can be projected as true length, otherwise it is projected as regular.
-
The spacing of the hatch is according the specific sectioned area and not according to the view bounding box.
Creating a section view
-
Draw a section line.
-
InvokeInvoke the View Creation function.
-
PickPick the Section Line. The View Creation dialog is modified accordingly, allowing you to select the required section view type
 . The first segment of the section line determines the projection angle of the Section View.

-
Select a location on the screen to position the Section View.
|
The position of the section view is according to the sectioned area and aligned to the original view. |
You can drag the sectioned view while maintaining its alignment with the main view. To break the alignment constraints, exit the Creation View dialog, double-click the section view (either the view itself or its name in the Drawing Tree) the and drag it while holding down the ALT key. |
|
|
|
|
Notes:
-
The section line data forms the view name of the section view.
-
The view name appears in the Drawing Tree.
-
The section line must cut the entire view at least once or the section view will not be created. (The end points must extend outside the view.)
-
Only one view can be created with the section line.