|
|
Automatic Label of Holes (LOH): Editing
After the labels have been created, they can be edited later. Single or multiple labels can be edited and overwritten.
Editing Single Labels
-
Right-click on the label to display the following popup menu:
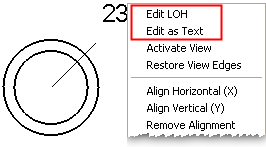
-
Select the required editing option.
|
Edit LOH |
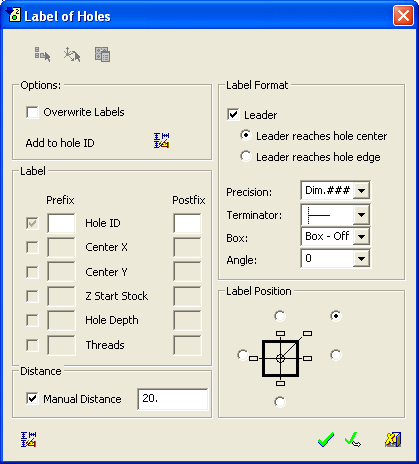
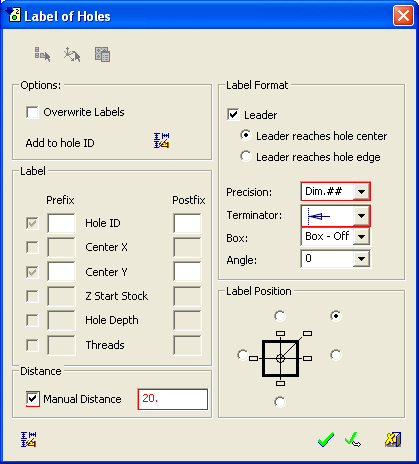
Edit the Label by opening the Label of Holes dialog in Edit mode.
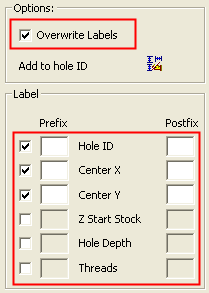
The Edit mode enables you overwrite existing labels and to add new ones. The following options are available in Edit mode:
|
||||||||
|
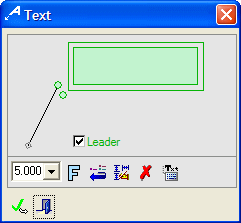
Edit as Text |
Edit the Label by opening the Text dialog.
|
Editing Multiple Labels
-
Select the entire view by Box and then right-click to display the following popup menu:
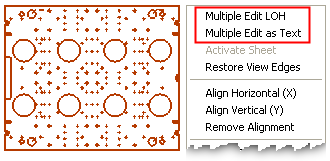
-
Select the required editing option.
|
Multiple Edit LOH |
Edit the Labels by opening the Label of Holes dialog in Edit mode.
If all the selected labels do not have the same structure (defined prefix/postfix, label format, etc.), those items that differ are marked in red. In the example above, at least one of the multiple selected labels, has a different precision and terminator setting, and also a different distance from its hole; hence the Precision, Terminator and Manual Distance fields are marked in red. Clicking OK/Apply does not change the existing prefixes, but retains the different prefixes for the different labels (unless they are manually changed). See the Edit mode explanations for this dialog when editing single labels. |
|
Multiple Edit as Text |
Edit the Labels by opening the Text dialog.
|
|