BoM: Drafting 

Access: Open this function from one of the following locations:
-
Click the
button in the toolbar. -
Click Symbols > Tables > BOM in the menu bar.
-
SelectDrafting Symbols >BOM on the popup menu (right-click the graphics area).
Create a Bill of Materials (BoM) for an assembly. A BoM is a list of components in the assembly.
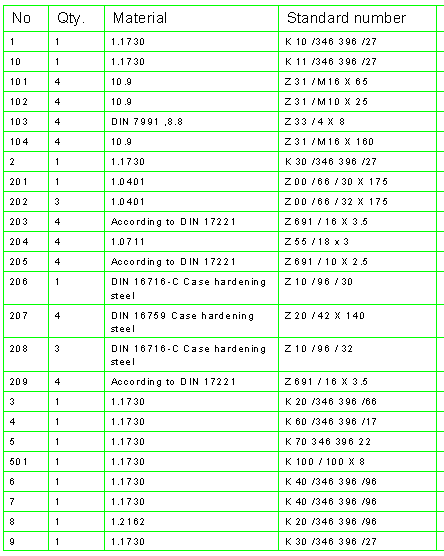
A BOM is an assembly parts list with component data (quantity, description, part number, standard, stock etc.) and is usually obtained from the Cimatron Explorer or Catalog. A BOM displays a list and description of all the information required for ordering materials.
A configuration file determines which attributes
appear in the BOM file.
The BOM_Template.csv file is the
BOM Configuration File; a resource
file which is used to define the relevant attributes to be displayed in
the Automatic BOM created from an Assembly. Usage instructions and column
descriptions are included in the CSV file.
System resource files are located in the following folder:
...\ProgramData\Cimatron\Cimatron\2026.0\Data\Resource
English resource files are stored in the English sub-folder under Resource.
Notes:
-
The BOM function is also available in the Assembly/MoldDesign application. The BOM Table Editor dialog for the Drafting application differs slightly from the dialog in the Assembly/MoldDesign application.
-
See the BOM Notes related to BOM in the Assembly/MoldDesign environment.
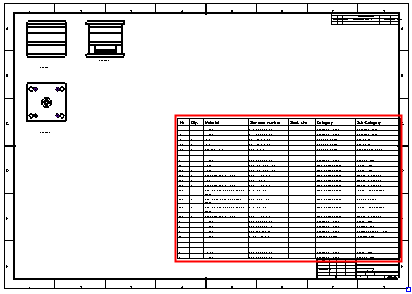
Bill of Materials (BOM) example:
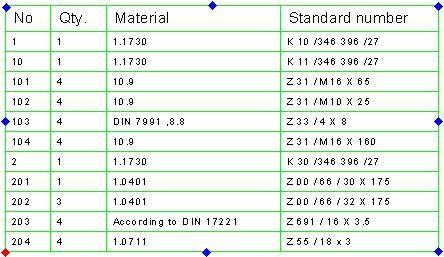
The BOM function enables you to:
-
Generate a Bill of Materials (BOM) which includes material type and size, catalog part number and vendor, and stock size
-
Add the BOM to a drawing
This provides you with:
-
Quick access to the BOM
-
Easier ordering of necessary materials
-
Better communication with other departments in your organization
You can relocate the BOM by picking a point on the screen to define its new position (the table will jump to the picked point).
Note: When the 8 dragging points of the picture are displayed, one of them is colored RED . This is the "anchor point". By default, the left-bottom corner point is the anchor point. If you pick one of the other points (or drag the symbol by one of the points), that point will be the new RED anchor point.
|
Demo: Press the button below to view a short movie demonstrating the function: |
|
|

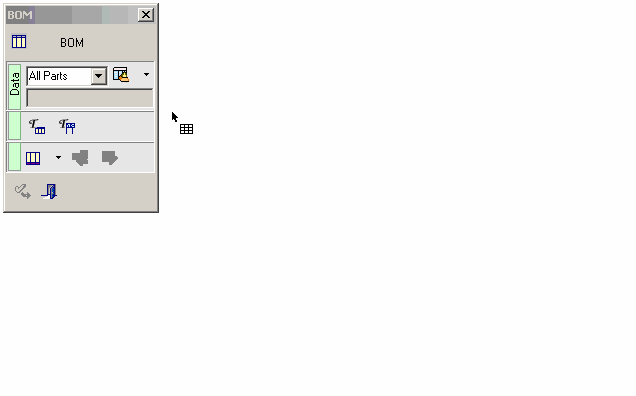
When the BOM function is invokedinvoked, the BOM dialog is displayed to guide you through the table creation and editing stages.
|
|
|
|
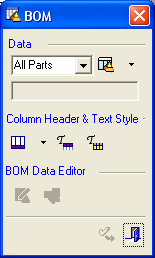
BOM Dialog
The BOM dialog is displayed to guide you through the table creation and editing stages. In the example dialogs below, all the options and buttons are displayed here as available at the same time - this is for clarity; the Data section is grayed out when editing a BOM table.
The following operations can be carried out from the BOM dialog:
|
|
|
|
Sections of the dialog: |
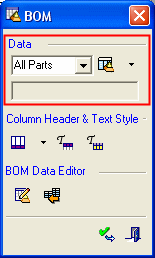
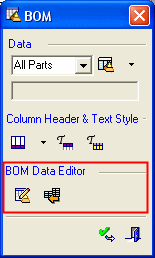
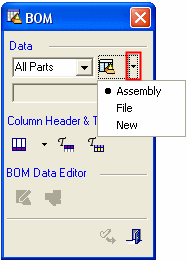
Data Section
|
|
Define Data: Define which data will be included in the BOM and how it will be presented. The available options are:
For information on the Group Purchase List, see Table Editor buttons and Popup Operations. |
||||||
|
|
BOM Type: Define the type of BOM. The available options are:
|


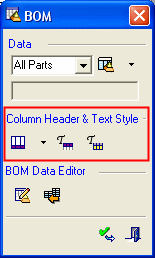
Column Header & Text Style Section
|
|
Title Location: Define the location of the title row of the BOM table; either at the top or the bottom of the table. When splitting a BOM, the resultant split depends upon the defined title location.
Note: The Title Location button shows you the location of the title by changing according to the title position. When the title is down, the button is displayed as |
||||
|
|
Title Style: Define the font style of the title row. The Title Style dialog is displayed. The five most recently used fonts are displayed at the top of the table. Define the style and exit the dialog. Note: Define individual column width and alignment using the Properties button of the Column Chooser dialog, which is accessed via the BOM Table Editor dialog.
For a description of this dialog and the interaction process, see the Text Style dialog below. |
||||
|
|
Text Style: Define the font style of the text rows. The Text Style dialog is displayed. The five most recently used fonts are displayed at the top of the table. Define the style and exit the dialog. Note: Define individual column width and alignment using the Properties button of the Column Chooser dialog, which is accessed via the BOM Table Editor dialog.
For Title Style and Text Style dialogs, the interaction is identical. In both dialogs, select the required style changes:
|

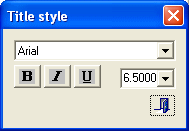
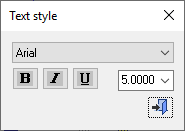
 , in Italics
  , in Underline
  .
.
BOM Data Editor Section
|
|
Edit BOM Table: Modify the BOM using the BOM Table Editor. This editor is used if you are creating a new BOM or editing an existing one. |
|
|
Split BOM Side: Split a BOM Table either to the left or right side. |