|
|
Motion Editor > Move Motions: Options and Results
![]()
![]()
Select the procedure (from the Process Manager) and do one of the following:
-
Press the
 button
from the toolbar.
button
from the toolbar. -
Choose NC Utilities > Motion Editor > Motion Editor from the menu bar.
-
Right-click on the procedure and select NC Guide Commands > Motion Editor from the popup menu.
Once in the Motion Editor, select Move from the Motion Editor Guide.
The Motion Editor Move tool enables you to move one or many toolpath segments.
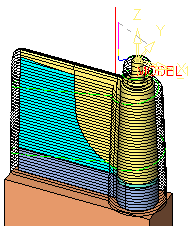
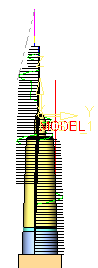
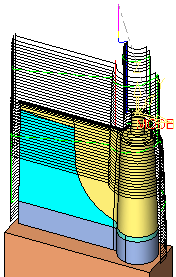
Note: In some cases, it is more efficient to use motion editing on the procedure rather than editing it. In the example below, part of the toolpath is moved.
|
Before moving |
After moving |
|
|
|
|
|
Required Step 1 
Pick the toolpath motions to be moved. If necessary, use the Navigator to hide or show portions of the toolpath.
The following select options are displayed:
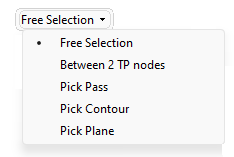
In the example below, the Pick Plane option is used:
-
Using the Pick Plane option, pick the plane which is to be used to move the motions.
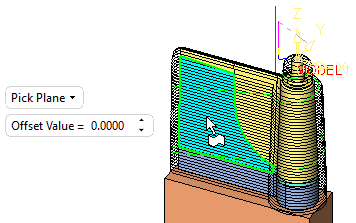
A toggle arrow is displayed to enable you to pick the side on which to perform the move operation.
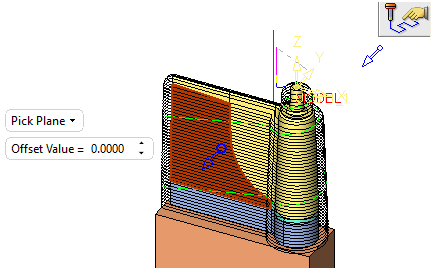
Pick the arrow to flip the direction; this picks the toolpath segment on the other side of the plane. Picking another plane or planar face un-picks the previous selection.
-
Set the parameter as required.
-
Click MMB to exit and proceed to the next step.
Required Step 2 
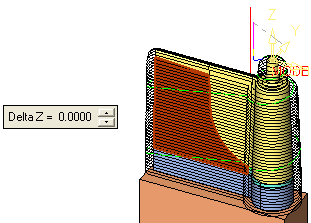
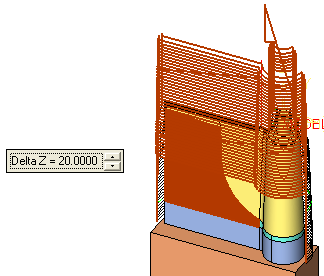
Set the move distance.
-
The following parameter is displayed:
|
Delta Z |
Set the distance to move the selected motions in the Z direction. |
Set the required move value. The appropriate motions are highlighted and previewed in their new position. Adjust the move distance as required.
|
|
|
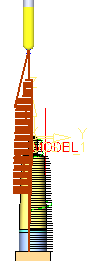
The moved segments are connected to the adjacent segments with the same motion type as the moved segment.
If a motion with a loose end is moved (for example, a motion next to a motion that was deleted without a Connect), there is no connection created.
If a one or more vertical fast motions are moved, they will be unified with the connection created by the move operation.
|