|
|
Motion Editor > Project Motions: Options and Results
![]()
![]()
Select the procedure (from the Process Manager) and do one of the following:
-
Press the
 button
from the toolbar.
button
from the toolbar. -
Choose NC Utilities > Motion Editor > Motion Editor from the menu bar.
-
Right-click on the procedure and select NC Guide Commands > Motion Editor from the popup menu.
Once in the Motion Editor, select Project from the Motion Editor Guide.
The Motion Editor Project tool enables you to project a toolpath onto a set of surfaces.
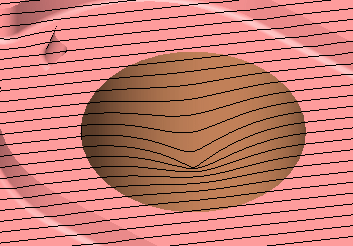
Note: In some cases, it is more efficient to use motion editing on the procedure rather than re-executing it. In the example below, the toolpath is projected onto the missing surface.
|
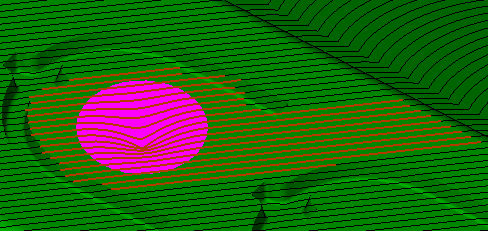
The toolpath follows the surface countour into a hole. |
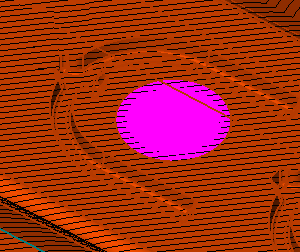
The toolpath is projected onto a new surface. |
|
|
|

Required Step 1  :
:
Pick the toolpath motions to be projected. If necessary, use the Global Filter / Navigator to hide or show portions of the toolpath.
The following select options are displayed:
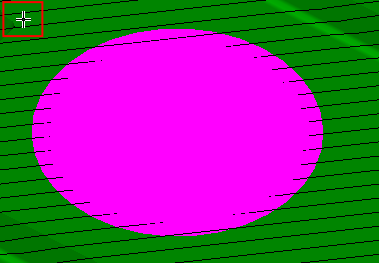
In the example below, the Free Selection option is used:
-
In this example a capping face is created first.

-
To create a projection in the Z up direction only, toggle the Up & Down Project to Up Project Only.
-
Using the Free Selection option, drag a box as indicated in the picture. Zoom in the area to select a point between motions; otherwise you select a specific motion.
|
|
|
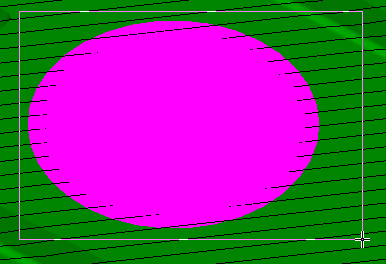
This results in the following selection:
-
Press <exit><exit> to proceed to the next step.
Optional Step 1 
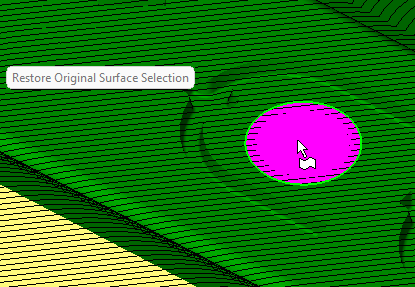
Pick faces to be removed from the projection group.
Note: By default the projection faces are the part faces and check faces.
-
Pick faces to be removed from the projection group.
If required, select Restore Original Surface Selection to re-add the removed surfaces. -
Click MMB to exit and proceed to the next step.
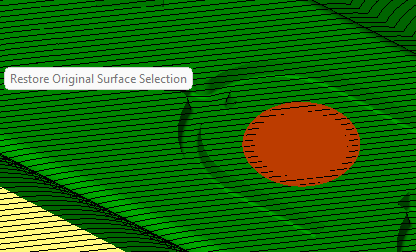
Optional Step 2 
Pick faces to be added to the projection group.
Notes:
-
By default the projection faces are the part faces and check faces.
-
A surface from the original procedure's part or check surfaces that was removed via Optional Step 1 that is returned to the selection via Optional Step 2 will not have the original procedure's offset value- It will be assigned the offset as specified in the Offset for Added Surfaces parameter on the screen.
-
Pick faces to be added to the projection group.
If required, select Restore Original Surface Selection to remove the added surfaces.

The toolpath has been projected onto the new surface.
|