|
|
Electrode Preferences > Drafting > Electrode Drawing > Electrode General Settings

Access: Invoke this function from one of the following locations:
-
Select the Preferences button
 from the Quick Access Toolbar, or
 -
Select Tools > Main Tools > Preferences from the menu bar.
Navigate to Electrode > Drafting > Electrode Drawing > Electrode General Settings.
Define the general settings for electrode drawings.
The Electrode General Settings dialog is displayed.
Interaction
-
Define the general settings for electrode drawings.
|
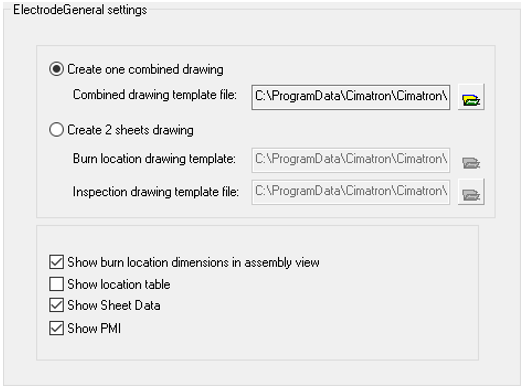
Create one combined drawing |
Indicate that the drawing is a combined drawing. If the 2 sheet drawing option is ON then this option is OFF and the template field is grayed out. When ON, select the template file for the drawing. |
|
Create a 2-sheet drawing |
Indicate that the drawing will be a 2 sheet drawing with a burn location drawing and inspection drawing. If the one combined drawing option is ON then this option is OFF and the template fields are grayed out. When ON, select the template files for the burn location and the inspection drawings (different templates). |
|
Show burn location dimensions in assembly view |
Display/Hide the burn location dimensions in the assembly views of the electrode drawing. |
|
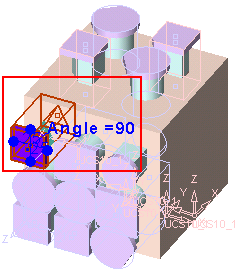
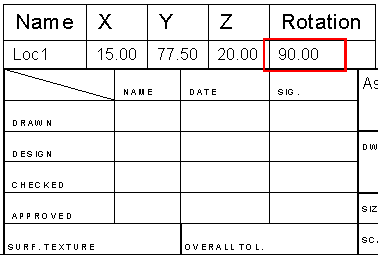
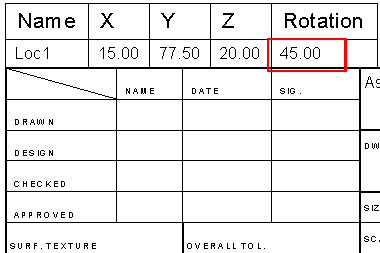
Show location table |
Show/Hide the name of the electrode and its location above the title block in the drawing. An electrode blank is positioned at an angle of 90 degrees.
This is shown above the title block in the drawing.
Change the angle of the blank to 45 degrees. Press the Update button
The Rotation angle is updated above the title block in the drawing.
|
|
Show Sheet Data |
Show/Hide the sheet data in the drawing. |
|
Show PMI |
Control the display of PMI in electrode drawings and in electrode assembly drawings. In the Electrode environment, as electrode assembly drawings do not have views (they have frames instead) and the view creation mechanism is automatic, this option enables you to hide or show PMI in electrode assembly drawings (select the checkbox to show the PMI). By default the option is selected and also shows PMI at lower levels. |
 on the toolbar to
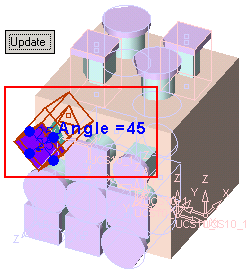
-
Press the appropriate approval option.
|