Punch/Trim  : Options and Results


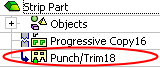
Access: Open this function from one of the following locations:
-
Select Die Design > Strip Tools > Punch/Trim from the menu bar.
-
Select Punch or Trim from the following Die Design Guide: Die Strip Design Guide.
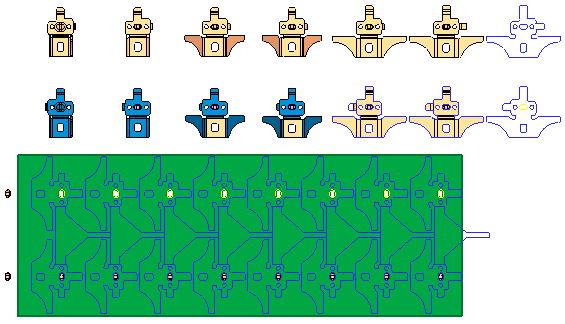
Pick a contour and define a punch on the strip or only trim it. The trimming is progressed to the next stations.
This function enables you to punch and/or trim the strip part at a single station or several stations in one operation and create a punch/trim with specific attributes for automatic use in the die setup.
In addition, you can define whether to trim only the 2D faces or both 2D and 3D faces on the strip. You can define whether or not to add a punch as well as trim the face or just trim the face without adding a punch.
This function is enabled only when the strip environment is activated.
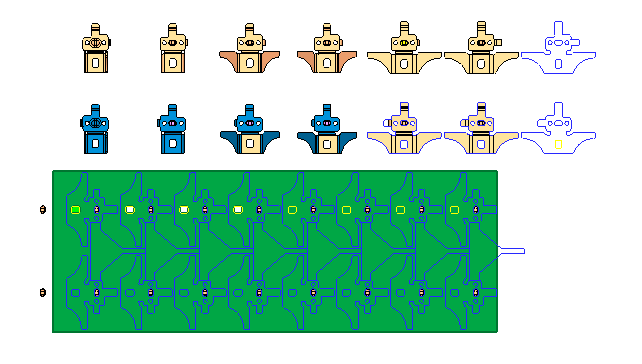
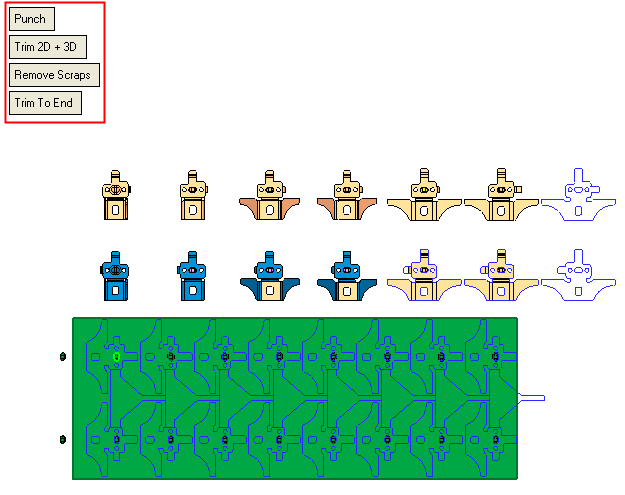
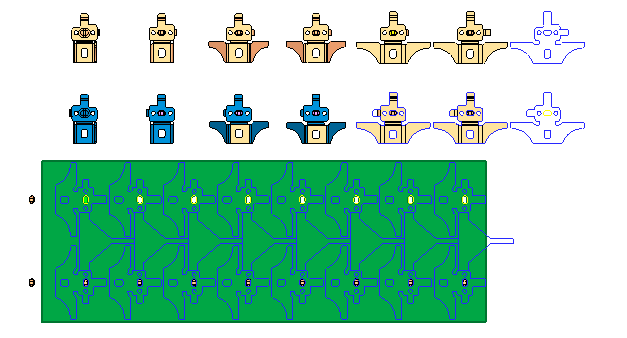
In the example shown below, you can create a punch and trim the face all the way to the end removing the scraps.
Note: The system can only trim 3D objects that were added by the Progressive Copy function. Otherwise the  option is disabled.
Required Step 1 
The face is automatically selected (marked in green) when entering the Punch/Trim function, providing the face is part of the strip and the strip environment is enabled.
Required Step 2 
-
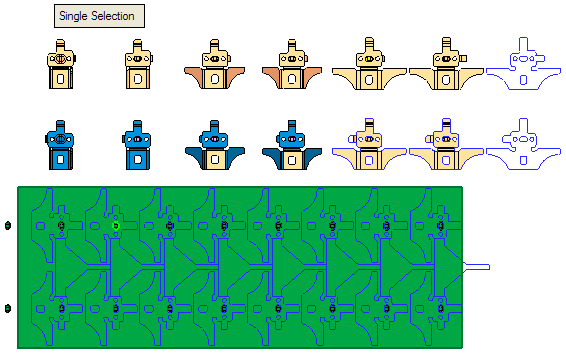
Click on a single or multiple predefined closed 2D contour(s) to pick it, such as sketch, composite or wire.
The following toggle options are displayed:Single Selection
Pick a single contour. The 3rd required step is automatically displayed. See the Additional Examples.
Multi Selection
Pick multiple contours. An unlimited number of contours can be picked and this is reflected in the number of features created in the tree (one feature per contour), which can save a lot of time (especially in electronic equipment dies). See the Additional Examples.
ExitExit the step.
Note: If you pick multiple contours and subsequently select the Single Selection option, all the picked contours are cleared.
In the example below, a single contour has been picked (marked in green):
Required Step 3 
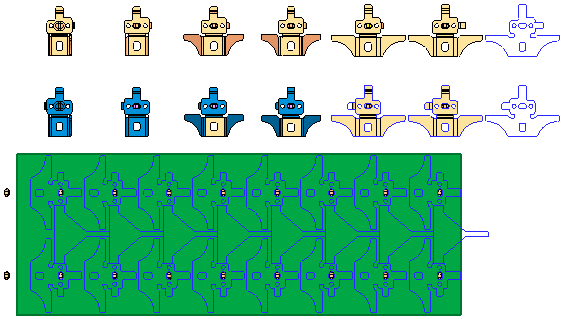
- Define the parameters. In this case the following parameters are selected.
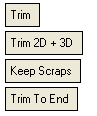
In this example, no punch will be created and the face be trimmed all the way to the end, maintaining the scraps. In addition, both 2D and 3D faces will be trimmed, since the Trim 2D+3D option is selected. - Click OKOK
 or ApplyApply
 in the Feature Guide to complete the function.
The selected contour has been created as a punch, the face has been trimmed to the end of the row and the scraps maintained.
When completed, the Punch/Trim feature will appear in the Feature Tree
Additional Examples
Punch
In this case the Punch option is selected is selected. This means, the system trims the face in addition to creating a punch. Since the Trim 2D option is selected, the system will trim both the contour and the dimples, removing the scraps, as shown below:
-
Select the predefined closed 2D contour, such as sketch, composite or wire (marked in green), and <exit><exit>
-
Click OKOK
or ApplyApply in the Feature Guide to complete the function.
In this case, a punch has been created (highlighted in green), the system has trimmed both the 2D contour and 3D dimples, and any additional existing scraps are removed.
Punch: Multiple Selections
-
Select the predefined closed contours (sketch, composite or wire) then toggle the
 toggle button to the
  , then in the number field
  , enter the value of 4 and <exit><exit>
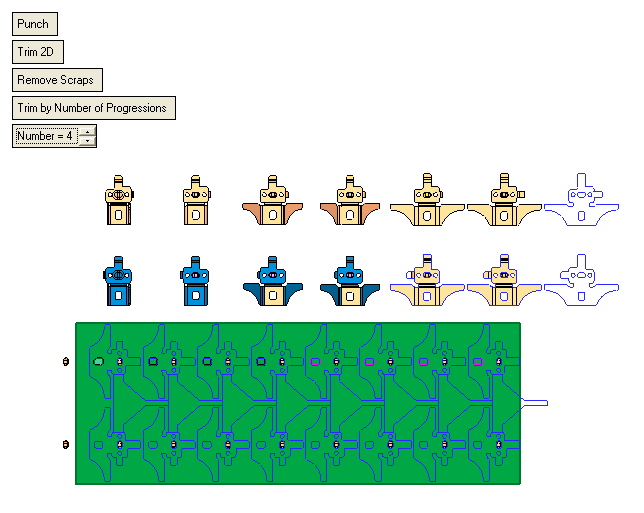
In this example, the selected contours will be created as a punch and the 2D face will be trimmed with this contour four times and the scraps removed.
-
Click OKOK
or ApplyApply in the Feature Guide to complete the function.