|
|
Replay 
Access: Open this function from one of the following locations:
-
Select the Replay
 icon
from the toolbar.
-
Select Edit > Main Tools > Replay from the menu bar.
Open the Replay dialog to move forwards and backwards in the Feature Tree.
The Replay function provides options for easy navigation of the Feature Tree. The icon for Replay is available any time a part is active, and is also available from the Feature Tree, by right-clicking on any feature in the tree.
Replay provides options to the selected feature in the timeline; Insert and Jump To:
-
Insert is used to create a new feature at this point in the timeline. The tree insertion arrow now moves, and the features below are suppressed. In order to exit the Insert mode, the suppressed features must first be unsuppressed and regenerated.
-
Jump To is used as a view-only function. The tree insertion arrow moves but no features are suppressed. You can quickly move forward and backward through the features without waiting for regeneration.
The Replay function enables you to do the following operations in the Feature Tree:
-
Jump to view the Part creation process from start to finish, in the order in which the functions were performed.
-
Insert features into the tree
-
Trim selected features from the tree.
Note: Replay is available in the Part environment and in the Assembly environment when a part is activated in the Feature Tree.
View the Part Creation Process
Jump to view the Part creation process from start to finish, in the order in which the functions were performed.
While in Replay mode, the following toolbar appears above the Feature Tree:

The toolbar can also be replicated as a popup by right-clicking anywhere in the graphic area.
The blue arrows in the top row are used to jump to the start or end of the feature tree, or to move backwards or forwards one step at a time. The button is used to jump to the feature you select on the display. The
  button allows you to insert a new feature and the
 ![]() is used to exit Replay mode. The
is used to exit Replay mode. The  button allows you to delete the features preceding the feature selected in the tree.
While jumping between steps, the  symbol tells you what item in the tree matches what you see in the display.
Example:
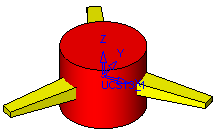
The part below was created in five steps.
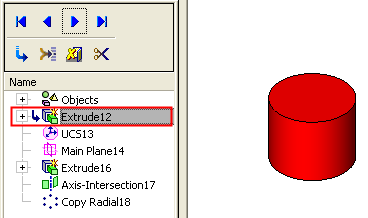
To view the creating process from the beginning, click the far left arrow (Go to Start). Then click the Forward step by step arrow to see the first feature, Extrude12. The current step is marked by a  symbol.
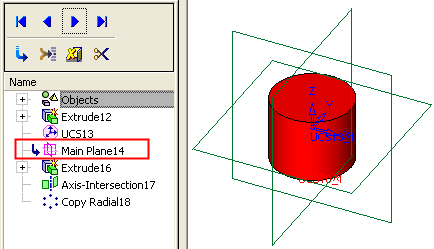
Continue clicking the Forward arrow to see each step.
Main Plane14:
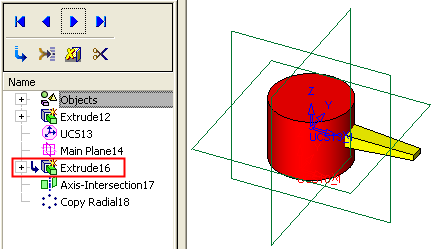
Extrude16:
Axis-Intersection17:
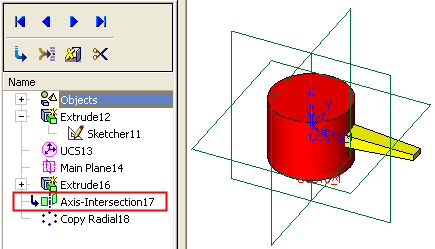
(Note that Sketcher11 appears underneath Extrude12; this is because the extrusion is created using this Sketch. In terms of chronological order, Sketcher11 was created before Extude12.)
The final step is Copy Radial.
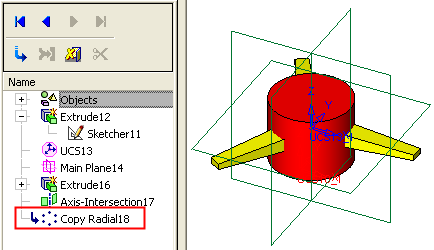
Insert Features
Insert features into the Part creation process via the Feature Tree.
(You can access the Insert Mode by using the functions described under the Access button at the top of this Help topic, or via the Feature Tree in the Assembly environment, by right-clicking on a feature and selecting Insert from the popup submenu).
Example:
The following part is comprised of two features - Extrude12 and Shell13.
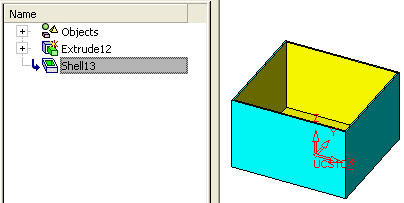
Enter Replay mode and advance step by step (by pressing the Forward One Feature button  ) to the Extrude12 feature.
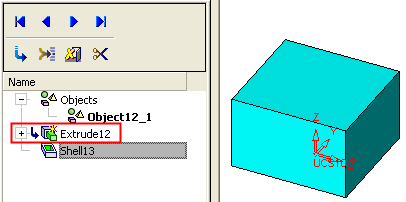
Click the  button to enter Insert mode. Note that all features after the point where you pressed Insert, are now temporarily suppressed (they are marked with a gray
  ).
).
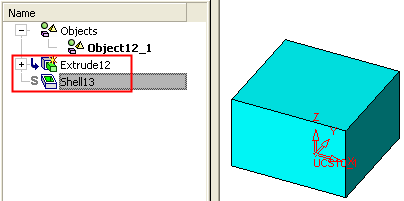
You now return to the Part environment, where you can add additional features in the middle of the part creation process. In our example, we add another extrusion (Extrude15).
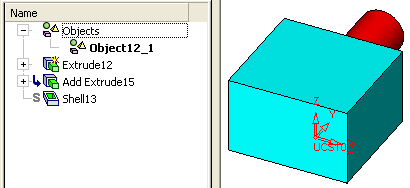
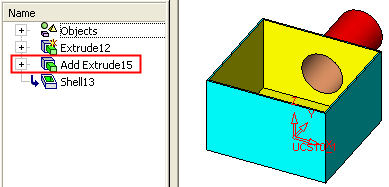
Return to Replay modeReturn to Replay mode and replay all steps to the end (by pressing the Go to End button  ). The features following the inserted feature(s) become unsuppressed, the Shell is regenerated, and includes the Extrude15 feature that was inserted.
Notes:
-
The Insert new feature(s) button is inactive when the last feature in the Feature Tree is selected.
-
A feature that has been suppressed in Insert Mode (due to a new feature being inserted before it in the feature tree), can still be edited in the usual manner.
-
A feature that has been suppressed in regular mode (not Insert Mode) will remain suppressed even after replaying all the steps to the end. The feature however can be individually edited or unsuppressed at any time.
-
While in Insert Mode, the Suppress and Unsuppress functions are grayed-out (unavailable).
Trim selected features using Replay mode:
Trim selected features from the Part creation process via the Feature Tree.
Example:
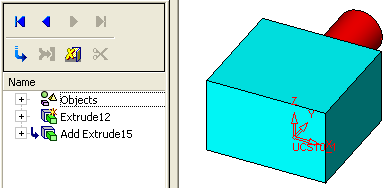
In Replay mode, advance to the Extrude15 feature. Click the trim button  .
.
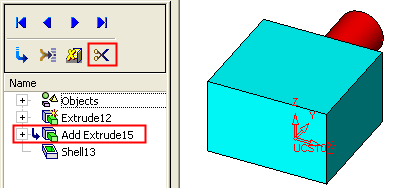
A warning message is displayed:
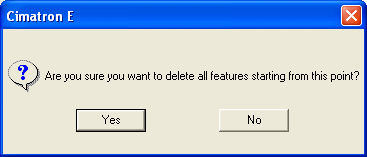
If you confirm the trim, all features from the selected feature onward are deleted (in this case the Shell13).
|
