Variable Cconic Conditions
Now we are going to apply the draft conditions for each part element.
To do this, click the Construction buttonConstruction button . The following dialog is displayed:

Notice that the first element is displayed with arrows at its ends, indicating the advance direction for the draft angles definition and it is also the element on which the parameters will be applied:
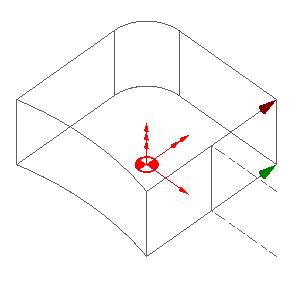
The contour with the green arrow will always be the programmed contour.
Start applying the draft angles. The values that you will set for each section are shown in the image below:

Apply the values input in the New Angle section and click the Change and forward buttonsChange and forward buttons  to apply the angle and keep to the next section.
If you click the Next buttonNext button , you will jump to the next section without applying the entered angle. This will allow you to verify the entered angles, which will appear in the Present Angle boxes.
Click the Exit buttonExit button to close the construction dialog.