Add Cooling Item 

Access: Open this function from one of the following locations:
-
Select Mold Design > Cooling > Add Cooling Item from the menu bar.
-
Select Cooling > Add Cooling Item from the Mold Design Guide Toolbar.
When adding certain catalog components (such as ejectors or cooling components) to faces, you can change the diameter of the added parts by changing the diameter of the sketch circle used to position them.
This means that cooling items with different diameters may be added easily and quickly in a single operation. You can add different sized items simply by changing the diameter of the circle used to position them. This is often required for baffles which may require different diameters in the same add operation.
Important: Make sure that the required assembly is activated before using this operation.
Note: Once the cooling items have been added, they can easily be edited or deleted.
General Interaction
The general interaction is similar to that for adding mold parts. The only difference is the Component Selection dialog displayed during the required step 1 - see below.
Required Step 1 
-
Select a cooling component. The Component Selection dialog is displayed. See the Example Catalog Component Selection Process, below.
The Component Selection dialog is displayed with the appropriate catalog Category, Sub-Category and Item component types automatically selected. In the example dialog below, the Category = Cooling Items, Sub-Category = Nipples and Item = Extension nipple were automatically selected; change the selection, as required.
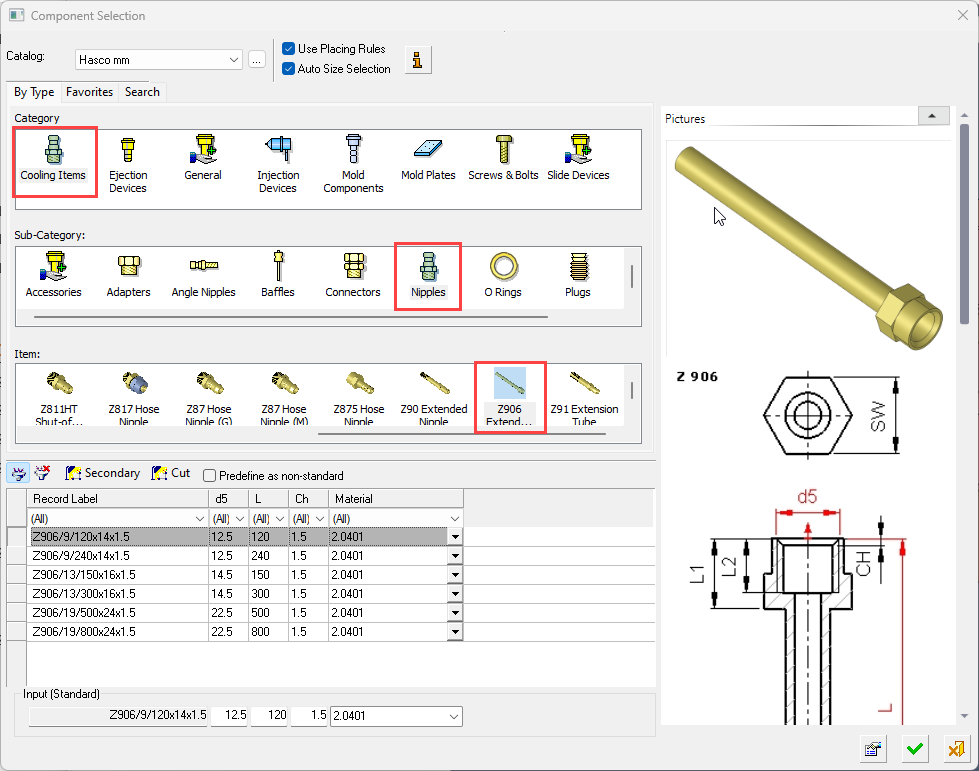
Example Catalog Component Selection ProcessExample Catalog Component Selection Process
The remaining interaction is identical to that for adding mold parts.When selecting a catalog component, the Component Selection dialog is displayed with the appropriate Category component type automatically displayed (depending on the function invoked) and Sub-Category component types displayed for selection.
An example catalog component selection process is described as follows (in this case, for Mold Components):

The appropriate Category component type is automatically selected and the Sub-Category component types are displayed for selection.
The Item row of the dialog displays a small image of the actual components, which enables easy recognition of the items. Pick a component item from this row, select the required size record from the catalog table and then position the component on the assembly.
If required, perform the optional steps of this function.For more, see Component Selection.
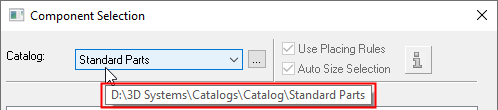
- Select the required catalog (1 in the image above).
Hover over the displayed catalog name to display a tooltip showing the catalog location in your computer. The default catalog location can be set in the Cimatron Control Panel.
To change the catalog, either browse to the required catalog location , or select a catalog from the dropdown list; this list contains the last 10 catalogs used.
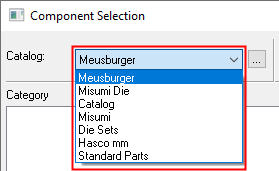
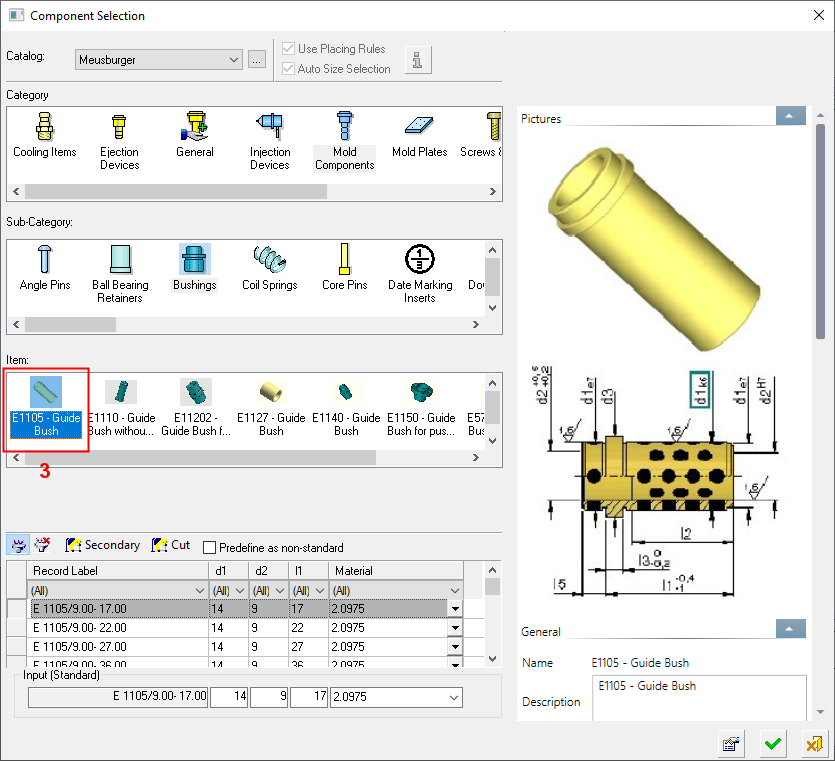
When a catalog is selected, the appropriate catalog Category and Sub-Category component types are automatically displayed (depending on the Catalog type). - Select the required Category and Sub-Category component types (for example, 2a and 2b in the image above). When you select a Category component, the appropriate Sub-Category components are automatically displayed.
When you select a Sub-Category component type, if placing or size rules have been applied to this component, the Rule Information button and the Placing/Size Rules checkboxes become available for use, as shown below. These rules can be edited as required using the Rules Editor.

- Depending on the Sub-Category component selected, the appropriate Item components are then displayed. Select the required component item (for example, 3 in the image above).
When the component item is selected, the Catalog Table and Properties of the relevant component are displayed.
- Click the Properties buttonProperties button
 to hide the Properties and to expand the Catalog Table to the full width of the dialog.
 - Select the required record from the catalog table and click OKOK
 to select the catalog item or click CancelCancel
  to exit.
- Select the required catalog (1 in the image above).
-
Click OKOK
 or ApplyApply
 in the Feature Guide to complete the function. In the Assembly Tree, added cooling items are placed in folders under the active sub-assembly. The Feature Tree now contains the added feature, for example:

In the example below, a cooling component (in this case a nipple) has been added to the cooling channels.
Note: In the Assembly Tree, for files created prior to Cimatron 12.0, added cooling items are displayed as sub-assemblies (instead of placed in folders) under the active sub-assembly.