|
|
Marking 

Access: Open this function from one of the following locations:
-
Click the
button in the toolbar. -
Select Symbols > Symbols > Marking from the menu bar.
-
Select Drafting Symbols > Marking on the popup menu (right-click the graphics area).
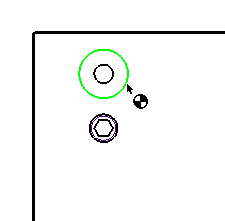
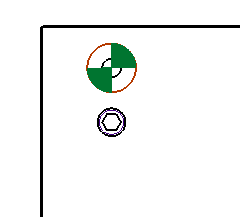
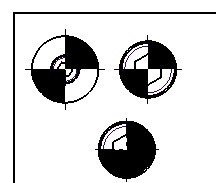
Apply markings to various circles, arcs or splines to differentiate between them, enabling you to identify them easily. These markings can be applied to ejector pins, cooling channels or other circular geometry.
|
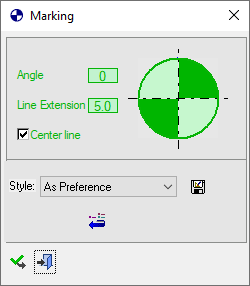
The Marking dialog displays
|
Below is an example of the symbol:
See Entity Overview for a general description. |
||||

Apply a Marking symbol
-
InvokeInvoke the Marking function.
-
Pick single circles, arcs or splines, or use the drag box for multi-pick.
-
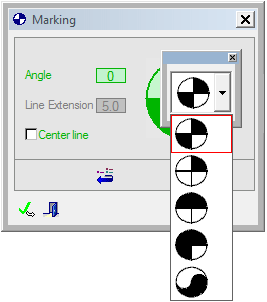
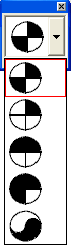
If required, you can change the marking symbol, by pressing the symbol on the marking dialog and then selecting the required symbol from the Marking dropdown menu, as shown below:
-
Select the Center line checkbox to add center line to the selected marking.
-
Enter the angle of the center lines from the Angle dropdown menu, as follows:

-
The Line Extension parameter is available when the Center Line checkbox is ON.
-
To complete the current operation and remain in the dialog, press the Apply
 button or <exit><exit>.
To exit the function, press the Close button.
Notes:
-
Right-click the entity itself to access the entity-specific (for editing) and general functions from the popup submenu.
-
Double-click the entity to edit it.
-
See the Symbol notes for additional information.
Edit a Marking symbol
-
Double click the symbol to be edited. The Marking dialog is displayed
-
To change the marking symbol, press the symbol on the Marking dialog and select the required symbol from the Marking dropdown menu.
-
Select or unselect the Center line checkbox to add or remove a center line, as required
-
Change the angle of the center lines from the Angle dropdown menu.
-
Change the Line Extension parameter as required.
-
Press <exit><exit> when finished.
|