Mechanism Assembly: Defining Alternative Parts 
Access: Open this function from the following location:
-
Select Catalog > Create Mechanism Assembly > Alternative Parts from the Assembly menu bar.
Define alternative parts in the Mechanism Assembly. These are parts that can be interchanged with one another when loading the assembly from the catalog.
For example, if a slider assembly has 2 types of Locking Heel, one of the 2 types can be selected when loading the assembly from the catalog. The one that is not selected will be suppressed.
Note: The Main Part must be defined before creating interchangeable parts.
General Interaction
The Interchangeable Parts dialog is displayed.
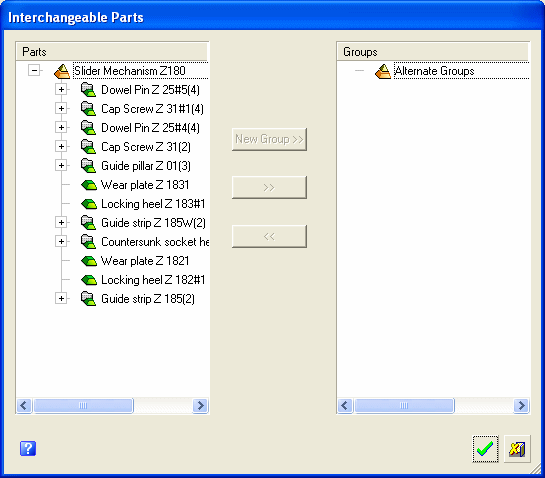
Initially, all the unassigned parts (including folders of more than one identical part) are listed in the left pane of the dialog. Define the various interchangeable parts relationships.
Note: A Child part cannot be an interchangeable part. Only Parent and Free parts can be designated as Interchangeable parts.
- Define a group of interchangeable parts
- Add a part to an existing group
- Revert items back to the Parts pane
Define a group of interchangeable parts
-
Select a part in the left pane of the dialog.
-
Click the New Group buttonNew Group button.
The selected part is moved to the Groups pane under a new group.
-
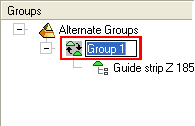
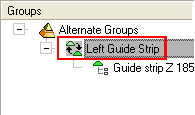
Enter the name of the new group.
The following icons are displayed in the Groups pane:

Signifies a Group.

Signifies a part that has been defined as a Parent part.

Signifies a part that has not been defined as a Parent part.
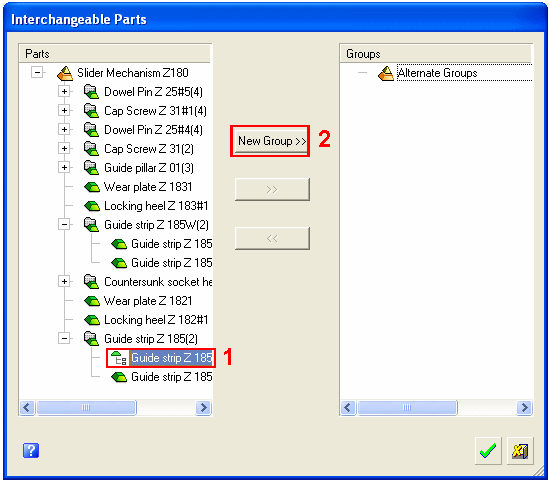
When the New Group button is pressed, the part is moved to the right pane and a new group is created.
Enter the name of the new group.
Add a part to an existing group
-
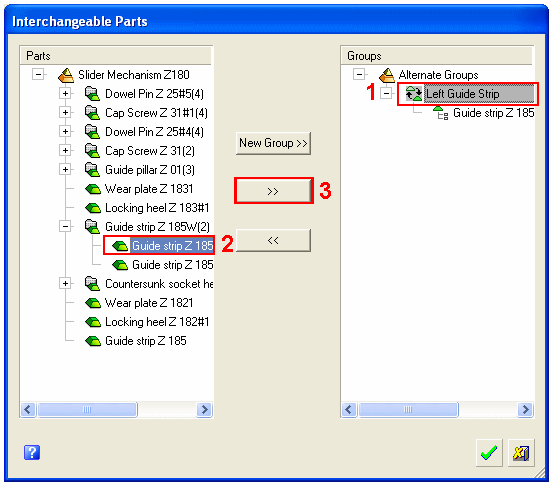
Select the group of the part in the right pane.
-
Select the part(s) in the left pane.
-
Click the Forward buttonForward button.
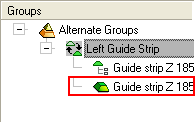
The part is added to the group and becomes one of the interchangeable parts in that group.
Note: Multiple parts can be defined simultaneously.
The part is added to the group and becomes one of the interchangeable parts in that group.
Revert items from the Groups pane back to the Parts pane
-
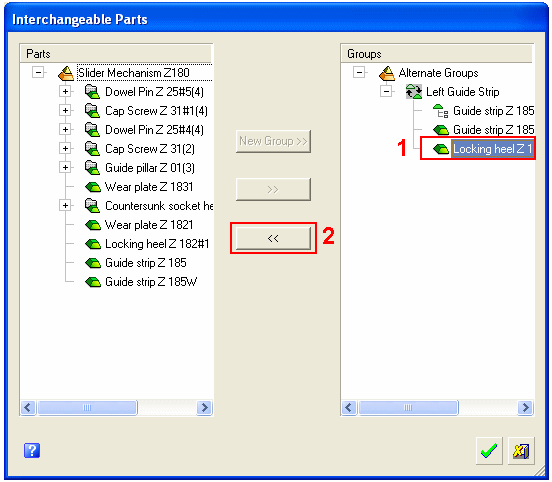
Select the part(s) to be reverted.
-
Click the Back buttonBack button.
Notes:
-
Groups or parts can be reverted back. Reverting groups will also revert all the parts in those groups.
-
Multiple groups or parts can be reverted simultaneously.
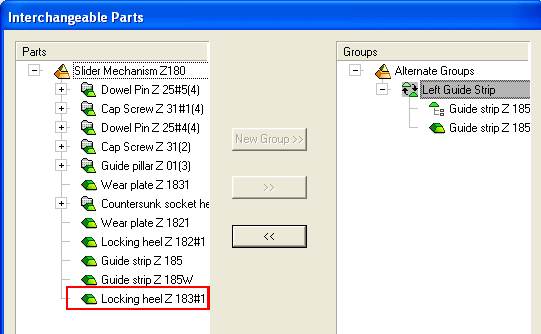
The delete part is reverted to the Parts pane of the dialog.
-