Move Radial 


Access: Open this function from the following location:
-
Select Edit > Move & Copy > Move Radial from the Part menu bar.
Move geometry around an axis.
|
Demo: Press the button below to view
a short movie demonstrating the function:
|
Practice: Press the button below to open Cimatron with a practice ELT file similar to that used to create the movie (if the relevant feature already exists in the ELT file, you can either edit it or delete it and create a new feature). |
|
|
|

The following is the Feature Guide for Move Radial.
|
|
|
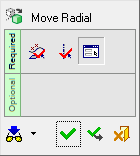
Required Step 1 
Pick the entities that you want to move.
When moving several faces from the same body, the faces are not unstitched but keep the original topology.
All types of entities can be picked. The cursor will tell you what you are picking, and you can use various geometry selection tools such as the Selection Filter or the Face Selection Options to enable you to pick the entities you want.
Press <exit><exit> when the required entities are picked.
Note: You can also select the entities and then enter the Move function. The selected entities will be automatically included in Step 1.
Required Step 2 
Select the axis around which the selected geometry will be copied. The axis can be defined by picking an edge, line, datum axis, UCS axis (pick a UCS axis), 2 points, or the axis through the center of a cylindrical face, arc or circle.
Required Step 3 
Set the parameter. Set the angle of rotation. Note that a directional arrow is displayed.
The value must be positive. You can flip the rotation direction by clicking on the blue arrow.
|
Angle |
Set the angle of rotation. The value must be positive. |
Note: You can flip the rotation direction by clicking on the directional arrow.
When you are finished, press OK ![]() or Apply
or Apply ![]() in the Feature Guide to complete the function.
in the Feature Guide to complete the function.
When completed, the Move Radial feature will appear in the Feature Tree as follows: