|
|
Remaining Stock: Deviation Map: Options and Results
![]()
![]()
Access: Open this function from one of the following locations:
Remaining Stock:
-
Select NC Process > Simulation > Remaining Stock from the menu bar.
-
Click the Remaining Stock button
 in the NC Guide Toolbar.
 -
Right-click on an item in the Process Manager, or anywhere in the graphics window when no procedure is active, and select NC Guide Commands > Remaining Stock from the popup menu.
Stock Calculate:
-
Select NC Process > Stock Calculation > Stock Calculate from the menu bar.
-
Right-click on an item in the Process Manager, or anywhere in the graphics window when no procedure is active, and select Control > Stock Calculate from the popup menu.
Delete All Remaining Stock Models:
-
Select NC Process > Stock Calculation > Delete All Remaining Stock Models from the menu bar.
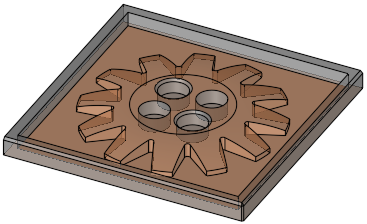
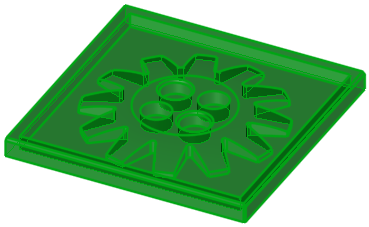
The Remaining Stock is the stock (raw material on which the toolpath will be performed) remaining after executing the procedures up to and including the current procedure.
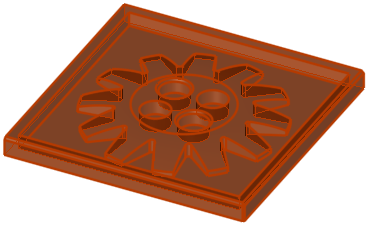
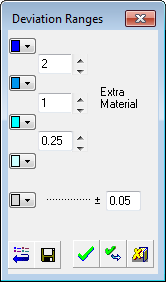
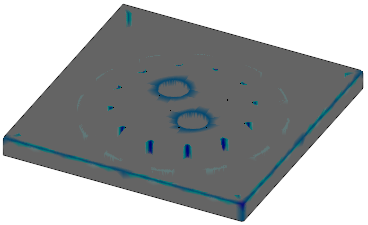
The Deviation Map displays the deviation between the calculated NC Stock and the NC Part. Only the extra stock is shown and the colors refer to the stock only.
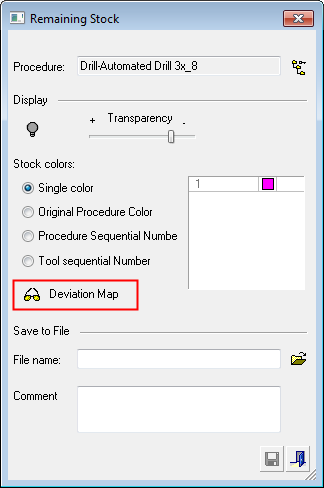
InvokeInvoke Remaining Stock; the Remaining Stock dialog is displayed. Click the Deviation Map button.
|
|
|
Required Step 1 
Pick the original object or faces(s) and then <exit><exit>. This step, preselected by the system is the stock mesh object.
Required Step 2
Pick the target object or face(s) and then <exit><exit>. This step, preselected by the system is the target part as defined in the NC Setup. If the part is not found, it is not preselected.
Required Step 3 
Set the parameters.
|
|
|
|
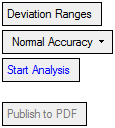
Deviation Ranges |
Displays a dialog showing color-coded deviation ranges.
|
||||||||||||
|
Normal Accuracy |
This is a dropdown list to define the accuracy level of the analysis. The available options are Low Accuracy, Normal Accuracy and High Accuracy. |
||||||||||||
|
Start Analysis |
Start the analysis using the parameter settings defined above. These parameter setting define the result of the analysis.
|
||||||||||||
|
Publish to PDF |
Publish to PDF to create 3D PDF files that include parts and assemblies from Cimatron. This button is available after an analysis is run. When the Publish to PDF button is pressed, a dialog is displayed giving you additional controls before the selected entities are exported to PDF. The PDF report is titled Deviation Map Report and below the visual area, the color-coded map and distance ranges are displayed. |
When finished, press Exit ![]() in the Feature Guide to complete the function.
in the Feature Guide to complete the function.
|