|
|
Create Stock  : Box Example
A Stock by Box is to be created for the following part:
|
The part on which the stock is to be created. |
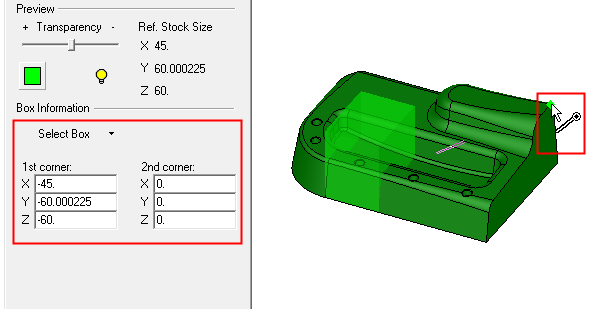
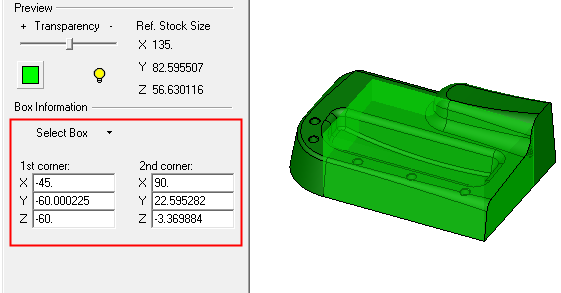
In the Stock Type = Box option, by default, the box covers the whole part. The stock size and the XYZ coordinates of the two furthest diagonal points of the stock box are detailed in the Initial Stock dialog (see below). |
|
|
|
Creating the stock
Invoke the Stock function (see Creating a Stock).
The Initial Stock dialog is displayed. Select Stock Type = Box.
The default option (under the Box Information section of the dialog) in the Select Box dropdown list is Select Box.
|
|
|
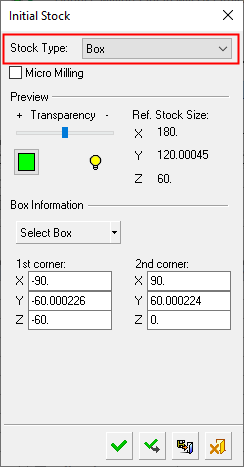
Note that the box covers the whole part by default. The stock size and the XYZ coordinates of the two furthest diagonal points of the stock box are detailed in the Initial Stock dialog.
If required, redefine the stock box using the Select Box dropdown options. With these options, you can define the stock box either by picking one corner of the stock box and then dragging the cursor to the second corner (this is the Select Box option) or by picking the first and second corners of the box (these are the Pick 1st Corner and Pick 2nd Corner options).
For example:
Select Box option
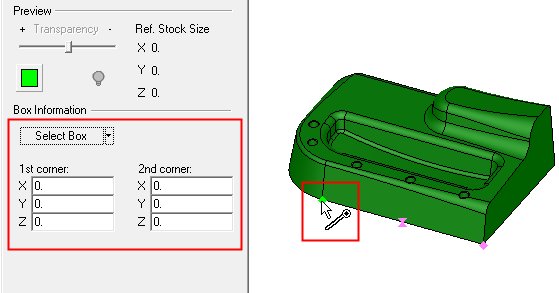
a. Press the button in the Box Information area of the dialog. This initializes the XYZ coordinates in the dialog and hides the display of the previous stock box.
b. Select the down arrow of the button and choose the Select Box option from the dropdown list.
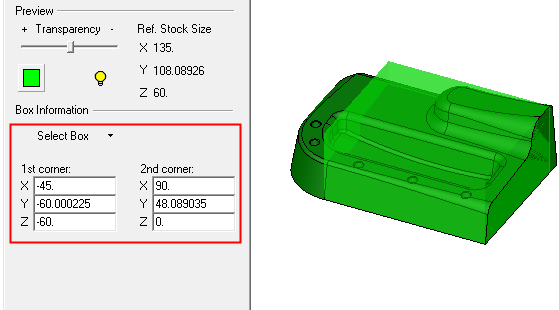
c. Pick the first point of the new stock box.
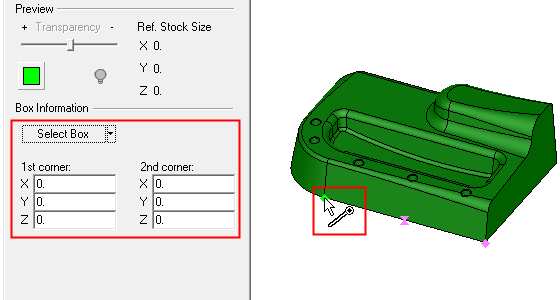
d. Drag the end of the diagonal to the second point.
e. The new stock box is displayed and the relevant parameter values in the dialog are automatically adjusted.
Pick 1st Corner / 2nd Corner options
a. Press the button in the Box Information area of the dialog. This initializes the XYZ coordinates in the dialog and hides the display of the previous stock box.
b. Select the down arrow of the button and choose the Pick 1st Corner option from the dropdown list.
c. Pick the first corner of the new stock box.
d. Select the down arrow of the button and choose the Pick 2nd Corner option from the dropdown list.
e. Pick the second corner of the new stock box.
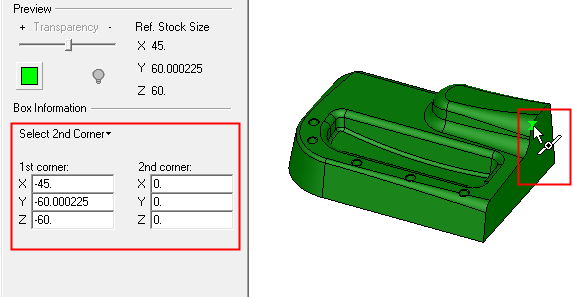
f. The new stock box is displayed and the relevant parameter values in the dialog are automatically adjusted.
Press Apply ![]() to display the new stock.
to display the new stock.
When finished, press one of the approval options.
|
|
OK: Accept the changes, perform the operation, and close the current dialog/task. The stock/part is calculated. |
|
|
Apply: Accept the changes, perform the operation, and keep the current dialog/task open. The stock/part is calculated. |
|
|
Save: Save the settings. Suspend and calculate later. |
|
|
Cancel: Cancel all changes and close the dialog/task without saving the settings. |
|