|
|
Create Stock  : Contours Example
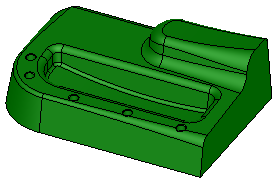
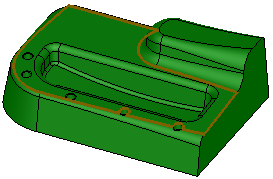
A Stock by Contours is to be created for the following part:
|
The part on which the stock is to be created. |
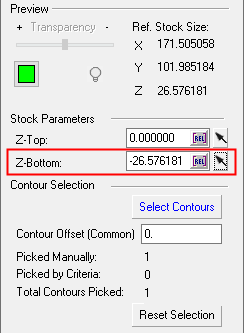
In the Stock Type = Contours option, pick the contours that will define the shape of the stock box. The relevant information is then detailed in the Initial Stock dialog (see below). |
|
|
|
Creating the stock
Invoke the Stock function (see Creating a Stock).
The Initial Stock dialog is displayed. Select Stock Type = Contours.
|
|
|
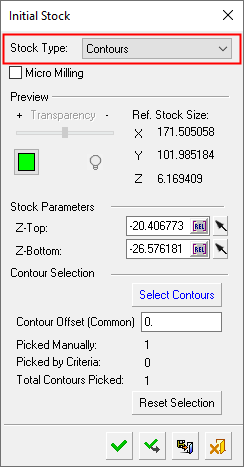
Press the Select Contours button to pick the contours that will define the stock box. The Contour Manager dialog is displayed during the contour picking stage.
|
Pick the first contour |
Pick the last contour |
|
|
|
Press OK ![]() in the Contour Manager dialog to accept the selected contours and to close the dialog. Control is returned to the Initial Stock dialog and this displays the relevant information.
in the Contour Manager dialog to accept the selected contours and to close the dialog. Control is returned to the Initial Stock dialog and this displays the relevant information.
|
|
|
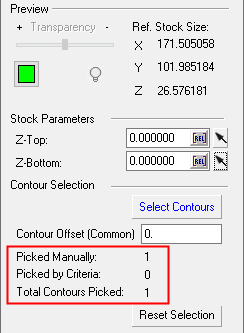
Enter the Z-Bottom amount and click anywhere in the graphics area to enable the approval buttons.
Press Apply ![]() to display the new stock.
to display the new stock.
|
|
|
When finished, press one of the approval options.
|
|
OK: Accept the changes, perform the operation, and close the current dialog/task. The stock/part is calculated. |
|
|
Apply: Accept the changes, perform the operation, and keep the current dialog/task open. The stock/part is calculated. |
|
|
Save: Save the settings. Suspend and calculate later. |
|
|
Cancel: Cancel all changes and close the dialog/task without saving the settings. |
|