Revolve (Solid) > New/Add: Angle and Angle Mid Plane


Access: Open this function from one of the following locations:
-
Click the
 button in the toolbar.
 -
Select Solid > Creation > Revolve from the menu bar.
-
Select Revolve on the popup menu if a sketch or 2D composite curve is selected.
Remove material by revolving a closed sketch / composite curve by a given angle.
Important: When using this function, material will be removed only from the current active object. (If only one object exists in the file it is automatically active unless manually deactivated.) See Activate / Deactivate and Activating Objects.
Note: For Add and Remove operations you can use wires or faces from a non-activated component (external reference).
|
Demo: Press the button below to view
a short movie demonstrating the function:
|
Practice: Press the button below to open Cimatron with a practice ELT file similar to that used to create the movie (if the relevant feature already exists in the ELT file, you can either edit it or delete it and create a new feature). |
|
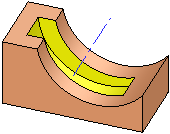
Revolve > Remove > Angle:
|
|
|
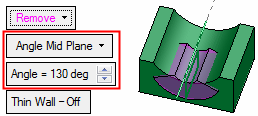
Revolve > Remove > Angle Mid Plane:
|
|

For information regarding the steps in this function and for parameter explanations, see Revolve: Options and Results.
Angle
Revolve on one or both sides, by a given angle.
Required Step 1
|
Required Step 2
|
|
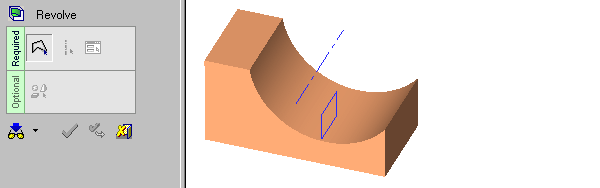
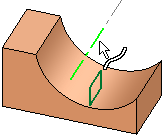
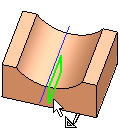
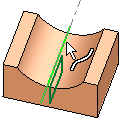
Selected entity.
|
Selected the axis of revolution.
|
Required Step 3 
Set the revolution parameters.
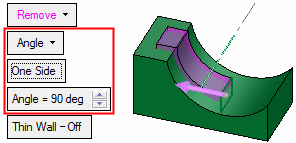
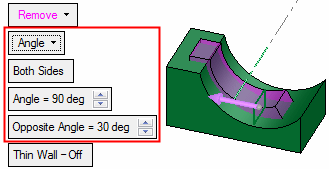
The One Side / Both Sides toggle option is displayed. Choose One Side if you want to extrude on one side of the contour, and press the Angle = field to enter the angle. You can flip the direction by clicking the direction arrow. For Both Sides, the additional parameter Opposite Angle is displayed, to set the revolve angle in the opposite direction from the arrow.
| Toggle One Side to Both Sides to revolve to the desired position on either side. | |
|
|
|
|
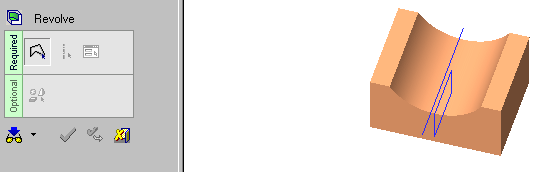
One Side result: |
Both Sides result: |
|
|
|
Angle Mid Plane
Revolve by the same angle in both directions.
Required Step 1
|
Required Step 2
|
|
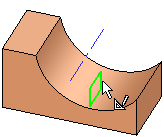
Selected entity.
|
Selected the axis of revolution.
|
Required Step 3
Set the revolution parameters.
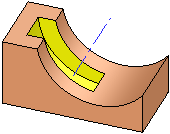
If you want to revolve the contour by the same value in both directions, choose Angle Mid Plane. The value you specify is the total angle of revolution.
|
Result: |
|
|
|
|