![]()
Apply Drafting Templates Dialog

Access: Open this function from one of the following locations:
-
Select Sheets > Create Sheet > Create Sheet from Template from the menu bar.
-
Select Create Sheet from Template on the popup menu in the Drawing Tree (right-click the Drawing
 in the Drawing Tree).
 -
Select File > Export > Export To Drafting from the menu bar.
After invokinginvoking the function, the Apply Drafting Templates dialog is displayed; some of the dialog options that are available when invoking from Export to Drafting are not available when invoking from Create Sheet from Template.
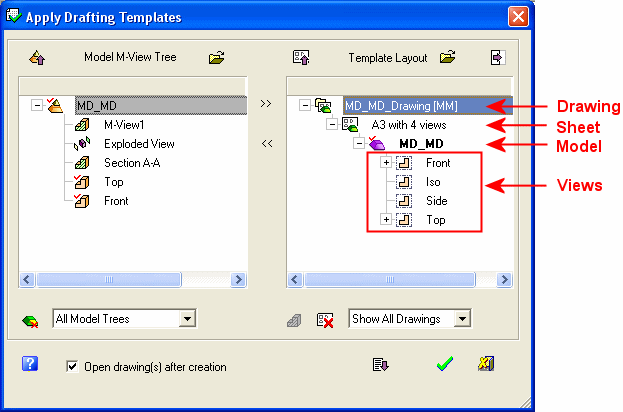
In this dialog, the system presents the views included in the selected template (in the Template Layout pane on the right) and asks you to select a model view (from the Model M-View Tree on the left) to be attached to those views.
|
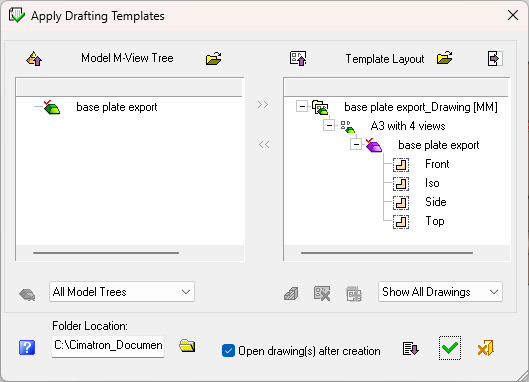
Dialog in Export > To Drafting: |
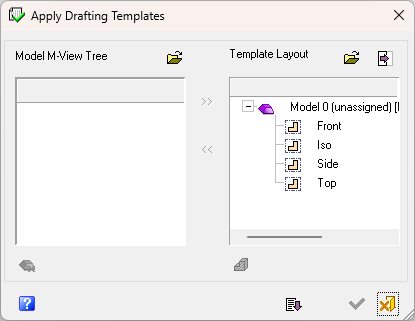
Dialog in Create Sheet from Template: |
|
|
|
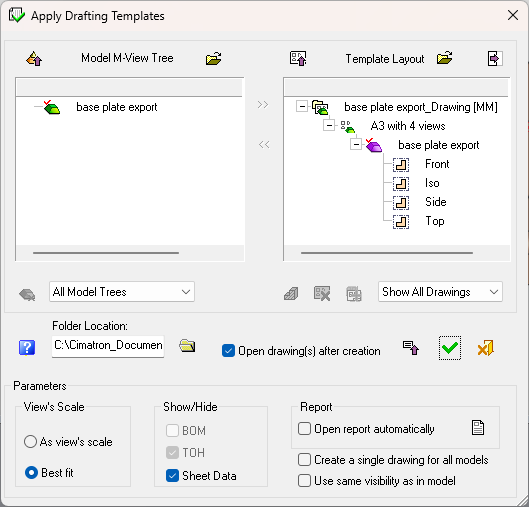
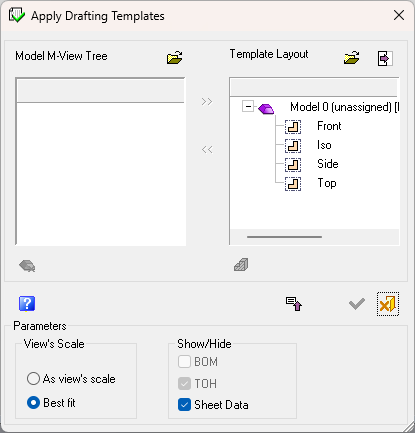
Dialog expanded downwards:Dialog expanded downwards:
These images below shows the additional parameters that are displayed when the dialog is expanded downwards. The image shows the dialog that is displayed from the Export to Drafting function; some of the dialog options that are available when invoking from Export to Drafting are not available when invoking from Create Sheet from Template.
 |
 |
In this topic
- Dialog Structure
- Dialog Operations
- Dialog Notes
- Dialog Buttons
- Selecting multiple models to apply to a drafting template
Dialog Structure
The Apply Drafting Templates dialog contains the following areas:
|
Model M-View Tree |
The Model M-View Tree pane (on the left side of the window), displays the tree of active (or selected) model's M-Views. From the Export > To Drafting function: When the dialog is invoked from the Export > To Drafting function, this pane (left pane) automatically displays the active model view tree, as displayed in the M-View tab of the parting file view tree.
From the Create Sheet from Template function: When the dialog is invoked from the Create Sheet from Template function, this pane (left pane) is initially empty until you select a model.
To select a model, click Open |
||||||||||||
|
Template Layout |
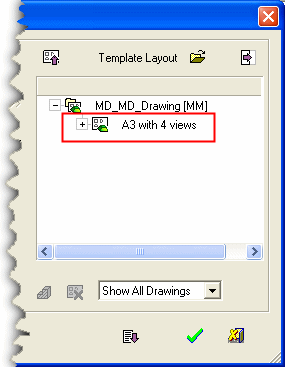
The Template Layout pane (on the right side of the window), contains the layout that exists in the previously assigned template selected in the Drafting Templates dialog (from Export > To Drafting and Create Sheet from Template). This assigned template outlines, for example, the number of views defined in the template and also the TYPE of template (Sheet or Drawing template).
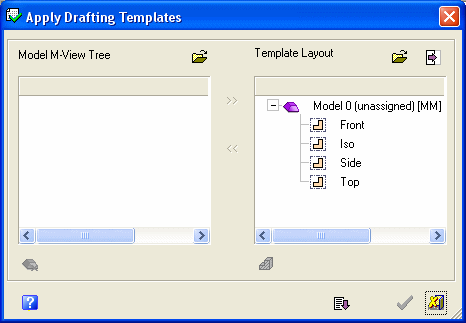
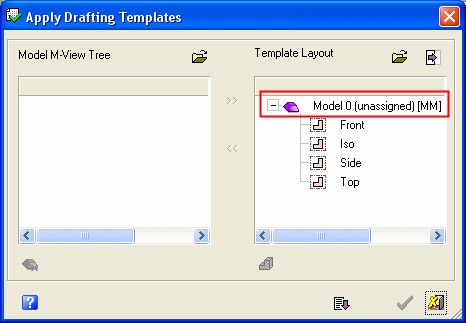
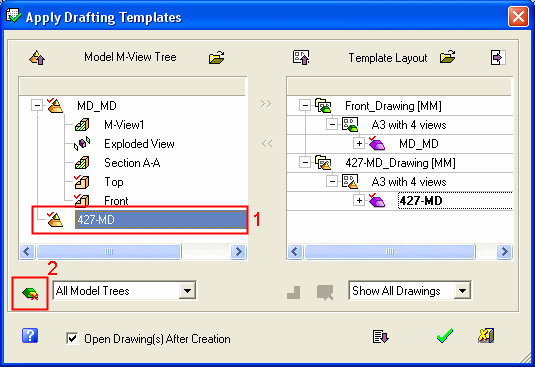
Model 0 (Unassigned): This is the tree root, indicating the default model name, when no models are assigned. If the template contains more than one model, each additional model will be assigned a sequential number, for example, Model 1, Model 2 and so on.
Views: These are the saved views that exist in the template, displayed as simple views, for example:
|
||||||||||||
|
Folder Location |
Select the destination folder for the exported drawing files. If the drawing contains parts from several folders, you may leave the destination folder field blank to replicate the structure of the source files. |
||||||||||||


Dialog Operations
- Load a model view tree
- Remove a model view tree
- Load a different template layout
- Remove a template layout
- Assign a view in the model to a predefined template view
- Unassign a model view from a template view
- Display an ID Number / Label of Holes for a view
Load a model view tree
- Click the Open
 button (above the Model M-View Tree pane) to display the Cimatron Explorer.
 - Select the required model. The selected model and its view tree (if any views exist) are displayed in the Model M-View Tree pane.
Note: Multiple model view trees can be loaded in the Model M-View Tree pane.
Remove a model view tree
- In the Model M-View Tree pane, select the model to be removed.
- Click the Delete
 button to remove the model from the Model M-View Tree pane.
Load a different template
- Click the Open button (above the Template Layout pane) to display the Drafting Templates dialog.
- Select the required template. The selected template layout is displayed in the Template Layout pane.
Note: Only one template type can be loaded. If multiple model view trees are loaded (in the left pane), then multiple template layouts are displayed (one template layout for each model view tree). However, all the template layouts are of the same selected "type" (for example, "A3 with 4 views").
Remove a template layout
- In the Template Layout pane, select the template layout to be removed.
- Click the Delete
 button to remove the layout from the Template Layout pane.
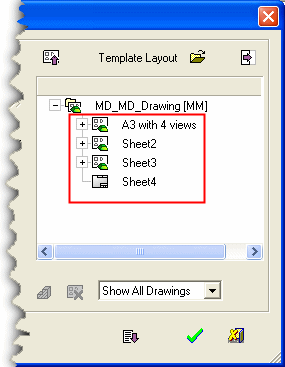
Insert Additional Sheets
- In the Template Layout pane, select a sheet.
- Either right-click on the template icon and select Add a Similar Sheet or click the Add a Similar SheetAdd a Similar Sheet
 button. A duplicate sheet is added (not an additional drawing or model).
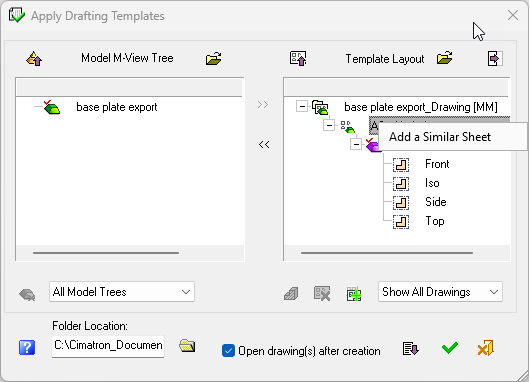
- Repeat the action as many times as required.
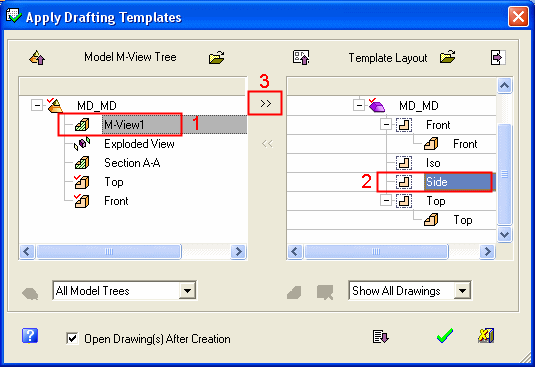
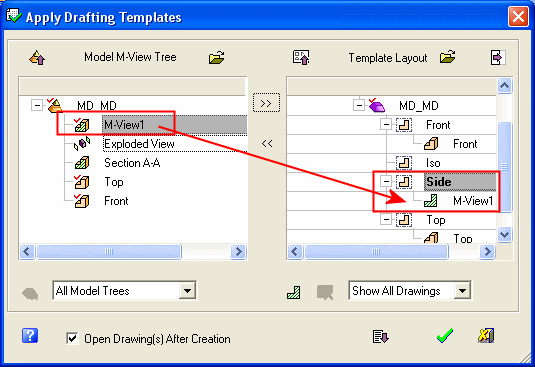
Assign a view in the model to a predefined template view:
- In the Model M-View Tree pane, select the model view that you want to assign.
- In the Template Layout pane (on the right), select the drafting template view to which the model view is to be assigned.
- Click the AssignAssign
 button. The selected model view on the left is assigned to the selected drafting template view on the right, as shown in the examples below:
Unassign a model view from a template view
- In the Template Layout pane, select the drafting template view to be unassigned.
- Click the Unassign
 button. The selected drafting template view is unassigned, as shown in the examples below:
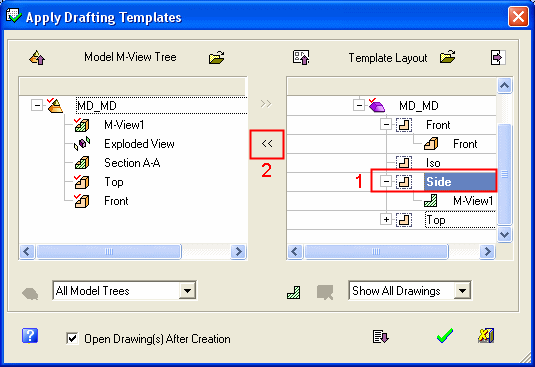
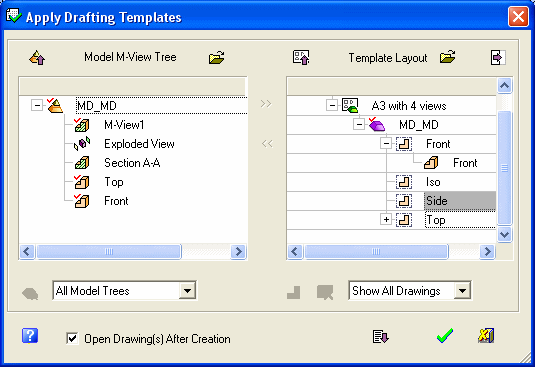
The model view has been removed from the Template Layout pane:
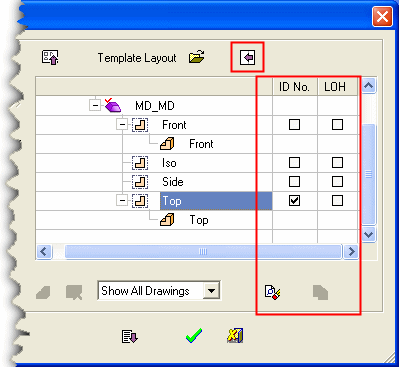
Display an ID Number / Label of Holes for a view:
In the Template Layout pane, click the Expand ![]() button to display the Symbol Automation checkboxes. These checkboxes enable you to include ID Number and/or Label of Holes (LOH) information in the drawing, as shown in the examples below.
button to display the Symbol Automation checkboxes. These checkboxes enable you to include ID Number and/or Label of Holes (LOH) information in the drawing, as shown in the examples below.
Select the appropriate checkbox. If required, press the Clear Symbol Settings ![]() button to quickly clear all the checkboxes.
button to quickly clear all the checkboxes.
|
Default dialog display: |
Dialog expanded to show the Symbol Automation checkboxes: |
|
|
|

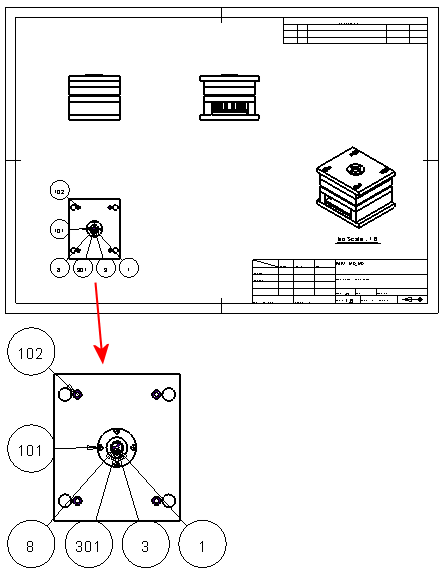
An example sheet showing the ID Numbers around a view; as a result of selecting the appropriate Symbol Automation checkbox:
Dialog Notes
Notes:
-
When active models and M-Views in the Model M-View Tree pane (on the left side of the dialog) are attached to models and views respectively in the Template Layout pane on the right, the attached items are marked with a
 in the Model M-View Tree pane; for example
  .
. -
The system automatically assigns the active models in the Template Layout pane on the right. If the Template Layout pane contains one model only, the selected model (for example
 ) on the left will be assigned automatically to the drafting template on the right (for example
  ). If the drafting template contains more than one model, the system automatically assigns the active model to all of them.
 -
If the name of an M-View (in the left pane) is exactly the same as the name of a view in the template, the M-View will automatically be assigned to the view. In the example above, the M-Views Top and Front have been automatically assigned to the identically named template views.
-
The same M-View can be assigned to more than one view in the drafting template.
ExampleExample: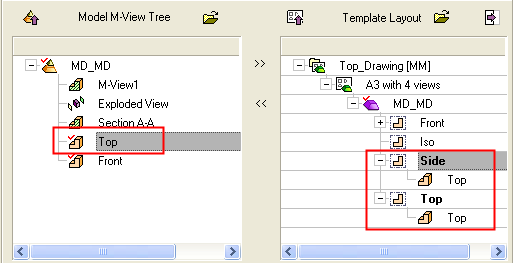
-
You can click the Delete
button to remove a model from the window. You can click the Open button to add another model or to replace a drafting template. -
After the assignment has been performed, when selecting the assigned section M-View, the Switch to 2D
 Section / Switch to 3D
  Section toggle button is enabled. You can then toggle these options to create a 3D section view or 2D section view, as required. (In this example, the section M-View will be created in 2D view).
 -
The same M-View can be assigned to more than one view in the drafting template.
-
Each model branch contains the number of views that have been defined in the template.
-
To unassign a model view from the drafting template, select the view and then click the Unassign
button.