|
|
Holder Gouge Checking: Cutter Sequence
Cutter Sequence is one of the Holder Options under Holder Gouge Check:

With this option you can open a table in which a sequence of milling cutters can be defined. The cutters must be chosen from the list of defined cutters. Feed and Spin may be defined for each cutter, and all cutters on the sequence list may be used during the procedure, as needed. Only relevant cutters can be included on the list (similar technological data - diameter, corner radius, and taper angle). See the example of Cutter Sequence
The first cutter (Number 1 on the sequence list) will be used for as many cutter motions as possible. Any areas that would be gouged by Cutter 1 remain unmilled. The second cutter on the list is then applied to the unmilled areas. As with Cutter 1, Cutter 2 will be used for as many motions as possible, and gouged areas remain unmilled. Cutter 3 is then applied to these unmilled areas. The milling continues in this manner, using replacement cutters as needed until the procedure is completed.
Using Cutter Sequence, the resultant procedure may use more than one cutter. If this is the case, Multi Cutters will be listed as the cutter in the Process Manager.

You can divide this procedure into procedures that use each cutter.
Example of using Cutter Sequence:
A procedure uses Cutter B10, but this cutter holder will gouge the part. In the Optimizer table, press the Used button.

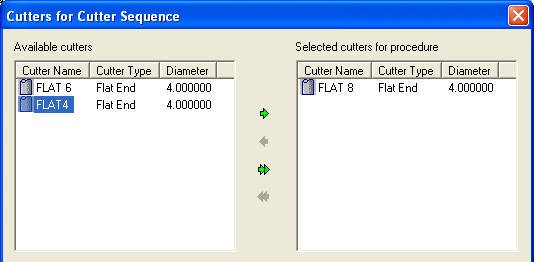
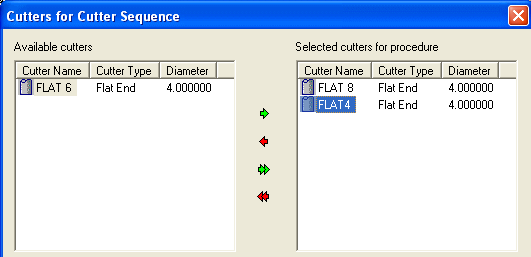
This will open the Cutter Sequence dialog. The defined cutter (FLAT 8) is listed in the Selected Cutters column, and all similar cutters found in the cutters list (with same diameter as FLAT 8) are listed in the Available Cutters column.

Choose the cutters from the Available Cutters list that you want to include in the cutter sequence.
Move the required items between the left and right panes as follows (use the Shift or Ctrl key for multiple selection).
-
Using the arrow buttons
-
 Select one or more items from the left pane and click the single green arrow button
  to add them to the right pane.
 -
 Click the double green arrow button
  to add all items from the left to the right pane.
 -
 Select one or more items from the right pane and click the single red arrow button
  to remove them from the pane.
 -
 Click the double red arrow button
  to remove all items from the right pane.
-
-
Double-click
-
Double-click the required items in the left pane to add them to the right.
-
Double-click items in the right pane to remove them.
-
-
Drag and Drop items between the panes.

Once you have moved the cutters to the "Selected Cutters" list, you can rearrange the order by dragging cutters up or down. The order of this column determines the cutter sequence.
The Optimizer table is then updated and will now include the numbers of selected cutters:

|