|
|
Step 9 - Interactive UCS
-
Open any part and look at the bottom left corner to see the dynamic UCS.

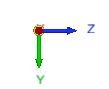
The UCS is composed of 3 main UCS axes: X - red, Y - green, Z - blue. -
Move the mouse cursor on top of the UCS to see three more arrows, which are 80% transparent with light gray color. These directions represent the negative directions.
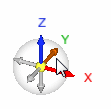
Any arrow that the cursor is on will be highlighted. (This is relevant to all the items/icons in this area.)
Clicking any of the arrows will rotate to the plane normal to its direction.
The rotation will be the shortest rotation. It will go to the closest 90 degree orientation. -
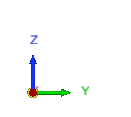
For example, click the X arrow in the positive direction.
The result will be:
-
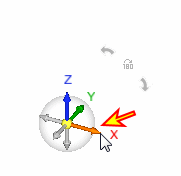
Rotate the UCS (Dynamic ZPR is on; move the mouse while pressing the left mouse button) and place it as shown in the picture below. Then press the X+ direction:
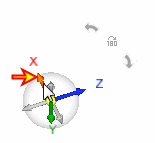
The result will be:
When hovering above the UCS, there are two additional bottoms that show up. These two arrows allow us to rotate the view along the axis that is perpendicular to the screen. Each click on an arrow rotates the view by 90 degrees.
The center of rotation is always the center of display (the depth is not important in this case) and the current zoom level remains the same.

The UCS also has a floating toolbar to the left of it. The toolbar contains display-related items so it will be much easier to approach them. Hovering above the left hand side of the UCS will expose the toolbar:
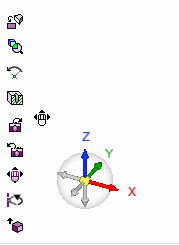
The bottoms that are included in the toolbar are:
- Rotate to Plane
- Zoom to Selection
- Center of Rotation
- Dynamic Section
- Next View
- Last View
- ZPR (as if Ctrl is pressed down)
- Rotate by Angle
- +Z ISO View (this is a Core\Cavity ISO View - a toggle option that flips ISO view along the X axis)
![]()
![]()
![]()