Create a Sheet by Applying a Sheet Template in a Drawing File

Access: Open this function from one of the following locations:
-
Select Sheets > Create Sheet > Create Sheet from Template from the menu bar.
-
Select Create Sheet from Template on the popup menu in the Drawing Tree (right-click the Drawing
 in the Drawing Tree).
 -
Select File > Export > Export To Drafting from the menu bar.
From the Drafting environment, create a sheet from a Sheet Template. This involves applying (loading) a Sheet Template to a model to quickly create a drawing sheet from the model.
See Create Sheet from Template.
Create a drawing sheet by applying a sheet template while in a drawing (drafting) file
-
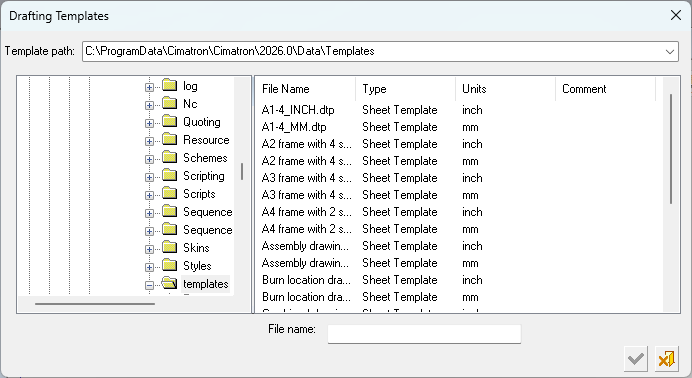
While in a drawing file, invokeinvoke the Create Sheet from Template function. From the displayed Drafting Templates dialog, select the template you want to use, as follows:
Notes:
-
Default Product and Manufacturing Information (PMI) templates are supplied, however you can save any PMI in a view as a template.
-
From the Drafting Template dialog, when creating a sheet from a template, only sheet templates can be selected; hence the Drafting Templates dialog shows only the "Sheet Templates" (under the Type column).
When Exporting to Drafting, the Drafting Templates dialog also shows "Drawing Templates".
- Sheet Template: A template that contains a single sheet.
- Drawing Template: A template that contains multiple sheets. See Save as Drawing Template. -
Select a sheet template with the same units as that of the drawing file. If the drawing file is in MM and an INCH sheet template is selected, a message is displayed prompting you to select a template in the appropriate units.
-
-
Click OK
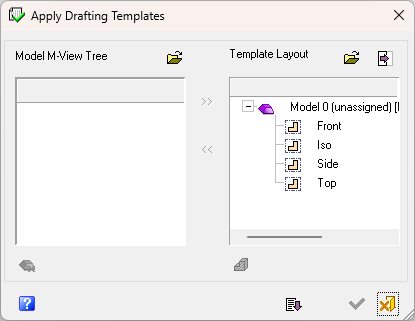
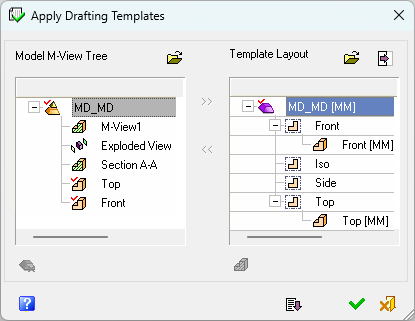
 . The Apply Drafting Templates dialog is displayed.
In this dialog, the system presents the views included in the selected template and asks you to select a model to be attached to those views.
This dialog is also displayed when Exporting to Drafting. Some of the dialog options that are available in Export to Drafting are not available in Create Sheet from Template.
See Apply Drafting Templates Dialog for additional information on this dialog.
-
To select a model, from the Model M-View Tree pane, click Open
 . The Cimatron Explorer is displayed and allows you to select a part or an assembly which will be used for the creation of the views. For example:
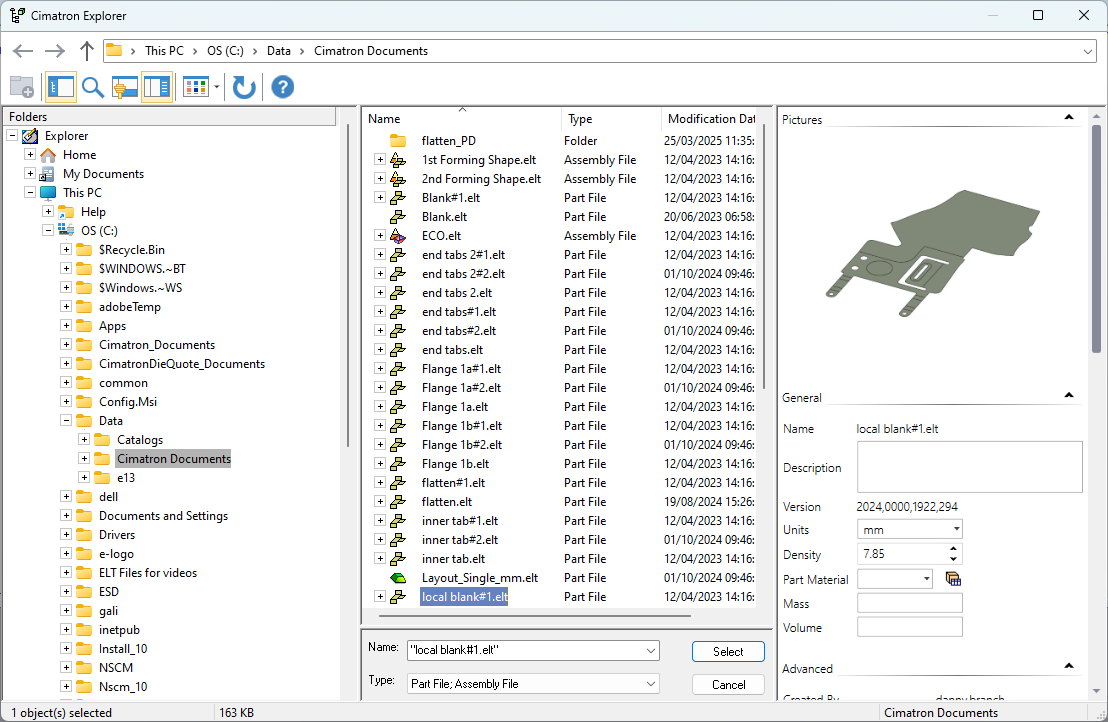
Note: Cimatron Explorer enables you to perform multiple selections, meaning you can select more than one model to apply to the sheet template. You can select any number of part models and assemblies. However, you can select only one electrode assembly and one electrode part. See Multiple Selection Example for more.
-
Click Select. The Apply Drafting Templates dialog is displayed again, this time showing the selected model in the Model M-View Tree pane.
-
If the model you selected includes M-Views, they will be displayed below the model in the Model M-View Tree pane.
-
If the name of an M-View (in the left pane) is exactly the same as the name of a view in the template (in the Template Layout pane), the M-View will automatically be assigned to the view.
In the example below, the M-Views Top and Front have been automatically assigned to the identically named template views.
-
-
Assign the required Model M-View Tree view to the appropriate template view in the Template Layout pane. See Apply Drafting Templates Dialog for more on assigning/unassigning views.
-
Click the Expand
 button to set any appropriate options (see Apply Drafting Templates Dialog).
 -
When the template and model have been defined, click OK
. The system creates a sheet with all the views, tables and text which were defined in the template. The views show the selected model, as shown in the following example: