|
|
Import by Reference 


Access: Open this function from one of the following locations:
-
Select Die Design > Geometry Manipulation > Import By Reference from the menu bar.
-
Select Geometry Manipulation > Import By Reference from the following Die Design Guide: Die Process Design Guide (Forming).
-
Activate the component (right-click and select Activate Component) and then select File > Import > Geometry and use the Place By Reference option.
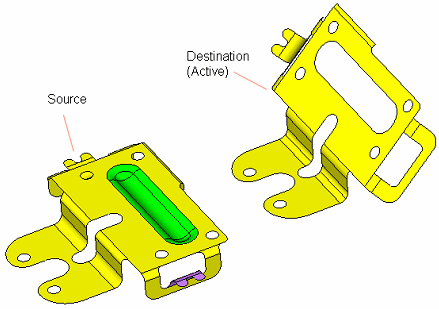
Import geometry from another part in the assembly to the active part by defining the origin and axes of two UCSs.
In the assembly example shown hereexample shown here, the purple and the green set of faces can be copied from the Source (Reference) part to the corresponding place in the Destination (Active) part
|
|
|
|
|
|
|
|
|
|

-
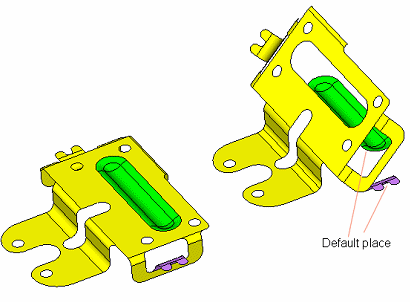
You can select the reference geometry to copy (in this case purple or green faces) and by default, the geometry will be imported to the active part according to the absolute position and orientation as placed in the source file.
-
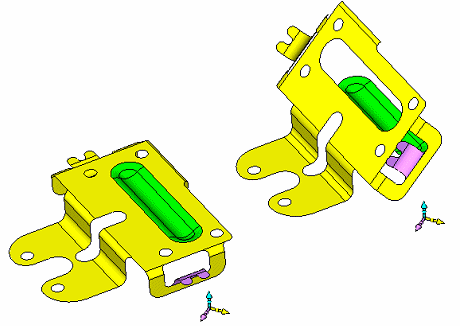
You can then define the orientation of the two reference UCSs to control the correct position of the imported geometry on the active part.
Notes:
-
The Import By Reference function actually runs the Import Geometry function, using the Place By Reference option of that function.
-
The Import By Reference function is not available if the Assembly or NC part is active or when opening a part in the Assembly environment. In this case, use the Import Geometry function together with the Place By Reference option.
General Interaction
The following is the Feature Guide for Import By Reference (the Import Geometry feature guide is opened).
|
|
|
Required Step 1 ![]() : Pick the reference entities.
: Pick the reference entities.
Required Step 2 ![]() : Relocate entities.
: Relocate entities.
Optional Step 1 ![]() : Offset and rotation.
: Offset and rotation.
Detailed Interaction
See Options and Results.
|