|
|
New Injection Simulation  : Cooling Simulation

Access: Open this function from the following location:
-
Select Analysis > Injection Simulation > New Simulation from the menu bar. Select the Cooling Simulation option.
Start a new Moldex3D simulation.
The simulation and analysis of the cooling of the mold is especially useful for complex cooling circuits, as well as for conformal cooling.
Pick the analyze entities. This option requires the cooling lines and stock to be defined. The following parameters are displayed:
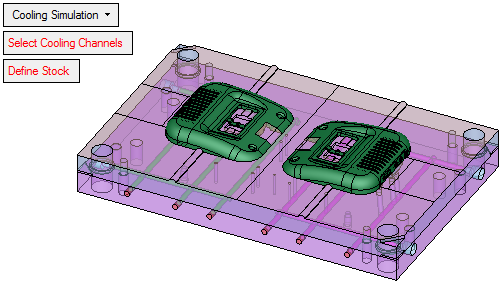
The parameters displayed in red indicate that they have not been defined. Once defined, these parameters are displayed in BLUE.
|
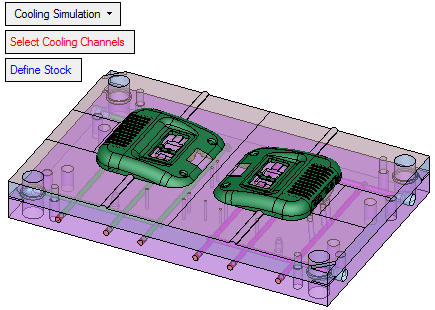
Select Cooling Channels |
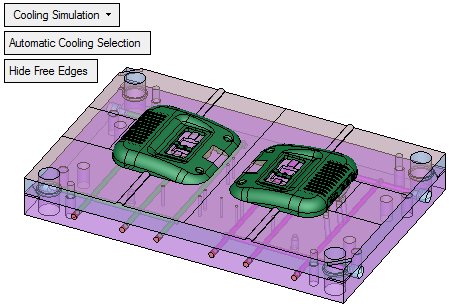
Select the cooling channel faces. The following parameters are displayed:
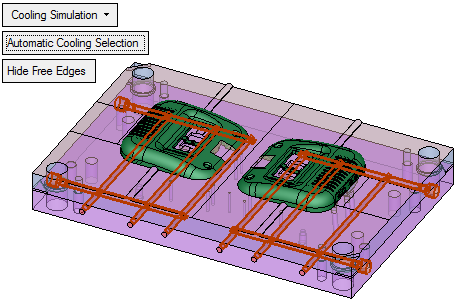
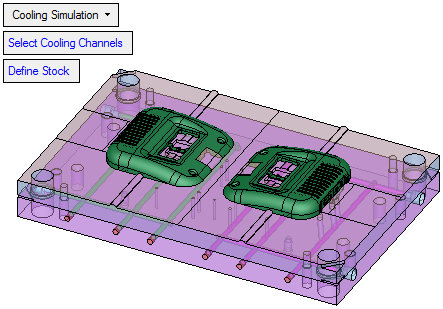
Automatic Cooling Selection: Select this option to automatically select faces that have previously been marked as cooling faces. This entails defining Cooling Circuits and Cooling Items using the Analyze Cooling Circuit function. In the following example, the cooling faces are automatically selected.
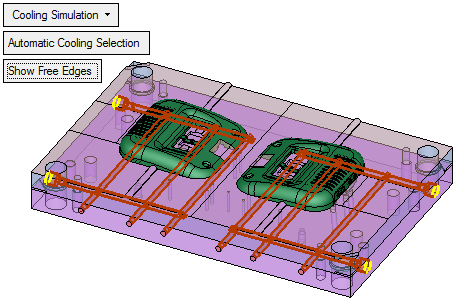
Hide / Show Free Edges: This is a toggle option that analyzes the free edges on all the selected faces and either hides or shows them. In the following example, the free edges are shown.
|
|
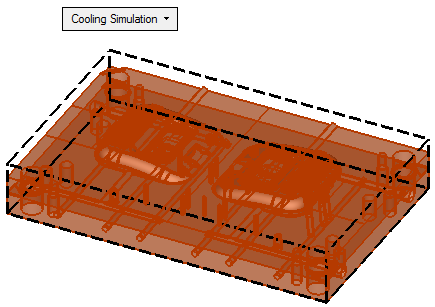
Define Stock |
Select faces that define the stock of the core and cavity. In this case, the stock was selected By Box:
The Define Stock parameter is now displayed in blue, indicating that it has been defined.
|
The required parameters are displayed in BLUE, indicating that they have been defined.
When finished, press OK ![]() in the Feature Guide. The third party application is opened with the Cimatron model already loaded and the cooling channels and stock as defined.
in the Feature Guide. The third party application is opened with the Cimatron model already loaded and the cooling channels and stock as defined.
Notes: Valid input for the Cooling Simulation option includes a part (1 or more), cooling lines and stock. The cooling lines should be built in the following way:
-
Only entrance and exit channels should reach the stock walls. All other channels should end within the stock (the bounding box of the cooling channels – the steel to be cooled). This includes baffles and bubblers – they too should not reach the stock walls.
-
The cooling channels are divided into Moldex3D eXplorer cooling objects based on their structure. Faces that can be stitched together to an object will become a single object.
-
Baffles and bubblers will go into the system as empty pipes.
-
All the above can be done manually, but the best way to get to a valid cooling channel for the analysis is to place standard nipples, plugs, baffles and bubblers on the cooling channel, and define them as such with the Analyze Cooling Circuit function.
-
-
Faces marked as Plugs will not be exported to Moldex3D eXplorer.
-
In the case of Baffles and Bubblers, the faces that are touching the stock will be shortened so they are not considered inlets/outlets.
-
Faces marked as inlet/outlet that do not reach the wall, or run past it, will be extended/trimmed to end exactly on the wall.
-
|