|
|
New Injection Simulation  : Options and Results

Access: Open this function from the following location:
-
Select Analysis > Injection Simulation > New Simulation from the menu bar.
Start a new Moldex3D simulation.
Create a new injection mold and/or cooling simulation using the third party application. The part to be analyzed, the melt entrance points and the cooling circuits are indicated. When you exit this tool by pressing OK in the Feature Guide (see below), the external application is loaded with the model and data.
This tool is a third party application which enables you to simulate and analyze both the injection molding and also the cooling process of the mold from within Cimatron.

A report generator enables you to provide relevant feedback to your customers.
Note: A license is required to run the third party software. If no injection mold simulation software is installed, or if you do not have a valid license, an appropriate message is displayed.
Required Step 1 
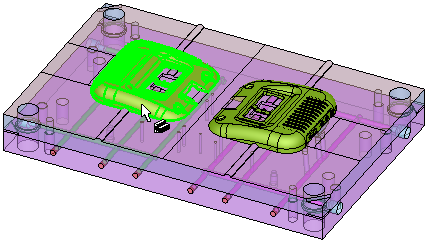
Pick the part to be analyzed. The body picked in this stage must be closed solid object otherwise an appropriate message is displayed.
For example:
Required Step 2 
Select the required analysis option and set the appropriate parameters. The following parameters are displayed:
|
|
The Filling Simulation option is, by default, initially displayed. Select this option to display the following additional analysis options from the dropdown menu. Filling Simulation |
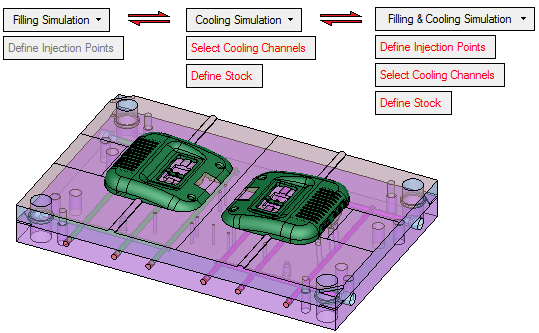
Filling & Cooling Simulation
Pick the analyze entities. This analysis option combines the Filling Simulation and Cooling Simulation options and displays the following parameters. See the relevant option for parameter explanations.

When finished, press OK ![]() in the Feature Guide. The third party application is opened with the Cimatron model already loaded and the melt entrance points, cooling channels and stock as defined.
in the Feature Guide. The third party application is opened with the Cimatron model already loaded and the melt entrance points, cooling channels and stock as defined.
To save a simulation file:
Before the simulation file can be opened, it must first be saved using the Moldex3D eXplorer. In the Moldex3D eXplorer tree, right-click the relevant Run object and select the Export as a Project option. This creates a folder where you can save the relevant files (*.mvj) of the project.
Moldex3D eXplorer
The following dialog is initially displayed in the third party application, enabling you search for, import, and specify the material and set other process parameters:
|
|
The Moldex3D eXplorer Analysis Setup dialog includes the following main areas: Plastic Material: Polymer type, supplier, and grade name. Process Condition: Filling time, melt and mold temperatures and cooling time. The process condition default values are changed according to the plastic material setting and the model size. For example, the filling time is derived from the Modeling Injection machine type which is automatically selected according to the part size. You can change these parameters manually. Analysis Settings: The analysis project folder path, optional remarks and an analysis history. Generate HTML Report: Generate data summary in an HTML file. |
Press the Analyze now button to start the calculation process which creates the new simulation. The Moldex3D eXplorer application automatically launches and the following window is displayed. You can follow the job status in the Running Job Monitor window.
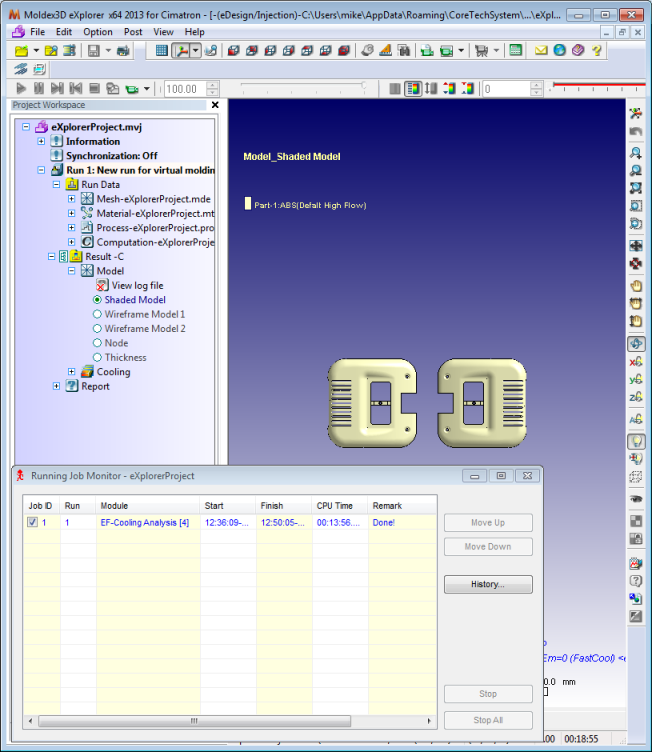
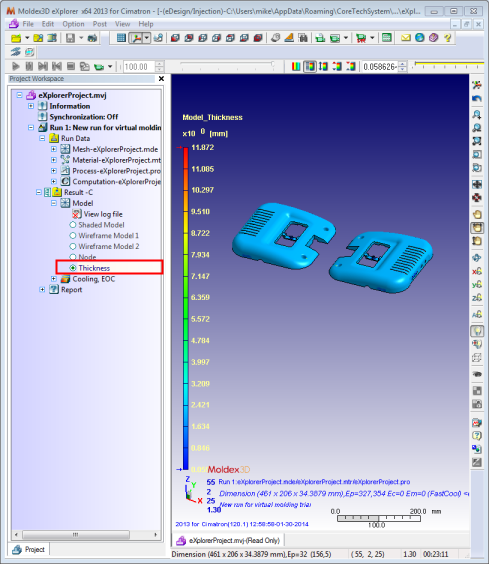
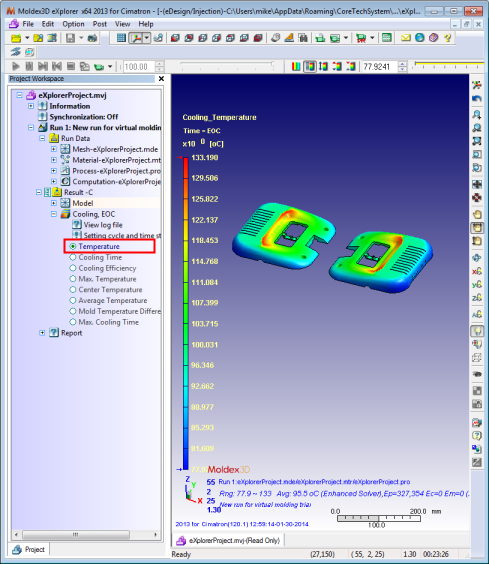
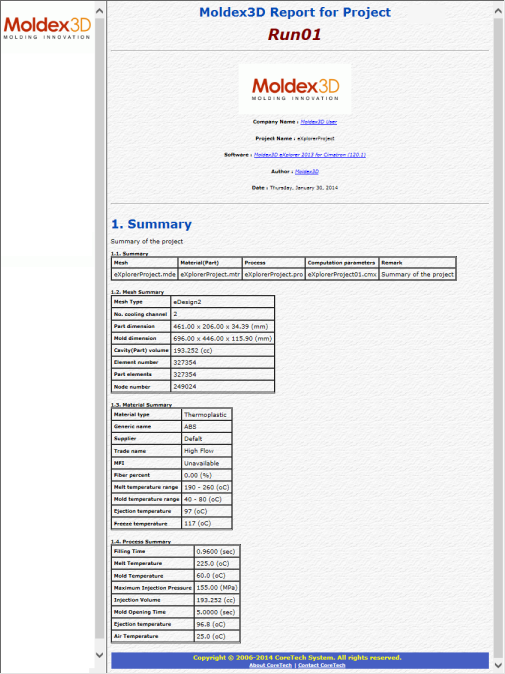
Once the calculation is finished, you can start using the application for different kinds of analyses, and also view the Report file; see the examples below.
|
Thickness Analysis: |
Cooling Temperature Analysis: |
|
|
|
|
Cooling Efficiency Analysis: |
Report: |
|
|
|

|