|
|
3 Face Round  : Options and Results


Access: Open this function from one of the following locations:
-
Click the
button in the
toolbar. -
Select Solid > Modification > 3 Face Round from the menu bar.
Create round faces between three groups of smooth faces.
After selecting the third set of smooth faces, you can use the Keep or Don't Keep Feature options as required, as described in the steps below.
Required Step 1 
Pick the top set (faces to be removed) of smooth and adjacent faces.
The toggle option Auto / Manual is displayed. This enables you to either automatically or manually select the required faces to complete the operation.
|
Auto |
This option requires you to pick a face from the top set (faces to be removed) of smooth and adjacent faces. The system then automatically performs the following:
Auto is the default option.
|
||||||||||||
|
Manual |
This option requires you to manually pick all the faces required to complete the function.
|
||||||||||||

The next steps of the function enable you to select the smooth and adjacent faces either side of the step 1 faces. Press <exit><exit> when finished, to move to the next step of the function.
Required Step 2
Pick the first set of smooth and adjacent faces.
Example 1:
|
Pick the required face(s): |
The face is selected: |
|
|
|
Example 2:
|
Pick the required face(s): |
The face is selected: |
|
|
|
Press <exit><exit> when finished, to move to the next step of the function.
Required Step 3
Pick the second set of smooth and adjacent faces.
Example 1:
|
Pick the required face(s); in this case by using "pick other": |
The "other" face is selected: |
|
|
|
|
|
Example 2:
|
Pick the required face(s): |
The face is selected: |
|
|
|
Note that the faces selected in each step of the function are colored differently to distinguish between them. In this case, the green faces were selected in step 1, the blue faces in step 2 and the red faces in step 3.
The toggle option Keep Features / Don't Keep Features is displayed.
|
Keep Features |
Keep additional features that are rounded (such as holes). |
|
Don't Keep Features |
Delete additional features that are rounded (such as holes). |
When you have set the parameters, click OK ![]() or Apply
or Apply ![]() in the Feature Guide to complete the function.
in the Feature Guide to complete the function.
When completed, the 3 Face Round feature will appear in the Feature Tree as follows:
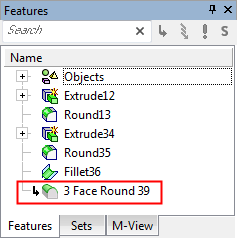

|