Split Faces : Split Faces > By Curve / Edge


Access: Open this function from one of the following locations:
-
Click the
button in the toolbar. -
Select Faces > Main Tools > Split Faces from the menu bar.
Split faces by geometry.
Split one or more faces by a splitting curve or edge. There are two options:
- Single surface- The curve can be projected onto a single surface.
- Picking multiple faces - The curve can be projected onto multiple faces.
|
Demo: Press the button below to view
a short movie demonstrating the function:
|
Practice: Press the button below to open Cimatron with a practice ELT file similar to that used to create the movie (if the relevant feature already exists in the ELT file, you can either edit it or delete it and create a new feature). |
|
|
|

Single Surface
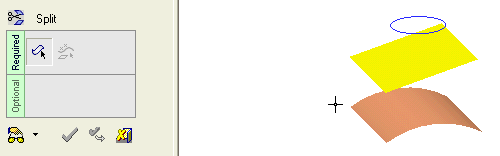
Required Step 1

Pick the face(s) or object to be split.
The Faces / Object toggle option is displayed, enabling you to pick either face(s) or an object to be split. For this example the Faces toggle option is selected (see the split methods for additional information). To split a single face, pick the face to be split.

<exit><exit> when the face is selected.
Required Step 2 
Pick the splitting curve or edge. This can also include sketches and composite curves.
Project the splitting curve onto the face to be split (using one of the projection toggle options) and set the displayed parameters:
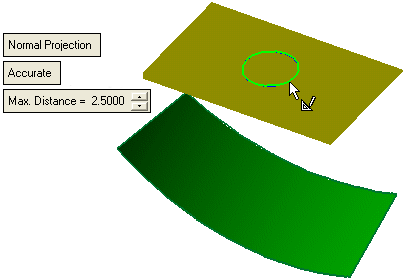
Define the method that the splitting curve is projected onto the face to be split. This is a toggle option: Normal Projection / Direction Projection.
|
Normal Projection |
The splitting curve is projected normal onto the face to be split, as shown below. When this option is selected, the following parameters are displayed:
|
||||||||
|
Direction Projection |
Direction arrows are displayed enabling you to define the direction by which the splitting curve is projected onto the face to be split. When this option is selected, the following toggle option is displayed:
|
Click OKOK![]() or ApplyApply
or ApplyApply![]() in the Feature Guide to complete the function.
in the Feature Guide to complete the function.
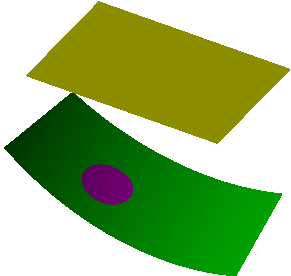
The face is now split into two faces, for example:
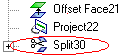
When completed, the Split will appear in the Feature Tree as follows:
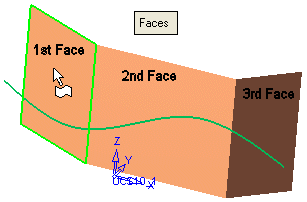
Picking Multiple Faces
Required Step 1
-
To split multiple faces, pick the faces to be split (three faces in the example below) and <exit><exit>.
Required Step 2
Pick the splitting curve or edge (in this example a spline).
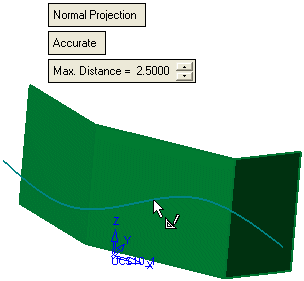
The option Normal Projection is the default whereby a curve is projected onto a face in a normal direction. Toggle to Direction Projection to project a curve in a user-defined direction.
Click OKOK![]() or ApplyApply
or ApplyApply![]() in the Feature Guide to complete the function.
in the Feature Guide to complete the function.
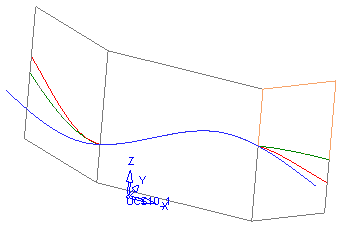
The faces are now split accordingly. The drawing below shows both Normal Projection (red) and Direction Projection along the Y-axis (green).
When completed, the Split feature will appear in the Feature Tree as follows:
