|
|
Warp Faces  : Options and Results


Access: Open this function from the following location:
-
Select Faces > Create Faces > Warp Faces from the menu bar.
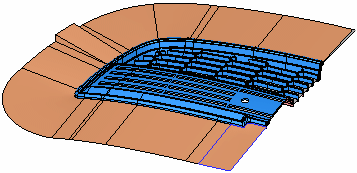
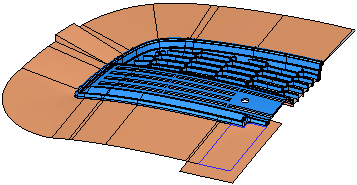
Recreate a face according to defined constraints.
The Warp Faces function takes an existing surface and translates it into a new position with a new boundary. The function assists you in creating both internal and external parting surfaces, especially complex surfaces that cannot be easily designed with traditional surfacing tools. The function can create parting surfaces that mimic the surrounding geometry (both boundary and shape).
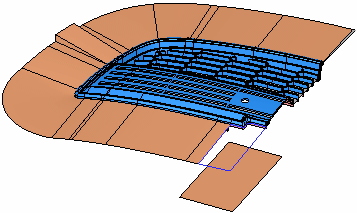
The following example is used for explanation:
Required Step 1 
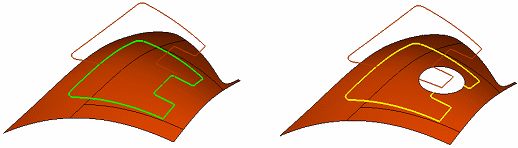
Pick the faces or an object to be warped and then <exit><exit>. These are the "input" faces for the function.
In this example, different faces are selected to demonstrate the different options in the next step.
|
|
|

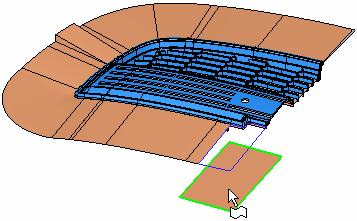
Required Step 2 
Pick a pair of constraints (points, edges, wires) or a closed wire. In this step, the input faces selected in step 1 will be warped (or "recreated") along the target constraints or the closed wire.
The following options are displayed:
|
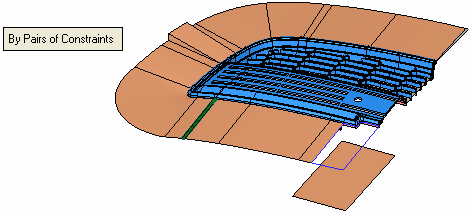
The toggle option By Pairs of Constraints / By Wire & Direction is displayed: |
|
|
|
|
Parameters:
|
By Pairs of Constraints |
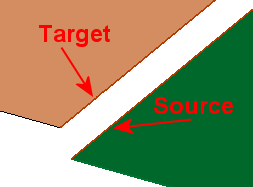
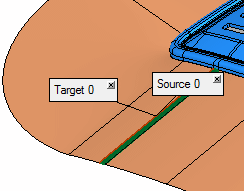
Pick a pair of source/target constraints (consisting of points, edges or wires) within which the input faces selected in step 1 will be recreated. The source constraint must lie on the input faces or object.
This is the default option. If this toggle option is selected, the optional step 1 is available. |
||||||||||||
|
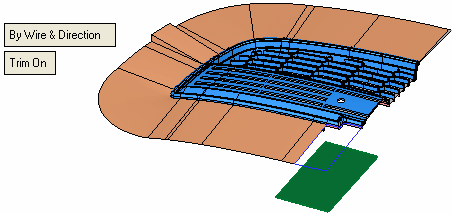
By Wire & Direction |
Pick a closed wire within which the input faces selected in step 1 will be recreated, and then pick a direction.
When this option is selected, an additional toggle option is displayed, Trim On / Trim Off.
Notes:
|


Optional Step 1
Pick fixed constraints (wire, edges, curves or points) lying on the input faces or object.
This step is available if the option By Pairs of Constraints is selected is required step 2.
Click OKOK![]() or ApplyApply
or ApplyApply![]() in the Feature Guide to complete the function.
in the Feature Guide to complete the function.
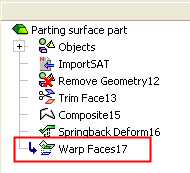
When completed, the Warp Faces feature will appear in the Feature Tree as follows:

|