|
|
Screws & Bolts 
Access: Open this function from one of the following locations:
-
Select Mold Design > Add Mold Component > Screws & Bolts from the menu bar.
-
Select Add Mold Component > Screws & Bolts from the Mold Design Guide Toolbar.
General Interaction
The general interaction is similar to that for adding all mold components from the catalog. However, for each category of mold component to be added (Injection Devices, Plates, etc.), the Component Selection dialog which appears at required step 1, is displayed with the appropriate Category component type automatically selected and the Sub-Category component types displayed. For example, if Plates are selected to be added, the Plate category is automatically selected when the Component Selection dialog is displayed and all the Plate sub-categories are available for selection.
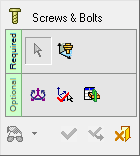
The following is the Feature Guide for Screws & Bolts.
|
|
|
Required Step 1 ![]() : Select a component from the catalog; the Component Selection dialog is displayed.
: Select a component from the catalog; the Component Selection dialog is displayed.
Required Step 2 ![]() : Place the selected component using one of the placing options.
: Place the selected component using one of the placing options.
Optional Step 1 ![]() : Set the offset and rotation positioning parameters.
: Set the offset and rotation positioning parameters.
Optional Step 2 ![]() : Select a UCS from the added part to position the component.
: Select a UCS from the added part to position the component.
Optional Step 3 ![]() : The Cut Manager is displayed; select the parts to be cut.
: The Cut Manager is displayed; select the parts to be cut.
Detailed Interaction
See Options and Results.
|


