|
|
Add Transfer Shape 
Access: Open this function from one of the following locations:
-
Select Die Design > Forming Shapes > Add Transfer Shape from the menu bar.
-
Select Forming Shapes > Add Transfer Shape from the following Die Design Guide: Die Process Design Guide (Forming).
Create a forming shape (where the part is gradually unfolded) by defining the appropriate transfer shape over a selected blank. Transfer shapes are used to create the minimum area nesting shapes (to use the minimum material) for the Transfer die. The new forming shape includes the selected blank(s) and the chosen transfer shape.
Note: You can add, delete, relocate or insert & reconnect forming shapes as required.
Usage Example
|
Selected blanks: |
|
Transfer Shapes for the selected blanks: |
||
|
|
Rectangle: |
Parallelogram: |
Miter: |
|
|
|
|
|
|
|
|
|
|
Trapezoid: |
Chevron: |
Arcs: |
|
|
|
|
||
General Interaction
The following is the Feature Guide for Add Transfer Shape.
|
|
|
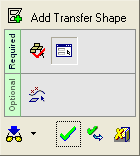
Required Step 1 ![]() : Pick one or two blanks (2D closed wires).
: Pick one or two blanks (2D closed wires).
Required Step 2 ![]() : Define the nesting shape and set the parameters to achieve the best utilization.
: Define the nesting shape and set the parameters to achieve the best utilization.
Optional Step 2 ![]() : Pick additional entities to be transferred.
: Pick additional entities to be transferred.
Detailed Interaction
See Options and Results.
|


