|
|
Add Wedge  : Local Wedge


Access: Open this function from one of the following locations:
-
Select Mold Design > Insert > Add Wedge from the menu bar.
-
Select Die Design > Insert Tools > Add Wedge from the menu bar.
-
Select Insert > Add Wedge from the Mold Design Guide or Die Tool Design Guide (DieDesign).
Add a wedge to a solid object to lock it in position. A cutting object can also be selected.
The Add Wedge function enables the creation of a wedge on a selected face of an object. You can create different wedge types, either applying custom shapes (box, circle, enclosing polygon, etc.) or manually defining a wedge’s placement along individual edges. In addition, a cutting object with optimized geometry can be defined for the wedge. See Insert Tools for an introduction to inserts.
For the other steps of this function, see Add Wedge: Options and Results.
Required Step 2 
-
Set the local wedge parameters.
Global
This is a toggle option, Global / Local, which enables you to define where the wedge is to be added:
Global
Add the wedge globally around the face selected in step 1.
Example:Example: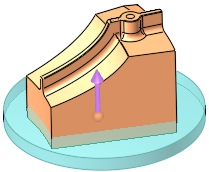
This is the default option. See Global Wedge for parameter descriptions of this option.
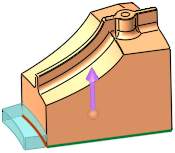
Local
Add the wedge locally to an edge of the face selected in step 1.
Example:Example:See Local Parameters for descriptions of this option.
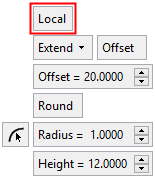
Local Parameters
-
Add the wedge locally to an edge of the face selected in step 1. Pick the edge(s) to which the wedge is to be added.
-
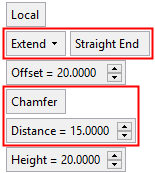
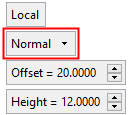
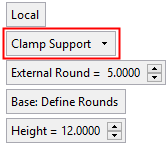
A toggle option, Extend / Normal / Clamp Support, enables you to define the shape of the local wedge.
The following parameters are displayed for the Local options:Extend:
Normal:
Clamp Support:
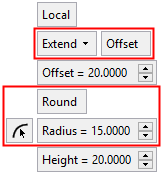

Specific parameters are displayed for each of the toggle options; some of these are screen parameters. See the parameters below and also the option examples.
|