|
|
Assigning Dimensions - General Procedure

Access: Invoke the Sketcher, define the sketch plane and then invoke this function from one of the following locations:
-
Click the Dimension button
 in the Sketcher
toolbar.
in the Sketcher
toolbar. -
Right-click the graphics area and select Dimension from the popup menu.
Create a dimension.
The General Dimensioning Procedure describes how to dimension an entity in general. Since this procedure varies slightly according to the kind of dimension you are dimensioning, specific instructions are provided for dimensioning various entities.
The following procedure describes how to assign dimensions to all entities. The dimensions may be regular units or expressions. Steps 2 and 3 may vary according to the kind of entities you wish to dimension.
Assign a dimension to an entity
-
Select the Dimension option
from the Sketcher toolbar. -
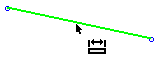
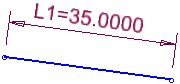
Click the entities you want to dimension. For example, to measure the distance between two points, you click two points.
-
Entities change color as the cursor passes over them.
-
Entities change to another color as you select them. These colors can be defined in the Color & Styles Preferences.
-
-
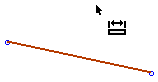
Click the location where you want the dimension to appear. For example, if you are dimensioning a line, click above or below the selected line. A dimension and the Sketcher Dimension dialog appear.
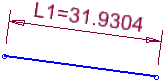
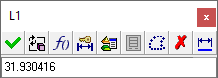
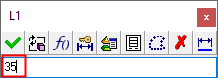
The Sketcher Dimension dialog displays the exact value of a dimension, while the corresponding dimension displays a rounded value.
Adjust the dimension value if required.
-
You can modify the actual dimensions of entities, adjust a displayed dimension's tolerance or precision.
-
Click anywhere to define the dimension (or click <exit><exit> or press Enter).
-
After a dimension is defined, you can delete it, move its location, or modify it, as described in step 3.
See also
-
Dimensioning the Sketch for a complete list of the entities you can dimension.
|