|
|
Pocket Design  : Options and Results


Access: Open this function from the following location:
-
Select Mold Design > Tools > Pocket Design from the menu bar.
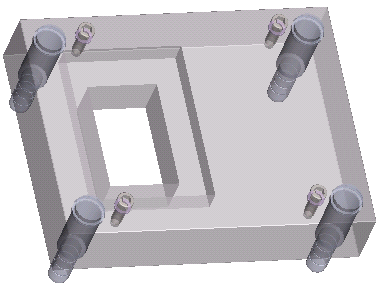
Create a compatible hole for an insert. Use this function when a simple boolean cut operation does not meet your requirements.
Note: The pocket is created only in components that are assigned to the active assembly. Make sure that the required assembly is activated before using this operation.
Required Step 1 
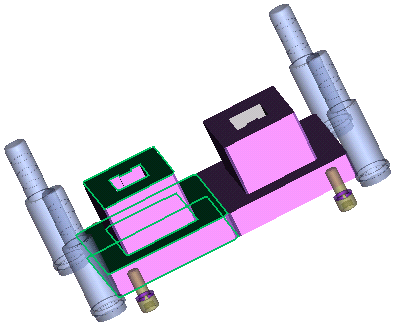
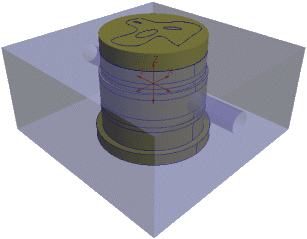
Pick the faces or objects that define the insert boundaries. See the example. See also Picking Objects or Faces.
-
The cursor changes to
 . Pick the faces or objects that define the insert boundaries (the default Filter option is Faces; change the filter to Objects if required). When picking faces, note that only the horizontal element of planar faces is taken into account. Pick the minimum number of faces that define the required bounding box. Do not pick vertical faces, internal faces or faces that do not define the bounding box. Pick chamfer faces only if they help to define the bounding box.
-
End your selection by pressing <exit><exit>.
Required Step 2 
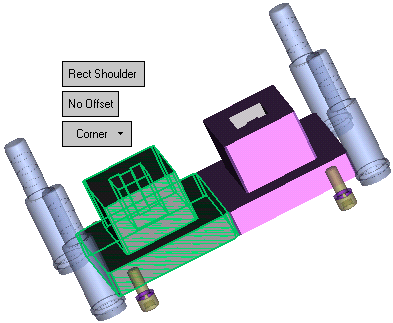
MoldDesign automatically recognizes the shape of the parts you have picked and displays the type of pocket that will be created when you press OK. The appropriate pocket parameters are also displayed.
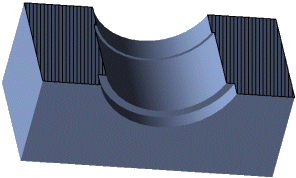
In the case above, the type of pocket is a Rectangular Shoulder.
The insert you picked is displayed in wireframe.
The object to be cut is displayed in transparent mode.
The bounding area is displayed in shade mode. This bounding area is used as the cutting object which creates a boolean cut in components that are assigned to the active assembly.
-
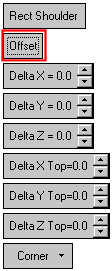
Set the parameters.
|
|
The pocket type is automatically detected, in this case Rectangular Shoulder, and the appropriate parameters are displayed. Press the pocket type to display a graphic representation of the pocket. |
|
|
Pressing Offset displays the offset parameters relevant to the pocket type. |
|
|
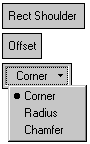
Select the Corner options. |

-
Press OK
 or Apply
  in the Feature Guide to complete the function.
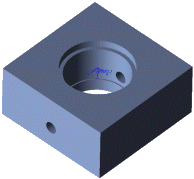
A PocketCut feature appears in the Feature Tree.
The resultant pocket is then created. Notice the rectangular shoulder shape of the pocket.
|
Feature Tree before the cut operation |
|
|
|
The Assembly and Feature Tree after the cut operation |
|
|
|
The Assembly Tree shows the PocketPart. When completed, the PocketCut feature will appear in the Feature Tree. |
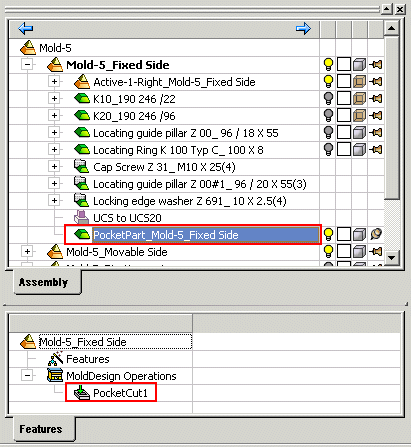
If the pocket part has not cut any component, it will be displayed in Shade mode. Otherwise the pocket object will be in hidden mode.
Examples:
-
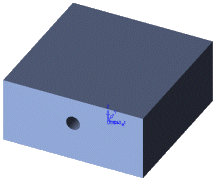
In the example below, an insert is to be placed in the plate object.
|
Insert - object to be placed in the plate |
Plate - object to be cut |
|
|
|
-
During the pocket operation, a cutting object is created (displayed in shade mode) based on the insert (displayed in wireframe mode). This cutting object cuts the plate (displayed in transparent mode).
-
The result of the pocket operation (the cut plate) is shown below.

|