|
|
DieDesign Analysis 


Access: Open this function from one of the following locations:
-
Select Die Design > AutoForm > Send To AutoForm from the menu bar. Select the required function.
-
Select Send To AutoForm from the following Die Design Guides: Die Tool Design Guide (Progressive).
-
Select Die Design > AutoForm > Receive Data From AutoForm from the menu bar. Select the required function.
-
Select Receive Data From AutoForm from the following Die Design Guides: Die Tool Design Guide (Progressive).
Validate the design of a progressive die project before manufacturing the die, using an AutoForm simulation and analysis tool.
One of the main challenges faced by die makers is the need to validate the strip design before actually producing the die. A typical die design process consists of several iterations of actual production of the tool or the blank, to analyze the SpringBack effect, trim optimization and other aspects that might change the desired result. In order to reduce the number of iterations and allow the designer to validate the design before manufacturing the die, Cimatron's strip design simulation solution is through an integration with the AutoForm ProgSim, the simulation product from AutoForm. The integration supports a three-phase process, which includes:
‒ A semi-automatic data preparation in DieDesign Analysis (Cimatron for AutoForm).
‒ Running the simulation in the AutoForm environment.
‒ Displaying the simulation results back in Cimatron for design adjustments.
You must have an installation of AutoForm on your computer to use this simulation and analysis tool. The installation can either be a full AutoForm license or the AutoForm ProgSim application (which can import data, run the simulation and analysis and then run the QuickLink package to export the results back into Cimatron).
As a first step, it is recommended to create a new subassembly for geometries that will later be used in AutoForm. This subassembly will hold all data and reference geometry required by AutoForm.
For more, see:
Cimatron - AutoForm Workflow
The basic workflow is as follows and may be repeated until the desired result is achieved:
In Cimatron:
In Cimatron, complete the strip definition and forming geometry. Prepare the data required by AutoForm, including:
-
Reference Geometry
-
Pilot holes
-
Lifter
-
Trimming wires
-
Punch/Die
-
Cams
-
Borders between two stations
-
Others
In Cimatron To AutoForm:
In Cimatron, open the Send To AutoForm function and attach geometry to relevant sets:
-
The Send To AutoForm dialog is displayed.
-
Assign (automatically) general data (such as thickness and progression/pitch).
-
Assign/Map (manually) any other geometry and parameters required to prepare AutoForm template items.
-
Add additional reference geometry if required. In the AutoForm ProgSim Simulation tool, new geometry cannot be created, only the existing (imported) geometry is used.
-
Export the data to AutoForm.
The defined data is exported into a zip file containing templates (xml files) and IGES files to run within AutoForm.
In AutoForm - Simulation:
The zip file exported from Cimatron using the Send To AutoForm function, is loaded into AutoForm for simulation and analysis.
|
|
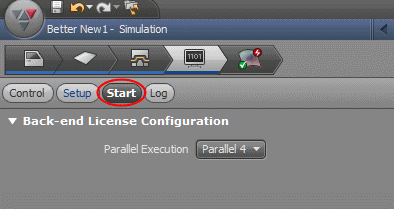
The analysis is calculated in AutoForm by clicking the start button. Refer to the AutoForm Help for information regarding the simulation and analysis process. |
In AutoForm, the following operations are performed:
-
The template is loaded and updated with the Cimatron geometry.
-
Additional parameters are defined (such as Material, Motions (for punches), production line settings, cam tools and others).
-
Start the simulation and analysis.
-
Verify the results.
-
Click the Share via Quicklink button to export the data to a zip file. This zip file is then used to import the simulation and analysis results back into Cimatron by using the Receive Data From AutoForm function.
In AutoForm to Cimatron:
In Cimatron, run the Receive Data From AutoForm function.
-
Open the zip file created by AutoForm's Share via Quicklink tool.
The Receive Data From AutoForm dialog is displayed.
-
Analyze the results.
-
Fix any problems in the Die progressive design.
For more, see:
|